Do you have a question about the Technics SL-1200GR2 and is the answer not in the manual?
General warnings for unit, AC lead, and placement to prevent fire and shock.
Instructions for checking and replacing the fuse in the mains plug.
Attach cartridge to head shell, align, and adjust overhang.
Adjust balance weight for horizontal equilibrium and set stylus pressure.
Adjust arm height until tone arm is parallel to the record.
Select pitch range and slide PITCH ADJ for fine adjustment.
Checks for no power, weak sound, reversed channels, and humming.
Steps to resolve blinking strobe light or blue indicator.
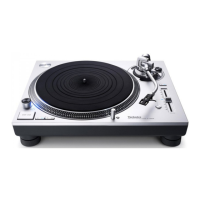
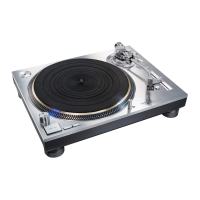
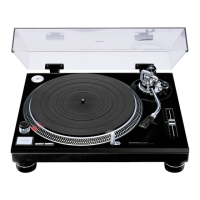
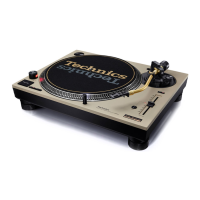
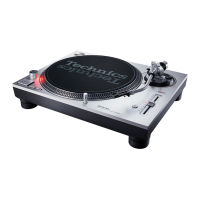
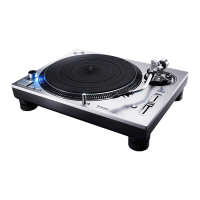
This document serves as the operating instructions for the Technics SL-1200GR2 and SL-1210GR2 Direct Drive Turntable Systems, providing comprehensive guidance on assembly, connection, operation, and maintenance.
The Technics SL-1200GR2 and SL-1210GR2 are direct drive turntable systems designed to deliver a high-quality, emotive musical experience. At its core, the system features a coreless direct drive motor and a newly developed motor drive circuit. This advanced motor design aims to achieve high precision, stable rotation, and high reliability by reducing minute vibrations and maintaining high torque. The innovative ΔΣ (delta sigma) -Drive motor drive circuit technology further suppresses motor-induced vibrations, minimizing their transmission to the stylus tip on the record.
The turntable system incorporates a newly designed low-noise power supply, which leverages know-how from Technics Grand Class amplifiers/digital players and noise removal circuits from the top-tier SL-1000R model. This design effectively suppresses external noise, contributing to a cleaner audio signal.
The tone arm is a critical component, featuring high-precision bearings for exceptional initial-motion sensitivity. The tone arm pipe is constructed from light, highly rigid aluminum, complemented by the traditional Technics gimbal suspension construction. This combination ensures that the tone arm responds with minimal resistance, allowing the stylus to track the record groove accurately.
The turntable platter itself is designed for high rigidity and improved vibration damping. It features reinforcing ribs on the back side of the aluminum die-cast platter, along with integrated rubber to suppress unnecessary resonance, thereby enhancing overall rigidity and damping capacity.
The entire unit is housed within a vibration-proof cabinet and supported by specialized insulators. The cabinet is a two-layered structure made from a combination of BMC (Bulk Molding Compound) and aluminum die-cast, ensuring high rigidity. The special silicon rubber insulators provide excellent vibration damping and long-term reliability, effectively reducing external vibrations and suppressing howling noise.
The turntable system offers a range of features for optimal playback and user convenience.
Assembly and Connection: Before use, the player requires assembly, including fitting the turntable, turntable mat, head shell, and balance weight. The manual provides detailed instructions for connecting the PHONO cable, PHONO earth lead, and AC mains lead to an integrated amplifier or component system. It emphasizes the importance of connecting the PHONO earth lead to prevent mains hum and advises against using the unit with amplifiers lacking PHONO input terminals, as this would result in inadequate volume and sound quality.
Cartridge Attachment and Adjustment: The process of attaching a store-bought cartridge is outlined, including tentative attachment to the head shell and light tightening of screws. The included overhang gauge is used to precisely adjust the cartridge overhang, ensuring the stylus tip aligns correctly with the gauge's end. The manual also guides users on how to tighten the cartridge screws carefully to prevent slippage. The balance weight is attached to the rear of the tone arm, and an auxiliary weight can be added depending on the cartridge's weight, with specific instructions for adjusting the balance weight to achieve horizontal balance.
Tone Arm Adjustments: Several critical tone arm adjustments are covered to optimize playback. Horizontal balance is achieved by turning the balance weight until the tone arm is approximately horizontal. Stylus pressure is set by turning the stylus pressure control to "0" and then adjusting the balance weight to the appropriate stylus pressure for the cartridge. Anti-skating control is adjusted to match the stylus pressure value. Tone arm height can be adjusted using the arm-height control ring, with a chart provided as a reference for different cartridge heights. For cases where the cartridge height is unknown or a non-supplied head shell is used, instructions are given to adjust the arm height until the tone arm and record are parallel. Armlift height can also be adjusted by turning a screw on the armlift mechanism.
Turntable Startup/Brake Speed Adjustment: Users can customize the turntable's startup and brake speeds. The startup speed, which relates to the torque (power required to rotate), can be adjusted to three different time options using the H (High) and L (Low) torque buttons. The brake speed, which determines how quickly the turntable stops, can be selected from five time options using the F (Fast) and S (Slow) brake buttons. Confirmation lamps blink to indicate the current setting and changes.
Playing Records: The basic operation involves turning the unit on with the [ON/OFF] button, which automatically selects 33-1/3 rpm. Pressing [START-STOP] initiates turntable rotation. The cue lever is used to lift and lower the tone arm over the record. The [RESET] button lights the pitch control blue LED lamp, setting the unit to a preset pitch regardless of the [PITCH ADJ] position.
Pitch Control: The pitch can be finely adjusted using the [PITCH ADJ] slider, offering approximate ranges of ±8% or ±16% depending on the selected pitch range. The strobe mirrors around the turntable's edge, illuminated by a blue LED, assist in accurately measuring the pitch. The [RESET] button can be used to return the pitch to its preset value.
Strobe Light Off Function: The unit includes a strobe light off function, which is "Disabled" by factory setting (meaning the strobe light is always lit when the unit is on). Users can "Enable" or "Disable" this function by long-pressing the pitch range select button when the turntable is stopped. When "Enabled," the strobe light turns off once the turntable reaches a constant speed and turns back on if the rotation speed deviates.
Playing Different Record Types: The manual provides instructions for playing EP records (using the [45] speed select button and EP record adaptor) and SP records (simultaneously pressing [33] and [45] for 78 rpm). It also notes that a record stabilizer (not included) can be used, with a maximum weight of 1 kg.
Proper maintenance is crucial for the longevity and performance of the turntable system.
Care of Parts: Regular cleaning of the stylus and records is recommended. The head shell with the cartridge should be removed, and the stylus cleaned with a soft brush, brushing from base to tip. A record cleaner should be used for records. The head shell terminals should be wiped occasionally with a soft cloth.
Cleaning the Dust Cover and Cabinet: The dust cover and cabinet should be wiped with a soft cloth. For heavier dirt, a tightly wrung wet cloth can be used, followed by a soft dry cloth. Users are cautioned against using solvents like benzene, thinner, alcohol, or chemical wipers, as these can deform the exterior case or damage the coating. It is also advised not to wipe the dust cover while a record is playing, as this can generate static electricity that may attract the tone arm.
Moving the Unit: For transport, the unit should be repackaged in its original packaging materials. If the original packaging is unavailable, specific steps are outlined: remove and carefully wrap the turntable and turntable mat; remove and carefully wrap the head shell and balance weight; clamp the tone arm with the arm clamp and tape it in place; and carefully wrap the main unit in a blanket or paper. Before repackaging, the balance weight should be removed, and the tone arm support inserted under the tone arm.
Troubleshooting Guide: A troubleshooting section addresses common issues such as no power, weak sound, reversed left and right sounds, humming during play, and blinking strobe light or blue indicator. Solutions are provided, often directing users to recheck connections or perform specific power cycling steps. If issues persist, users are advised to contact a service representative.
| Drive Method | Direct Drive |
|---|---|
| Motor | Coreless Direct Drive Motor |
| Effective Tonearm Length | 230 mm |
| Overhang | 15 mm |
| Tracking Force Adjustment Range | 0 - 4 g (Direct Reading) |
| Power Consumption | 11 W |
| Dimensions (W x H x D) | 453 x 173 x 372 mm |
| Power Supply | AC120 V, 60 Hz |
| Turntable Platter | Aluminum Die-cast |
| Speeds | 33-1/3 rpm, 45 rpm, 78 rpm |
| Wow and Flutter | 0.025% W.R.M.S. |
| Tonearm Type | Universal Static Balance |
| Headshell Weight | 7.6 g |
| Applicable Cartridge Weight Range (without auxiliary weight) | 5.6 - 12.0 g |
| Weight | 11.5 kg |
| Signal-to-Noise Ratio | 78 dB |
| Terminals | PHONO x 1, GND x 1 |