44
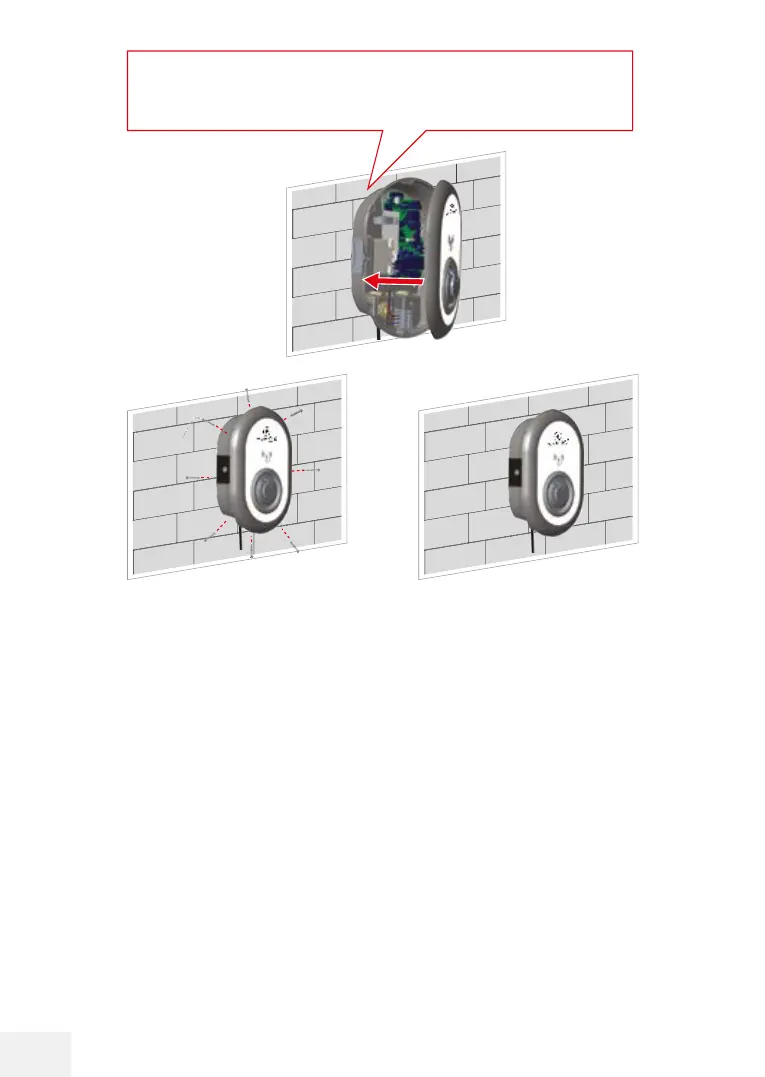
Illustration 7: Wall mounting
1. Open the front cover on the product in accordance with the instructions in „8.2.1 Opening
the cover on the charging station“, Page 42.
2. Centre the charging station with the aid of the drilling template and mark the holes with a
pencil.
3. Drill the wall at the marked points using the hammer drill (8 mm drill bit).
4. Insert the plugs into the holes.
5. Tighten the safety screws (M6 x 75) on the product using the Torx TR 25 safety screwdriver.
6. Direct the open connection cables through the hole on the le at the boom into the charging
station. Follow the instructions for establishing a mains connection (see Section 9.1) and
seing the charging current (see Section 10.1).
7. Tighten the cable screwed connections as shown in the figure. Before closing the cover on the
charging station, follow the instructions in Chapter „10 Seings for the Charging Station“, Page
48 and in the following sections from there if using functions with reference to these sections.
8. To close the cover on the charging station, tighten the previously removed cover screws using
the Torx TR20 safety angle wrench, or the right-angle angled adapter hexagon bit with the
Torx TR20 safety bit.
9. The installation of the charging station on the wall is now complete.
Before closing the cover on the charging station, follow the instructions
in Chapter „10 Seings for the Charging Station“, Page 48 and in the
following sections from there if using functions with reference to
these sections.
❽❽
❽❽ ❾❾