56 57
DE
EN
10.1.4 Seing the time zone
Under Set Time Zone you can enter the current location of the device.
> Use the Selection knob to select a time zone, then save by pressing the
Selection knob.
This seing is only visible and relevant if Update from net has been selected.
10.1.5 Summer time
> Use the Selection knob to select Summer Time > On or > O.
The seing is only visible and relevant if updating via the Internet has been
selected.
10.2 Internet seings
> Select System seings > Internet seings, to establish a connection to a
WLAN network.
In this menu you will find some seings and information about Internet connection.
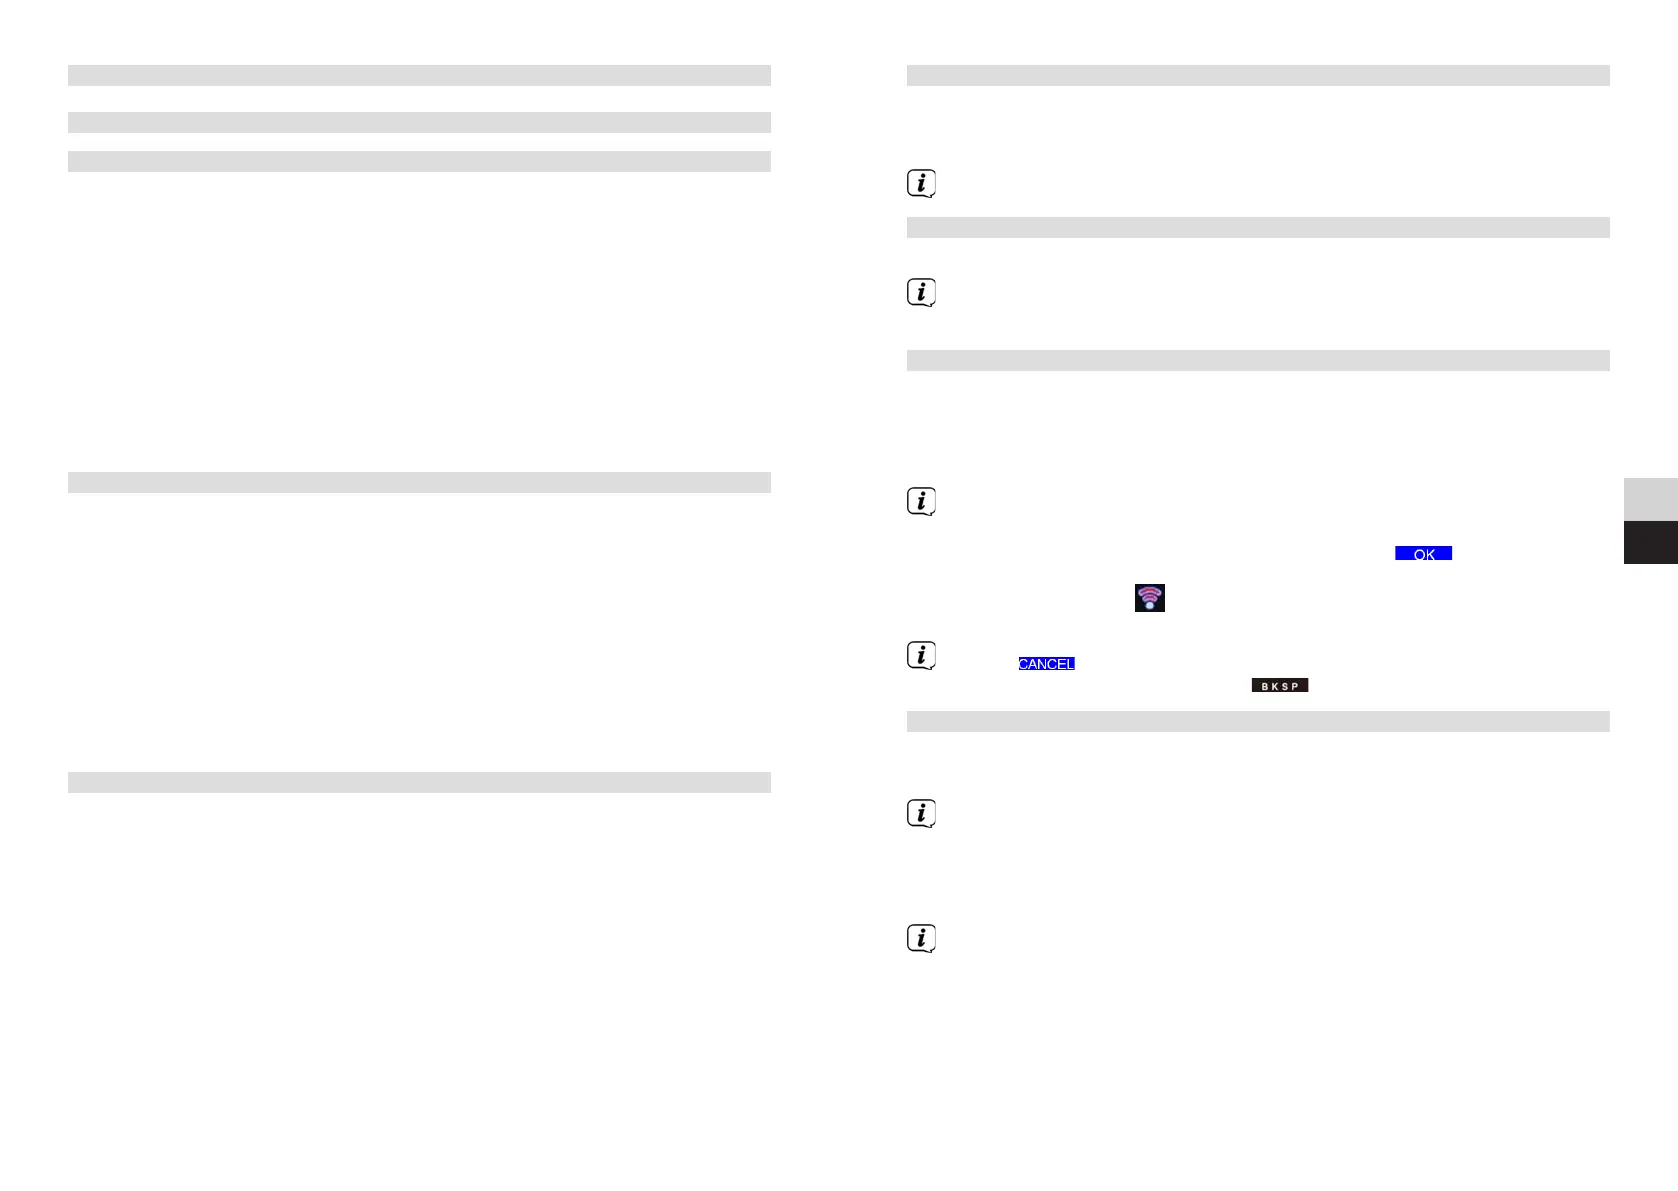
> Select Network wizard to establish a WLAN connection.
The network wizard shows you all the WLAN stations within range. Select the
WLAN network you know and select Skip WPS. Then enter the appropriate
password using the displayed keyboard. Then select . If the password
entered is correct, a connection to the network is now established. The signal
barin the status bar
of the display indicates whether the connection has
been established.
Select to abort the data entry. If you make a typing error you can
delete the last leer entered using .
10.2.1 WPS connection
> Select PBC WLAN set up if your router has the WPS function. This establishes
a direct connection to the router without having to enter the WiFi password.
If you activate WPS on your router, please observe its instruction manual.
> Start WPS on your router by pressing the corresponding buon.
> Aer you have called up the PBC WLAN set up function, press the Selection
knob to establish the WPS connection.
You can also use the WPS function in the network wizard by pressing the
Option buon or PIN aer selecting the WLAN network.
10 System seings
10.1 Date and time seings
10.1.1 Manually seing the date and time
Depending on the seing for time updates (Section 10.1.2), the date and time might
have to be set manually.
> Select Main Menu > System Seings > Time and Date and press the
Selection knob.
> Use the Selection knob to select the [Time/date seing] item, then press the
Selection knob.
> By turning the Selection knob you can set the flashing value in each case
and you can then skip to the next value in the sequence Day, Month, Year,
Hour, and Minute by pressing the Selection knob.
> The Date/Time is saved when the Selection knob is pressed on the Minutes
value.
10.1.2 Time update
Here you can specify whether time updates should be carried out automatically
via DAB+, FM or the Internet, or whether you wish to enter them manually (Section
10.1.1).
> In System Seings > Time and Date, select the [Time Update] item.
> Use the Selection knob to select the following options:
[Update from DAB] (Update via DAB+ only)
[Update from FM] (update only via FM)
[Update from Net] (update via Internet)
[No Updates] (time/date must be entered manually, see Section 10.1.1).
> Press the Selection knob to save the seing.
10.1.3 Seing the time format
Under Set format you can activate the 12 or 24 hour format.
> Use the Selection knob to select one of the options 12 (12 hour format) or 24
(24 hour format).
> Press the Selection knob to save.