58 59
DE
EN
10.4 Auto Standby
> By turning and pressing the Selection knob, in System seings > Auto
Standby, select whether the radio should automatically switch to Standby
aer (2 hours, 4 hours, 5 hours or 6 hours) if it has not been used in the
meantime, or switch the function o.
10.5 Brightness
Under System seings > Brightness you can set the brightness of the display
for operation to High, Medium, or Low, and for Standby to Medium or Low. For
Standby, you also have the facility of seing the time aer which the brightness
should be dimmed to the selected brightness.
> The seings are carried out by turning and pressing the Selection knob.
10.6 Language
> Under System seings > Language, select the desired system language by
turning and pressing the Selection knob.
10.7 Factory seings
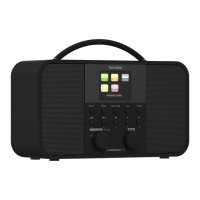
> Select System Seings > Factory seings to reset the Viola 2 C IR to its
delivery status.
Calling up the factoryseings resets all changesand seings you have made!
10.8 Displaying the soware version
> To display the installed soware version, call up System seings > Info with
the Selection knob.
10.2.2 Advanced network seings
To find out more about the current connection select Display seings.
Select Manual seing if you know your network parameters and would like to
configure them manually. Take note of the instructions on the display.
Select Delete network profile to delete connections no longer required or
select Reset seings to delete all network seings.
If the network connection should be retained in standby, select Enable
Network Connection in Standby > Yes. However, doing so will increase the
power consumption.
10.3 Set-up wizard
On first switching on and aer a factory seings reset, the set-up wizard is
automatically launched.
> First confirm the data protection stipulations by pressing the Selection knob.
> Then use the Selection knob to select whether the set-up wizard should be
carried out (YES) or not (NO).
If you select NO, the wizard closes and you need to perform the required
seings manually.
Aer selecting YES you will be guided in steps through the seings.
> Under Time format, select the desired display format for the time display
(Section 10.1.3).
> During the next step you must select via which source the time is to be
synchronised (for more information refer to Section 10.1.2).
> Then you can select whether the WLAN connection should also be maintained
in standby (YES) or whether it should be switched o (NO).
> You can then set up a WLAN network connection. For more details, see
Section 10.2.
> Press theSelection knob to close the wizard when Set-up Wizard
Completed appears in the display.

 Loading...


