TECO S.r.l. – Via G. Ricci Curbastro, 8 – 48124 Fornace Zarattini – Ravenna (Italy) – Tel. +39 0544 408333 – Fax +39 0544 280084 www.tecoonline.com
info@tecoonline.com Reg.Imprese di Ravenna, C.F. e P.IVA 01075610392 –R.E.A.n.118737 - Cap.Soc. 60.000 Euro – Registro A.E.E. IT08020000002839
The information contained within this manual may be subject to changes without prior notice by TECO.
Pag. 10 di 15
1.7 INSTALLATION AND OPERATION
1.7.1 PACKAGE CONTENTS
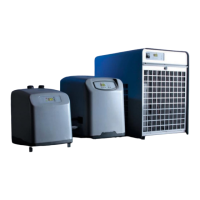
Upon opening the cardboard box, please check for the presence of all accessories (Fig. 5):
D Extension conveyor 1
E Conveyor 1
F Installation, usage, and maintenance manual 1
H Adhesive drilling template for the hot air outlet 1
I Cable ties for securing tubes 4
L Air conveyor fixing key 1
M Tube connection fittings complete with gaskets 2
N Tube clamps 2
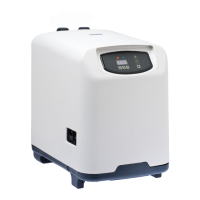
Verify through the technical data label (Ref. A3 Fig. 4) that the appliance contained in the packaging
matches the purchased model.
1.7.2 UNPACKING THE APPLIANCE
WARNING: Do not overturn the packaging or the appliance. Keep the packaging intact for future
handling.
1) Open the packaging and remove the accessories (Ref. A Fig. 2).
2) Remove the contents without turning them over; gripping them by the side handles (Ref. B Fig. 3).
3) Remove the polystyrene (Rif.C Fig.3).
4) Remove the plastic bag.
1.7.3 APPLIANCE INSTALLATION AND OPERATION
WARNING: Installation must not be carried out by the user but only by qualified technicians.
1) Do not install or attempt to repair the appliance if it has been damaged during transport.
2) Do not connect the power cord to the electrical supply unless specifically required..
3) To ensure the proper operation of the appliance under safe conditions, it is strictly forbidden to expose it to
weather conditions and direct heat sources (Fig. 1). The temperature in the installation environment should be
between 16°C and 32°C (60°F – 90°F).
4) Position the refrigerator so that the refrigerator itself and the parts containing live parts are not accessible
in any way to a person inside the tank.
5) Position the chiller in a way that it cannot fall into the tank under any circumstances
6) Choose the direction for the hot air outlet by rotating the conveyor (Ref. O Fig. 6) and secure it by turning
the two screws a quarter turn counterclockwise (Ref. Q Fig. 6) using the provided wrench (Ref. P Fig. 6).
7) If the installation is not inside a technical compartment, proceed to step 10.
8) If the installation is inside a technical compartment, make an opening on the chosen wall for the evacuation
of hot air, respecting the recommended minimum distances (Fig. 7). The supplied label (Ref. B9 Fig. 7) can
be helpful. The minimum internal dimensions of the cabinet are 390x390x525(h) mm; 15.35x15.35x20.67(h)
in.
9) Provide an opening of 400 cm² – 62 in² to allow air to enter the compartment (Ref. P1 Fig. 8).
Tab. 1-1
10) Prepare the tubes as follows:
10.1) If necessary, first slide on the tube clamp (Ref. P2 Fig. 9) and then the tube locking clamp (Ref. P3 Fig.
9).
10.2) Insert the fitting (Ref. P4 Fig. 9) into the tube and bring the tube locking clamp over the fitting (Ref. P5
Fig. 9).
10.3) Rotate the fitting (Ref. P7 Fig. 11) clockwise, orienting it according to your needs, and tighten it securely.
Hot Air Exhaust Opening Position
S 260 mm – 10,24 in
T 74 mm – 2,91 in
U > 60 mm – 2,36 in
V CP 5 427 mm – 16,8 in
Minimum distances from the walls
Z (filter side) 30 mm – 1,18 in
X (Cable output side)
50 mm – 1,97 in