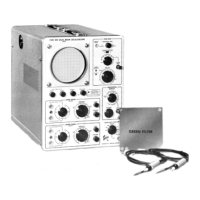
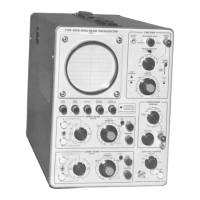
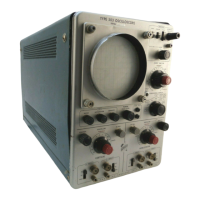
Operating Instructions— Type 503
X-Y MODE OF OPERATION
Placing the HORIZONTAL DISPLAY switch in the HORIZ.
AMPLIFIER position sets the Type 503 Oscilloscope up for
X-Y operation. In this mode of operation, input signals
may be applied to both the horizontal and vertical ampli
fiers, and the display is a graph of the waveform on one
channel versus the waveform on the other channel. The
horizontal sweep is disabled. Examples of the use of the
X-Y mode of operation are the plotting of hysteresis loops,
of voltage across a semiconductor versus current through
it, and of force or pressure versus deformation or strain
in a material. Use can be made of the differential input
feature on one or both channels.
APPLICATIONS
The following paragraphs describe procedures for mak
ing measurements of voltage, elapsed-time, and phase-
shift with the Type 503 Oscilloscope. No attempt has been
made to describe any but the most basic techniques. Famili
arity with the instrument will enable the operator to apply
the essence of these techniques to a wide variety of appli
cations.
Voltage Measurements
To measure the AC component of a signal, proceed as
follows:
1. Display the waveform over as large a portion of the
screen as possible by adjusting the appropriate SENSITIV
ITY control.
2. With the aid of the graticule, measure the distance
(in centimeters) between the two points on the waveform
between which the voltage measurement is desired. This
will be a vertical measurement where the waveform to be
measured is applied to the vertical channel, a horizontal
measurement where the waveform to be measured is applied
to the horizontal channel. Make sure that the appropriate
VARIABLE control is in the CALIBRATED position. On small
voltage measurements, the width of the trace can make
up an appreciable part of the entire measurement. For
this reason, it is important to take all readings in a given
measurement from the same side of the trace.
3. Multiply the distance between the two points by the
setting of appropriate SENSITIVITY control and by the atten
uation factor, if any, of the probe. This is the voltage
between the two points on the waveform.
To measure the DC level at some point on a signal, pro
ceed as follows:
1. Set the INPUT switch for the channel in use to the GND
position.
2. If the horizontal sweep is being used, rotate the LEV
EL control fully clockwise to the FREE RUN position to pro
duce a free-running trace. If the oscilloscope is being used
in the X-Y mode of operation, the signal on the other channel
will produce a trace.
3. With the appropriate POSITION control, position the
trace so that it lies along one of the lines of the graticule.
This line will be used as a ground reference; its position
in any given case will depend upon the polarity and ampli
tude of the input signal to be measured. Do not adjust
this POSITION control after the reference line has been
esiablished.
4. Set the INPUT switch mentioned in step 1 to the DC
position. If the horizontal sweep is being used, adjust
the LEVEL control for a stable display.
5. Measure the distance, in centimeters, from the ground
reference line established in step 3 to the point at which
the DC voltage level reading is desired.
6. Multiply this distance by the setting of the appropriate
SENSITIVITY control and the attenuation factor, if any, of
the probe. This is the DC level of the point measured.
Time and Frequency Measurements
To measure the time interval between two points on a
waveform, proceed as follows:
1. Set the oscilloscsope up for conventional operation
with the signal applied to either of the vertical INPUT con
nectors.
2. With the aid of the graticule, measure the horizontal
distance, in centimeters, between the two points whose inter
val you wish to find. Make sure that the SWEEP TIME/CM
VARIABLE control is in the CALIBRATED position.
NOTE
When making time measurements from the grati
cule, the area between the 1-cm and 9-cm g rati
cule lines provides the most accurate time measure
ment in the specified area (see Fig. 2 -7 ). There
fore, the first and last centimeters of the display
should not be used for making accurate time meas
urements. Position the display area to be timed
so the timing area starts at the first centimeter
graticule line. Set the SWEEP TIME/CM switch so
the end of the display timing area falls between
the first and ninth cm graticule lines.
Fig. 2-7. Area of graticule used for obtaining accurate time meas-
urements.
2-8
©
 Loading...
