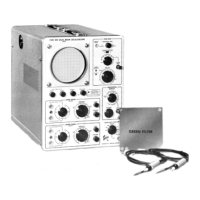
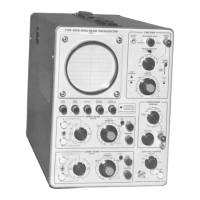
Performance Check— Type 503
c. Connect a 50-ohm termination, a UHF T connector,
and two 50-ohm cables to the output connector of the con
stant-amplitude signal generator, in the order given.
d. Connect one cable to the Type 503 VERTICAL + INPUT
connector, and the other cable to the EXT. TRIG. IN con
nector.
e. Connect a 10X probe to the test oscilloscope Vertical
+ Input connector, and connect the probe tip to the EXTER
NAL TRIG. IN connector.
f. Set the generator frequency to 50 kHz, and adjust
the output to 0.5 V, as indicated on the test oscilloscope by
a display amplitude of 5 cm.
g. Remove the test probe from the EXTERNAL TRIG. IN
connector.
h. Change the generator frequency to 450 kHz.
i. Check— A stable display may be obtained in the +
and — positions of the SLOPE switch by adjusting the LEVEL
control.
j. Rotate the LEVEL control to the AUTO, position.
k. Check— A stable display may be obtained in both
positions of the SLOPE switch.
l. Remove the probe.
26. Check Triggering— Internal High Frequency
a. Requirement— Stable displays in both positions of the
SLOPE and COUPLING switches, and in AUTO.
b. Change the SOURCE switch to INT., and the constant-
amplitude generator signal frequency to 50 kHz.
c. Turn the LEVEL control to FREE RUN, and adjust the
generator output for a display 0.5 cm in amplitude.
d. Adjust the LEVEL control for a stable display.
e. Check— A stable display may be obtained with the
SLOPE switch in either position, and with the COUPLING
switch in either position, by adjustment of the LEVEL control.
f. Change the LEVEL control to FREE RUN, and adjust
the generator output for a 0.8 cm display.
g. Change the LEVEL control to AUTO.
h. Check—Stable displays may be obtained with the
SLOPE and COUPLING switches in either position.
i. Change the LEVEL control to FREE RUN, the generator
frequency to 450 kHz, and adjust the generator output for
a 2-cm display.
j. Check—Stable displays with the SLOPE and COUPLING
switches in either position by adjusting the LEVEL control.
k. Adjust the generator output for a 2.5-cm display, and
turn the LEVEL control to the AUTO, position.
l. Check—Stable displays with the SLOPE and COU
PLING switches in either position.
m. Remove the constant-amplitude generator signal.
27. Check Triggering— External (1 kHz Square
Wave)
a. Requirement— Stable display in + and —SLOPE switch
positions, and in AUTO, triggering.
b. Connect a UHF T connector and two 50-ohm cables
to the output connector of the Standard Amplitude Calibra
tor (item 4 of Recommended Equipment).
c. Connect one cable to the EXTERNAL TRIG. IN con
nector.
d. Set the Standard Amplitude Calibrator to supply a 0.5-
volt square wave.
e. Change the SWEEP TIME/CM to 2 mSEC.
f. Check—A stable display may be obtained with the
SLOPE switch in both positions by adjustment of the LEVEL
control, and with the LEVEL control in AUTO.
28. Check Triggering— Internal (1 kHz Square
Wave)
a. Requirement— Stable displays in + and — SLOPE,
AC or DC trigger COUPLING, and in AUTO, triggering.
b. Change the SOURCE switch to INT.
c. Set the Standard Amplitude Calibrator to 50 millivolts.
d. Check— A stable display may be obtained with the
SLOPE switch in both positions, by adjustment of the LEVEL
CONTROL, and with the LEVEL control in AUTO.
e. Position the display to the graticule center, and obtain
a stable display with the LEVEL control.
f. Change the COUPLING switch to DC.
g. Check— A stable display may be obtained in both
positions of the SLOPE switch by adjustment of the VERTICAL
POSITION control. The bottom of the square-wave display
(zero DC level) should be within ± 1 cm of the graticule
center line when the SLOPE switch is in either position.
h. Disconnect the calibrator signal.
29. Check Line Triggering
a. Requirement-—Stable triggering at line frequencies.
b. Connect a 10X probe to the VERTICAL -|-INPUT
connector.
c. Connect the probe tip to a suitable line voltage source
(i.e., the line fuse terminal at the inside rear panel of the
test oscilloscope).
d. Set the VERTICAL SENSITIVITY switch to 5 VOLTS/
CM, and the SWEEP TIME/CM to 5 mSEC.
e. Change the SOURCE switch to LINE.
f. Check—A stable display may be obtained with the
SLOPE switch in either position by adjustment of the LEVEL
control.
g. Change the LEVEL control to AUTO.
5-11
 Loading...
