Installation Instructions
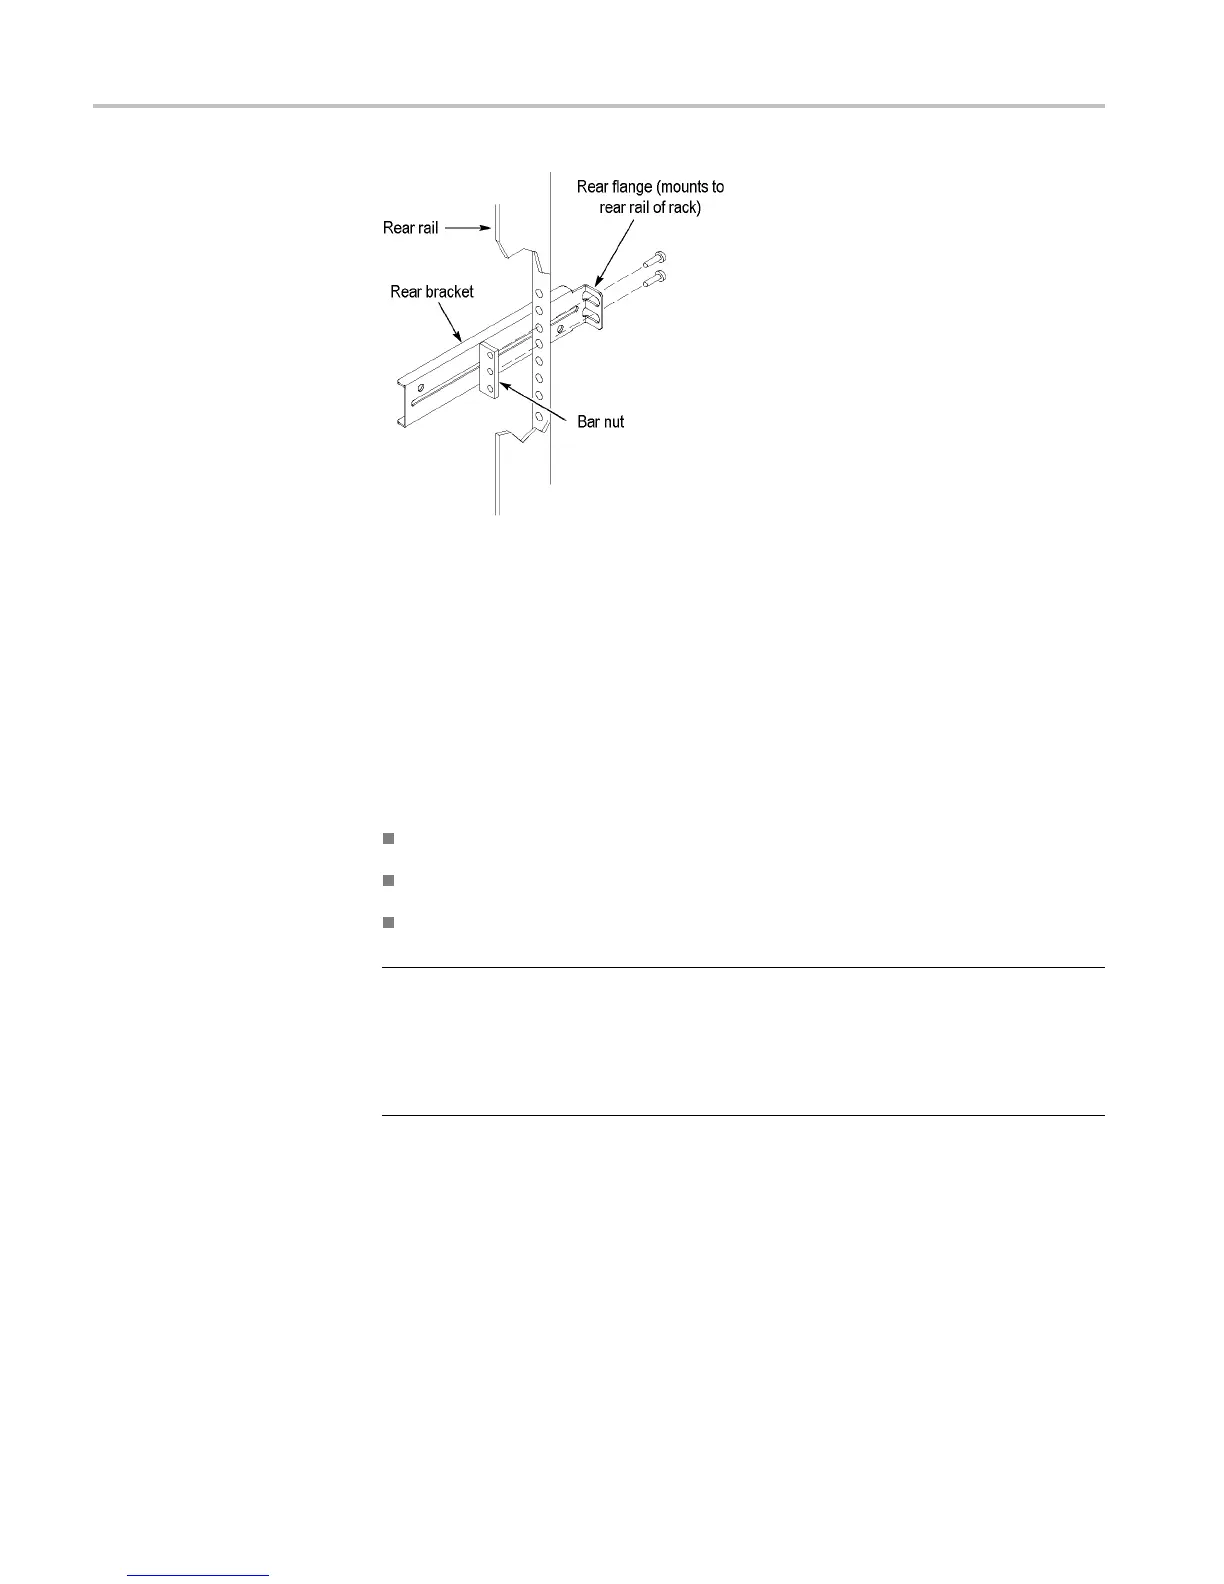
Figure 1 0: Attaching the rear brackets to the instrument rails
5. Mount the cosmetic trim on the front, using two 10-32 screws each. (See
Figure 11.) (Item 2 in this figure shows you where to locate the shelf during
shelf in
stallation).
Install the Shelf/Track Assembly into the Rack
You wil
l need the following tools to install the shelf/track assembly. (See Table 2
on page 9.)
One sc
rewdriver handle (Item 1)
One number two Pozidriv tip (Item 2)
One torque driver (Item 5)
NOTE. The rack h ardware kit contains hardware for mounting the instrument in
sev
eral configurations. Not all of the hardware in the kit is needed.
A standard equipment rack has rails with universal hole spacing. If you use a
ra
ck with other than universal hole spacing, you may have to drill additional
mounting holes in the rack.
1
.
G
rab the shelf/track assembly and slide the tracks into the brackets on the rear
rails of the instrument rack.
2
.
A
lign the front of the shelf to the bottom of the cosmetic trim on the front of
the instrument rack.
14 TLA6200, TLA6400, & TLA7012 Rackmount Kit Instructions

 Loading...


