Teledyne API – Ultra Sensitivity Model T200UP NO/NO
2
/NOx Analyzer Addendum to T200
22 07450B DCN6495
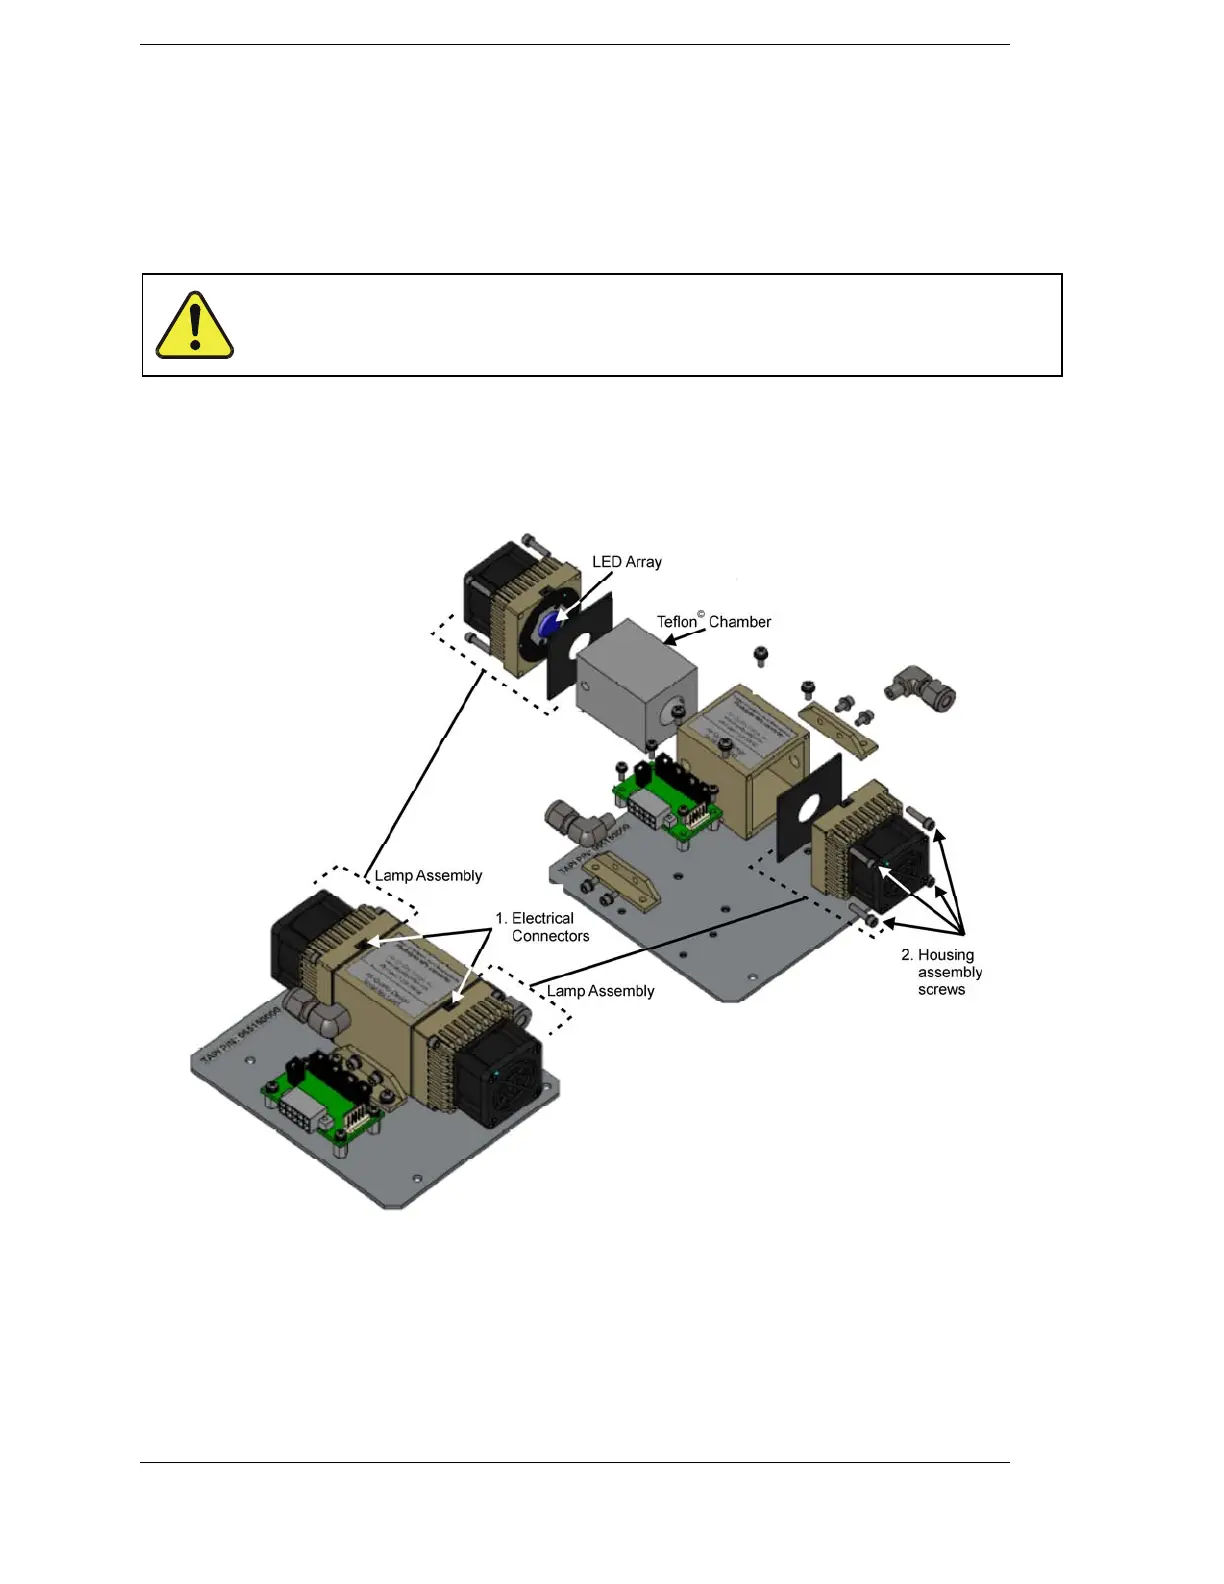
ii. For replacement, remove each lamp assembly and install the
replacement lamp assemblies.
7. Reassemble in reverse order (screws, electrical connection).
NOTE: Converter’s electrical connectors are delicate. Do not use
force during reconnection: the arrows on the molded connectors
should face inward so that they point toward each other.
CAUTION – PERSONAL SAFETY HAZARD: UV RADIATION
Ensure that the Photolytic Converter is completely reassembled so that
there is no exposure to UV radiation before powering ON the analyzer.
8. Conduct a leak check per instructions in the T200 manual
Maintenance section.
9. Calibrate per the procedures in the preceding Setup and Calibration
section and check the converter efficiency..
Figure 6-1. Photolytic Lamp Assembly Replacement
During regular maintenance, check the four hex head screws on each
lamp and tighten if necessary.
For all other instrument maintenance, follow the instructions in the T200
Operation Manual.