from 1 to 3 are lighting on, the zone 1 is blinking, and lighting on button shows the first
digit of the address (operation) number.
3. Press the right arrow button. The cursor will move one position on the right, zone 2
starts blinking and lighting on digit number shows the next number of the address (or
operation).
4. Proceed in an analogical way reviewing the address number up to the last digit.
5. Press the button again to step back in parameter setting mode.
Note: You can also leave the view mode and with single pressing the CANCEL button.
Recommendation: If you are not familiar in details with the engineer programming
menus (address and operation numbers) write down in sequence the digits (of lighting
buttons) corresponding to the respective address positions (zone numbers).
- Engineer Programming
The engineer programming menus are accessible only when the system is disarmed. Lighting on symbols or
indicate the currently set programming style type.
To access the engineer programming menus enter valid engineer code (7777 by default). A confirmation sound signal
is heard and the system starts waiting for the installer to enter ADDRESS or OPERATION number for programming.
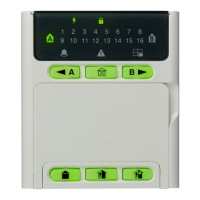
According the set programming style, the LED displays:
- The zone numbers 1, 2, 3 and 4, and lighting on - 4-digit ADDRESS programming style
- The zone numbers 1, 2 and 3, and lighting on - 3-digit OPERATION programming style
The symbol lights on permanently together with the letter for the set programming style – 4-digit ADDRESS
programming style is set by default.
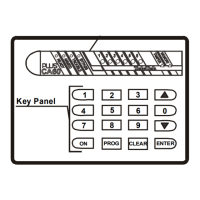
To proceed with programming, enter ADDRESS number and according the descriptions provided in item 7, set
parameters, attributes and options for the system configuration. Use the digit buttons to enter the address number.
Every pressing of a button turns one zone number off, and the pressed button lights on. After pressing the last digit of
the address number, the system enters automatically in mode for setting parameters - lights on, and or light
off.
Several zone numbers will light on as their number depends on the current parameters for programming. Zone 1 is
blinking to show that the first digit of the value is currently set. A permanently lit digit button shows the current set
value. To change it, press other digit button according the parameter. If there are several values (when setting the date
for example), you can review them using the arrow buttons. Note: In case of setting options from ENABLE/ DISABLE
type keep in mind that the opting is disabled when all digit buttons are off, and the option is enabled when all digit
button are lighting on. You can change the setting of the option with pressing random digit button or arrows buttons.
To confirm the entered settings press the ENTER button – the system automatically moves to the next address
number. To cancel the entered parameters press the CANCEL button – the system will move back to the main screen
for ADDRESS entry. To exit to main screen press CANCEL button a couple of times. In normal operation mode only
the DISARM button lights on in green.
According the entered ADDRESS number the LED indication will differ. Use the detailed descriptions in item 7 to
become familiar with the system settings.
Attention: The exit from the engineer programming menus is not automatic! Press CANCEL button several times to
exit to the main display and normal operation mode – only the DISARM button lights on in green.
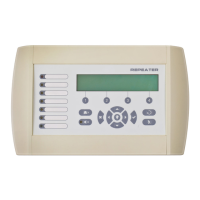
Example for reviewing of ADDRESS number in engineer menu with LED8/ 16A keyboard:
- The symbols and are lighting on. Zone 1 is blinking and Button 1 lights on.
- Press the button. It starts blinking showing that the system is in mode for address reviewing.
- The symbols and light up. Letter means that the set programming style is with 4-digit ADDRESSES.
- Zone 1 is blinking. Button 0 is lighting on – this is the first digit of the ADDRESS number.
- Press the right arrow button.
- Zone 2 is blinking. Button 0 is lighting on – this is the second digit of the ADDRESS number.
- Press the right arrow button again.
- Zone 3 is blinking. Button 9 is lighting on – this is the third digit of the ADDRESS number.
- Press the right arrow button for the last time.
- Zone 4 is blinking. Button 7 is lighting on – this is the last digit of the ADDRESS number.