TELINDUS 1132/1133 Web Interface User’s Guide
Version 2.0 Page 17/57 December 2004
To complete the connection you must now click the Apply button. The Apply button will
temporarily save this connection. To make the change permanent, you need to click on Save All
Settings. At the System Commands page under the TOOLS, click on Save All.
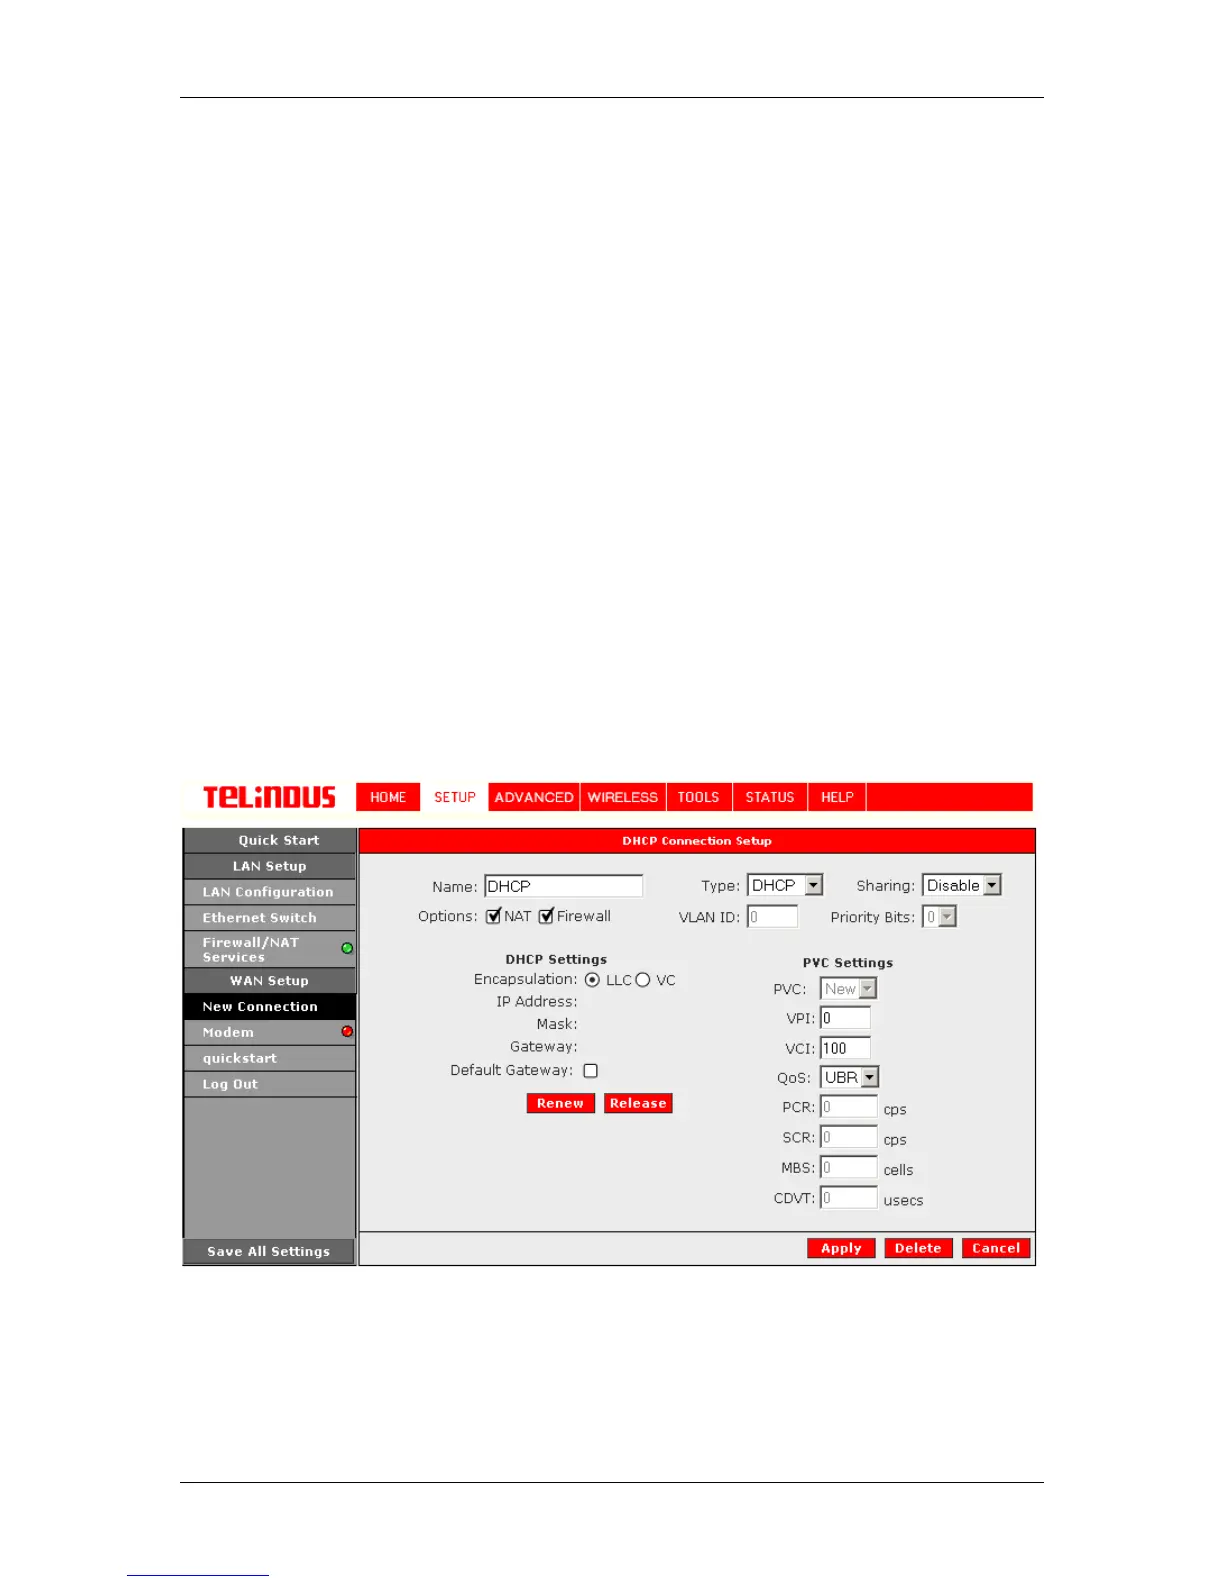
4.4.1.4 DHCP Connection Setup
Dynamic Host Configuration Protocol (DHCP) allows the ADSL Router to automatically obtain the
IP address from the server. This option is commonly used in situations where IP is dynamically
assigned and is not known prior to assignment.
To configure the ADSL Router for a DHCP connection, click on Setup and then click on New
Connection. The default DHCP connection setup is displayed. At the Type field select DHCP
and the DHCP connection setup page is displayed; Figure 8 illustrates a typical DHCP
configuration. Give your DHCP connection a unique name; the name must not have spaces and
cannot begin with numbers. In this case the unique name is called DHCP1. Select the
encapsulation type (LLC or VC); if you are not sure just use the default mode. Select the VPI and
VCI settings; your DSL service provider or your ISP will supply these; in this case the DSL service
provider is using 0,100. Also select the ATM Quality of Service (QoS); leave the default value if
you are unsure or the ISP did not provide this information.
If your DSL line is connected and your DSL/IPS provider is supporting DHCP, you can click the
renew button and the gateway will retrieve an IP address, Subnet mask, and Gateway address.
At anytime, you can renew the DHCP address by clicking on the renew button; in most cases you
will never have to use this button.
Figure 8 (DHCP Connection Setup)
To complete the connection you must now click the Apply button. The Apply button will
temporarily save this connection. To make the change permanent, you need to click on Save All
Settings. At the System Commands page under the TOOLS, click on Save All.