24
en
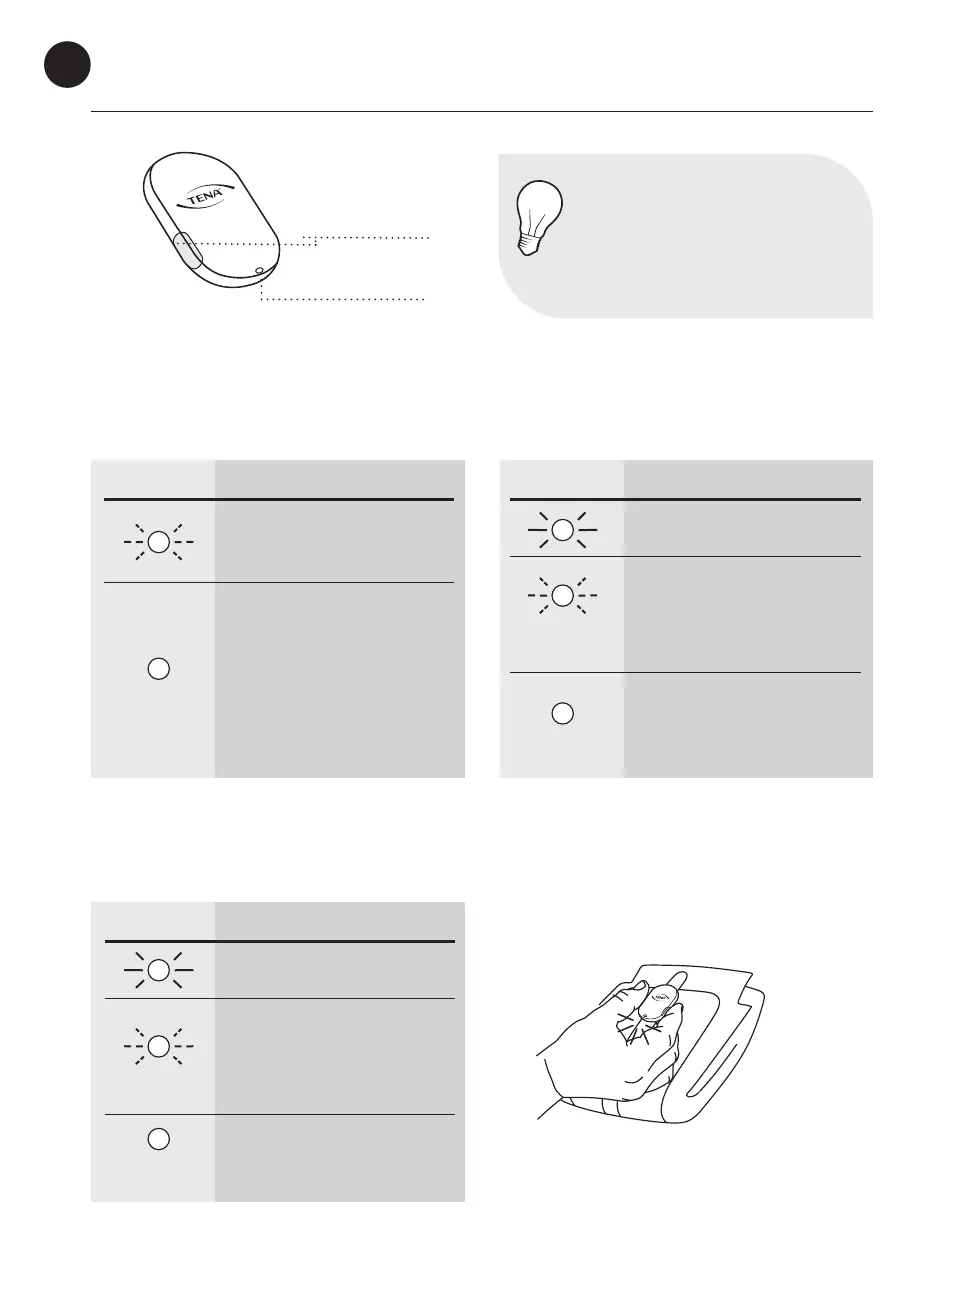
Transmitter lights & buttons
Buttons
LED light
NOTE
The LED light can be dicult
to see if exposed to a strong
sunlight, for example. Try to block
the sunlight to improve readability.
Battery installation
Once the battery has been installed in
the transmitter:
LED LIGHT WHAT IT MEANS
Blinks ve times:
The battery is in the correct
position. Attach the transmitter
to the sensor strip.
No light: OK
The light disappears after a few
seconds. Check for power by
pressing both buttons simulta-
neously for two seconds.
Change Indicator assembly
Once the transmitter has been attached to
the sensor strip:
Applying the Change Indicator to the incontinence product
Press both buttons simultaneously for two seconds at every change of incontinence product to
register the change in the app.
LED LIGHT WHAT IT MEANS
Steady light for a few seconds:
Everything is OK.
Blinks ve times:
The transmitter is not attached
properly or the battery is low.
Try re-attaching the transmitter.
If it does not help, change the
battery.
No light: OK
The light disappears after a few
seconds. Check for power by
pressing both buttons simulta-
neously for two seconds.
LED LIGHT WHAT IT MEANS
Steady light for a few seconds:
Everything is OK.
Blinks ve times:
The transmitter is not attached
properly or the battery is low.
Try re-attaching the transmitter.
If it does not help, change the
battery.
No light at all:
Error. See p. 25–29 for more
information.
 Loading...