4004-14
39
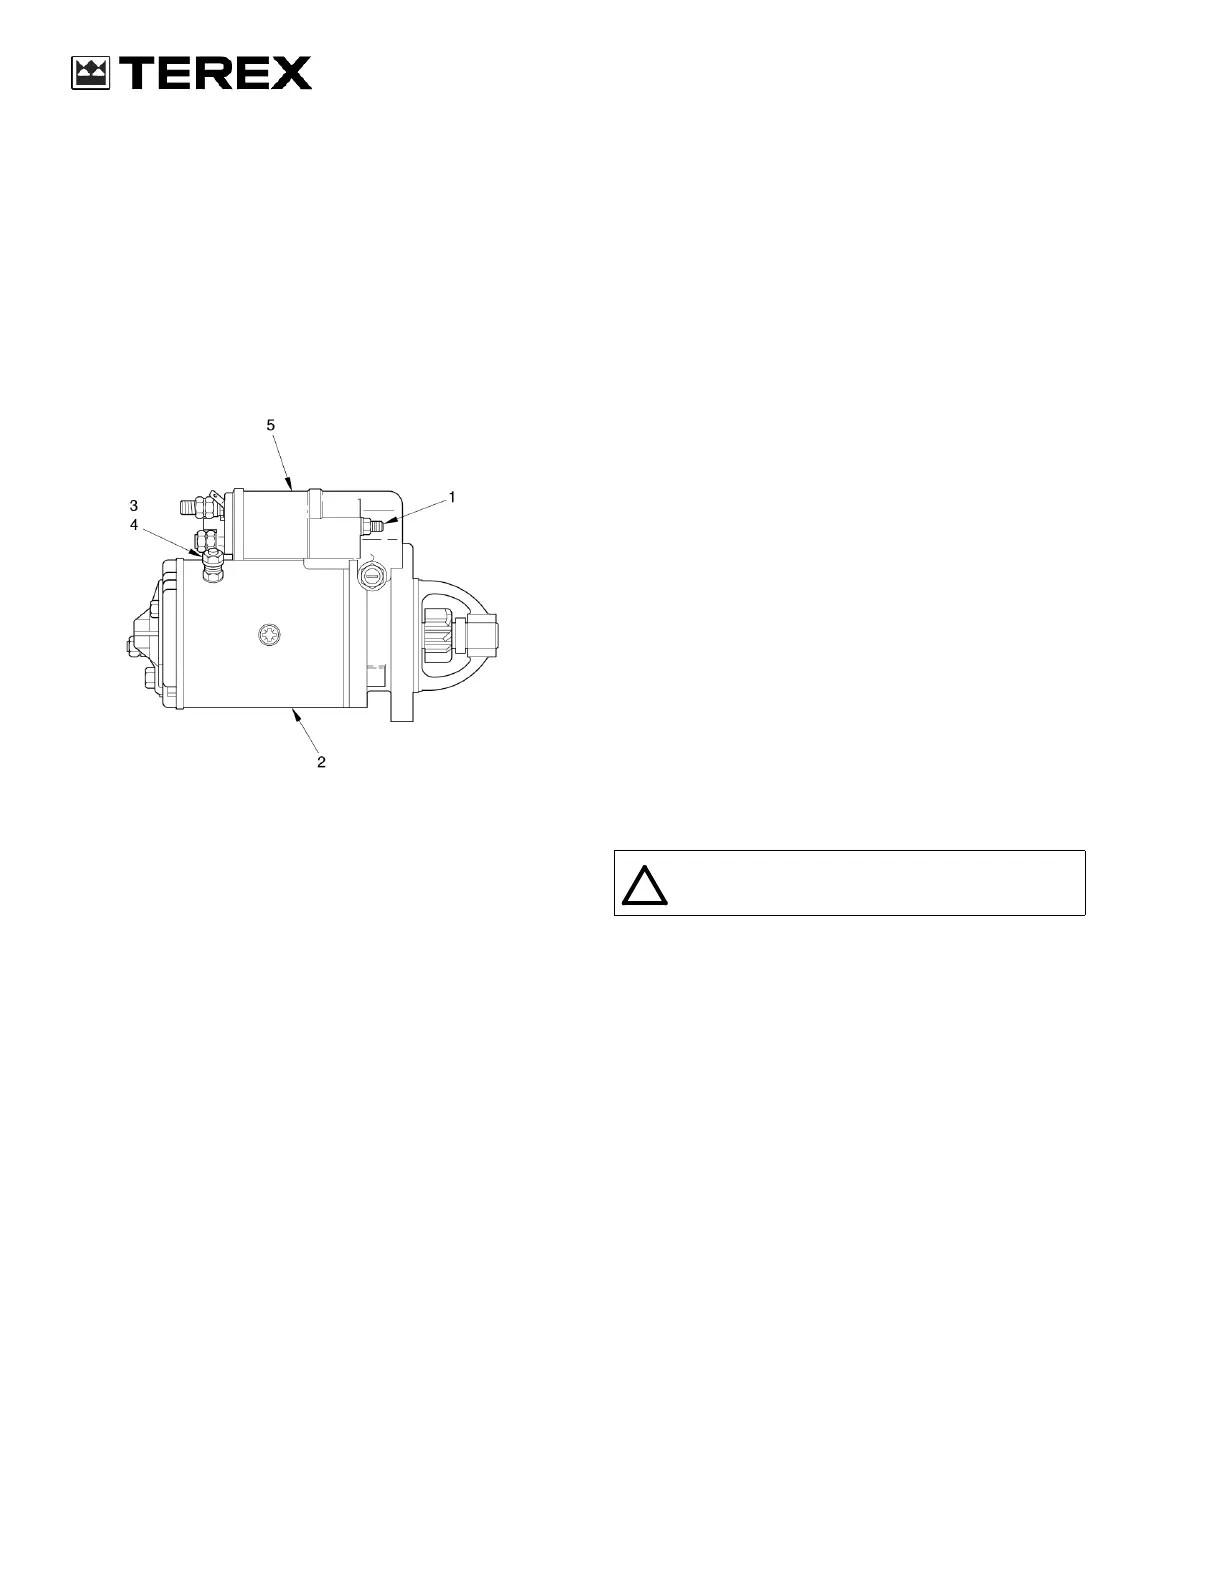
Removing the starter motor solenoid
Remove the starter motor solenoid as follows:
1.Remove the starter motor.
2. Remove the two nuts (3) and the copper link (4).
3. Remove the two nuts (1) which secure the sole-
noid (5) to the starter motor (2).
4. Remove the solenoid body (5).
5. Remove the solenoid plunger from the engage-
ment lever.
789M064A
Installing the starter motor solenoid
NOTE :
The installation of the starter motor solenoid
is the reverse of the removal.
Install the starter motor solenoid in the reverse order
of the removal but note the following:
1.Torque tighten the nuts (1).
2.Torque tighten the nuts (3).
Inspecting and testing the starter motor
Test equipment (Diagrams on Next Page)
110 volt insulation tester or ohmmeter
Inspect and test the starter motor as follows:
1. Inspect the bush (7) in the alternator cap (8). If
the clearance between the bush (7) and the
shaft (6) is noticeable, replace the bush (7), refer
to next page .
2. Partially disassemble the starter motor, refer to
page 6 (steps 1 through 6).
3. Inspect the bush (3) in the drive housing (2). If
the clearance between the bush (3) and the
shaft (4) is noticeable, replace the bush (3), refer
to page 13.
4. Continue to disassemble the starter motor, refer
to page 6 (steps 7 through 12).
5. Inspect the bush (1) in the intermediate plate (5).
If the clearance between the bush (1) and the
shaft (4) is noticeable, replace the bush (1), refer
to page 13.
6. Complete the disassembly of the starter motor,
refer to page 6 (steps 13 and 14).
7. Use a 110 V insulation tester or ohmmeter, to
check the insulation of the electrical components
(steps 8 through 10).
8. Touch one test probe (9) onto an insulated
brush holder and the other (10) on an unpainted
part of the carrier plate. The
ohmmeter must read infinity, as no current
should pass between the probes. If the meter
reads less than infinity, replace the brush holder.
9. Touch one probe (11) on the field terminal, the
other (12) on a clean part of the motor body, but
ensure neither brush touches the body, refer to
page 15. The ohmmeter must read infinity, if the
meter indicates less than infinity the field coils
are shorting and must be replaced.
10. Touch one probe (14) onto the armature shaft,
the other probe (13) onto a commutator seg-
ment. The ohmmeter must
read infinity. If the meter indicates less than
infinity, the armature must be replaced.
11.Assemble the starter motor.
WARNING :
Only trained electrical personnel
must do these checks.
!
 Loading...