Care and Maintenance 7
91/112TL160
Operating Manual 12.9.08 Version 1.0
• Connect the bleeder hose to the first bleeder
screw (64/2) of the rear axle and route it into the
collection bottle.
• Open the bleeder screw (64/2) until the brake fluid
(hydraulic oil) escapes without bubbles.
• Remove the bleeder hose and re-tighten the
bleeder screw.
• Connect the bleeder hose to the second bleeder
screw (64/2) of the rear axle and route it into the
collection bottle.
• Open the bleeder screw (64/2) until the brake fluid
(hydraulic oil) escapes without bubbles.
• Remove the bleeder hose and re-tighten the
bleeder screw.
• Connect the bleeder hose to the bleeder screw on
the inch valve of the hydraulic “Travel” pump and
route it into the collection bottle.
• Open the bleeder screw until the brake fluid
(hydraulic oil) escapes without bubbles.
• Remove the bleeder hose and re-tighten the
bleeder screw.
• Re-mount the cover on the front-end.
7.8.9.3 Adjusting the brake disc play
• Place the machine on a level surface and secure it
with chocks to prevent it from rolling away.
• Release the hand brake
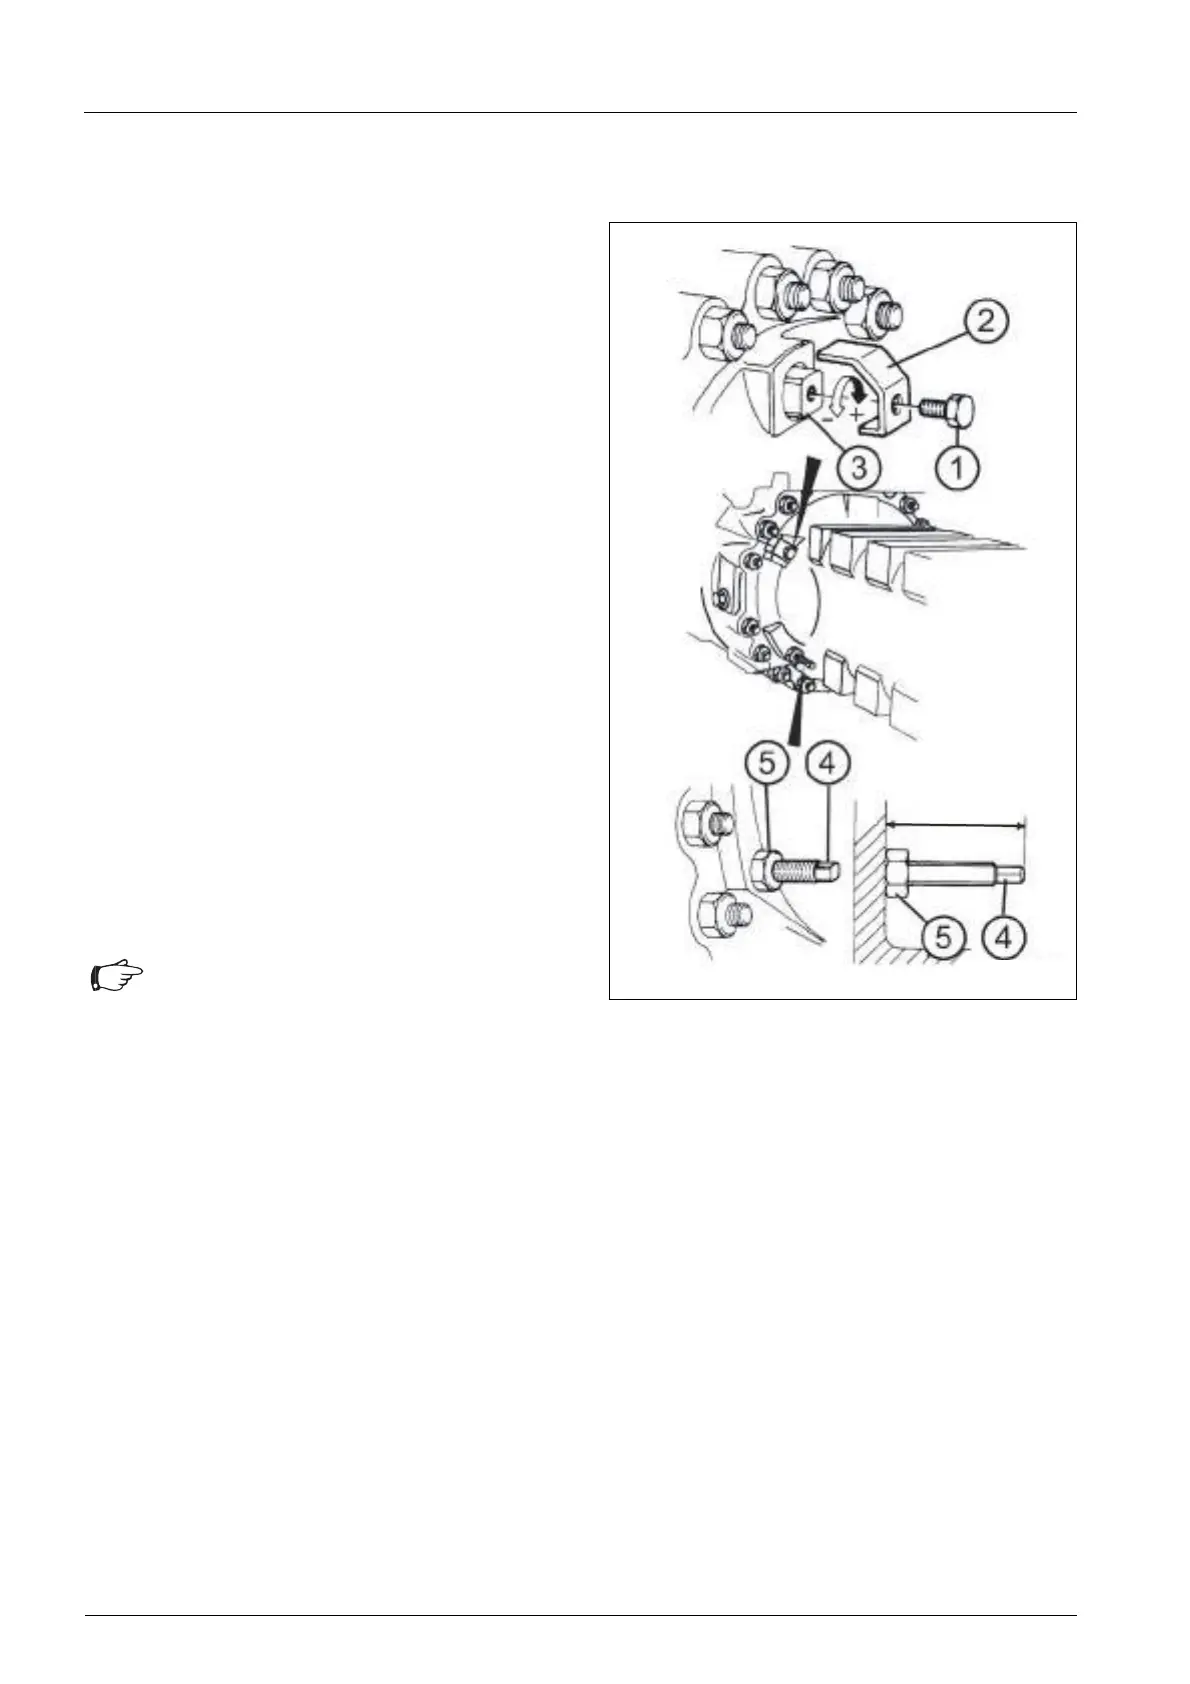
• Remove the screw (65/1) along with the retaining
fixture (65/2) on the left-hand brake of the front axle.
• Move the adjusting device (65/3) to the left (anti-
clockwise) until the stop.
• Move the adjusting device 3 full turns to the right
(clockwise).
• Re-install the retaining fixture. The play between
the brake discs is now adjusted.
• Adjust the remaining brakes of the other axle side
and the rear axle.
7.8.9.4 Adjusting the spring-loaded cylinder
• Slacken counternut (65/5).
• Adjust the mechanical unlocking mechanism
(65/4) to 47 mm.
• Re-tighten counternut.
• Adjust the spring-type actuators of the other
brakes accordingly.
Fig. 65 Adjusting the brake
Do not switch off the engine!



 To Next Page