5 First steps
29
5.2.8. Changing the lens
Only lenses that have been adjusted to the respective thermal
imager can be used. The serial number on the lens must match the
serial number displayed in the imager, see Optics, page 57.
> Place the imager on a stable base.
Removing the lens
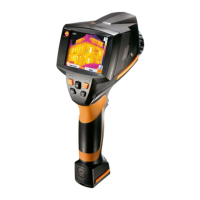
1. Grip the lens with your left hand (1), hold the imager with your
right (2) and press [Release lens] (3).
2. Unscrew lens by turning it anti-clockwise and remove.
Always keep lenses in the lens case (included in the scope of
delivery of the interchangeable lens) while they are not in use.
Attaching a new lens
1. Grip the lens with your left hand (1) and hold the imager with
your right (2).
2. Line up the marks on the lens and the instrument (4) and place
the lens in the lens mount.
3. Push the lens into the mount as far as it will go and turn it
clockwise until it clicks into place.