INsTAllATION 31
© TESVOLT We reser ve the right to make technical changes. Version RD.TI.015.E.ENG_Installation_Manual_TS48V_v.C.01 Last revised 06/2020
2
Place the APU LV on the top slide rail. At the four fastening
points, use the M6 x 16 pan head screws
D
(Phillips) and plastic
washers
D.1
included in the pack to fasten to the pre-installed
cage nuts.
3
TS 25 (TS cabinet) only: To relieve the strain, fit the C-rail
B
above the APU
1
. Fasten the C-rail
B
to the pre-installed cage nuts using two M6 x 16 pan head screws
D
(Phillips) and plastic wash-
ers
D.1
.
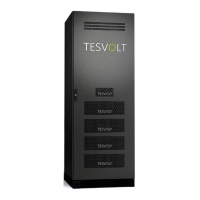
4
The two-pin plug for the e-stop connection on the APU LV must
be plugged in for operation. For further information about the
e-stop, please refer to section “6.4 E-stop contact” on page 35
of this Installation and Operating Manual.
5
All battery modules
2
of a TS 48 V battery storage system must have exactly the same state of
charge. So be sure to check the voltage of the battery modules before fitting them. A battery module’s
correct voltage must be 50.0 +/- 0.1 V. If you notice anything different, please contact the
TESVOLT Service Line +49 (0) 3491 87 97 - 200 or email service@tesvolt.com.
6
For systems with multiple APUs only: Divide the modules evenly between all the APUs in the system.
All APUs must have the same number of connected battery modules.
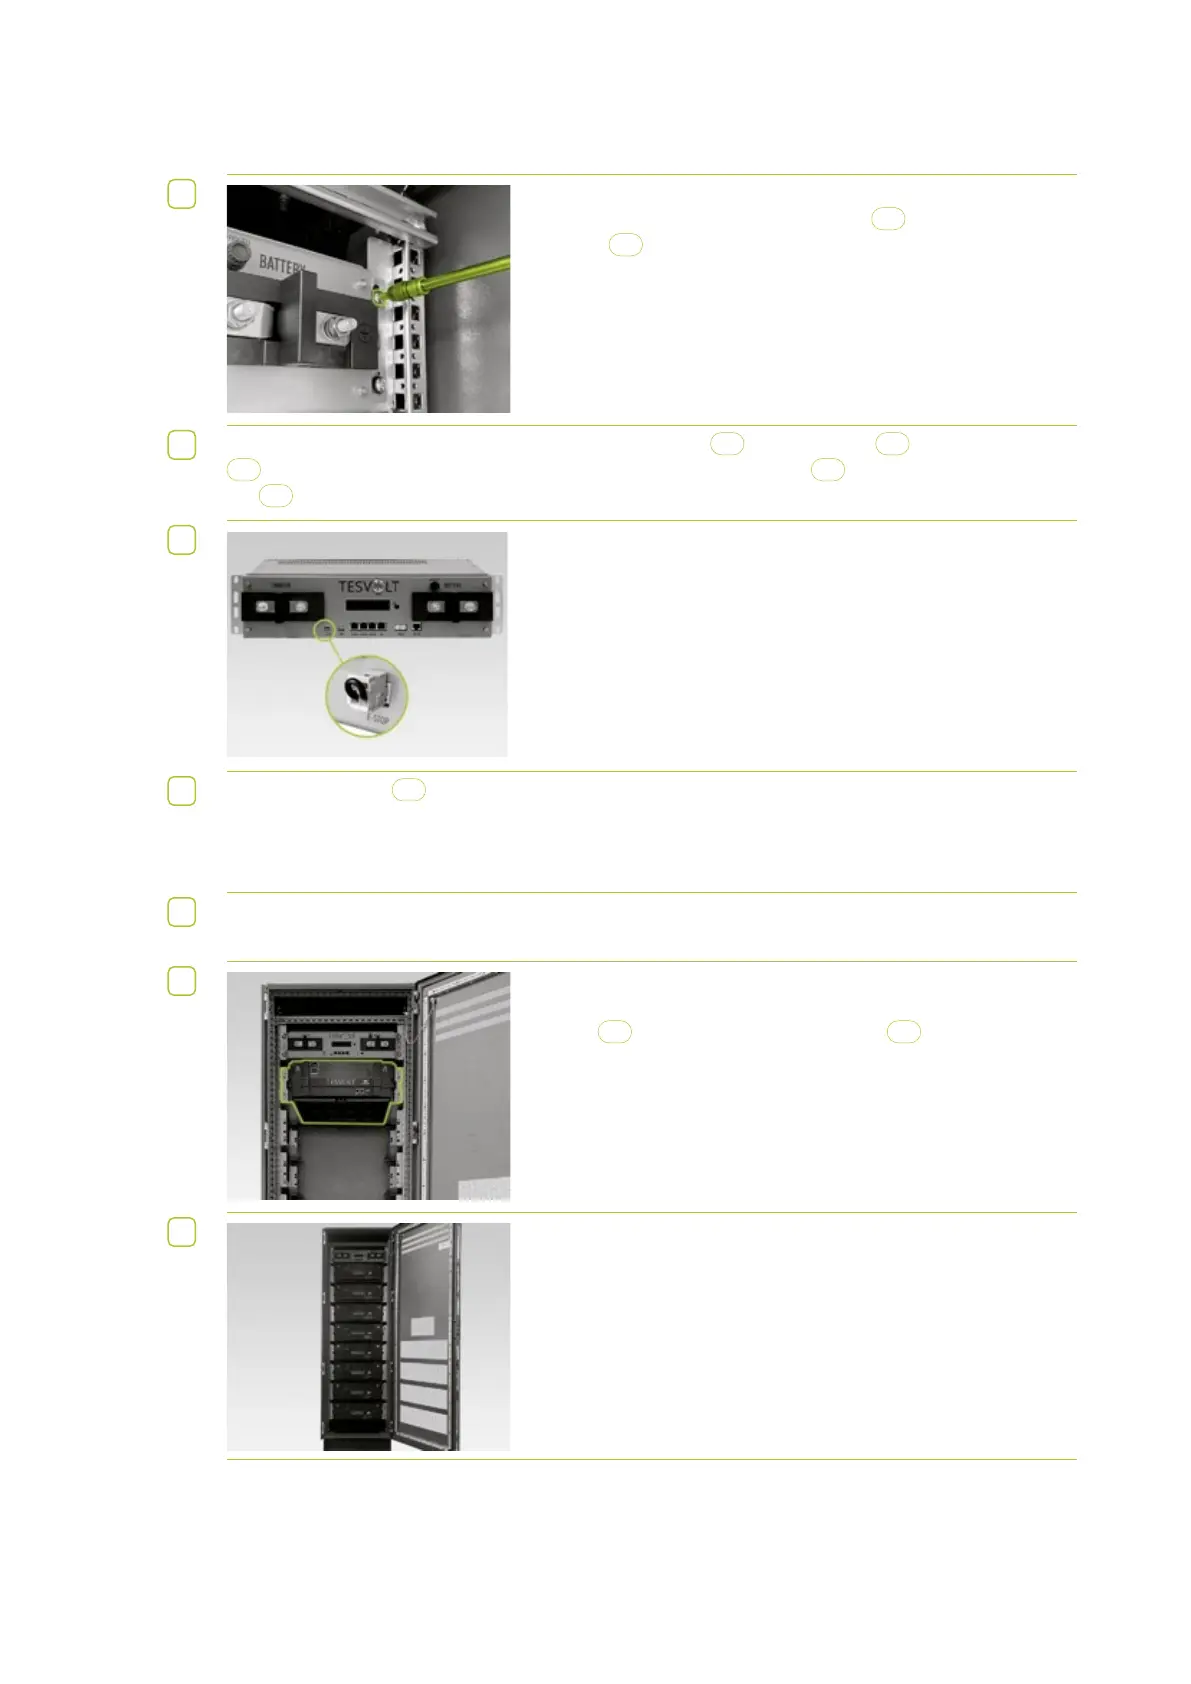
7
Fit the first battery module below the APU in the slide rails. Fas-
ten it to the pre-installed cage nuts using four M6 x 16 pan head
screws
D
(Phillips) and plastic washers
D.1
.
8
Now fit the remaining modules one after the other from the top to
the bottom and fasten them in place as described above.