TI-89 / TI-92 Plus / Voyage™ 200 PLT Cabri Geometry App 28
The
Regular Polygon
tool constructs a regular convex or star
polygon defined by a center point and
n
sides.
To begin creating either type polygon, perform steps 1 through 3,
then go to the appropriate step 4 depending on the type of polygon
that you want to create.
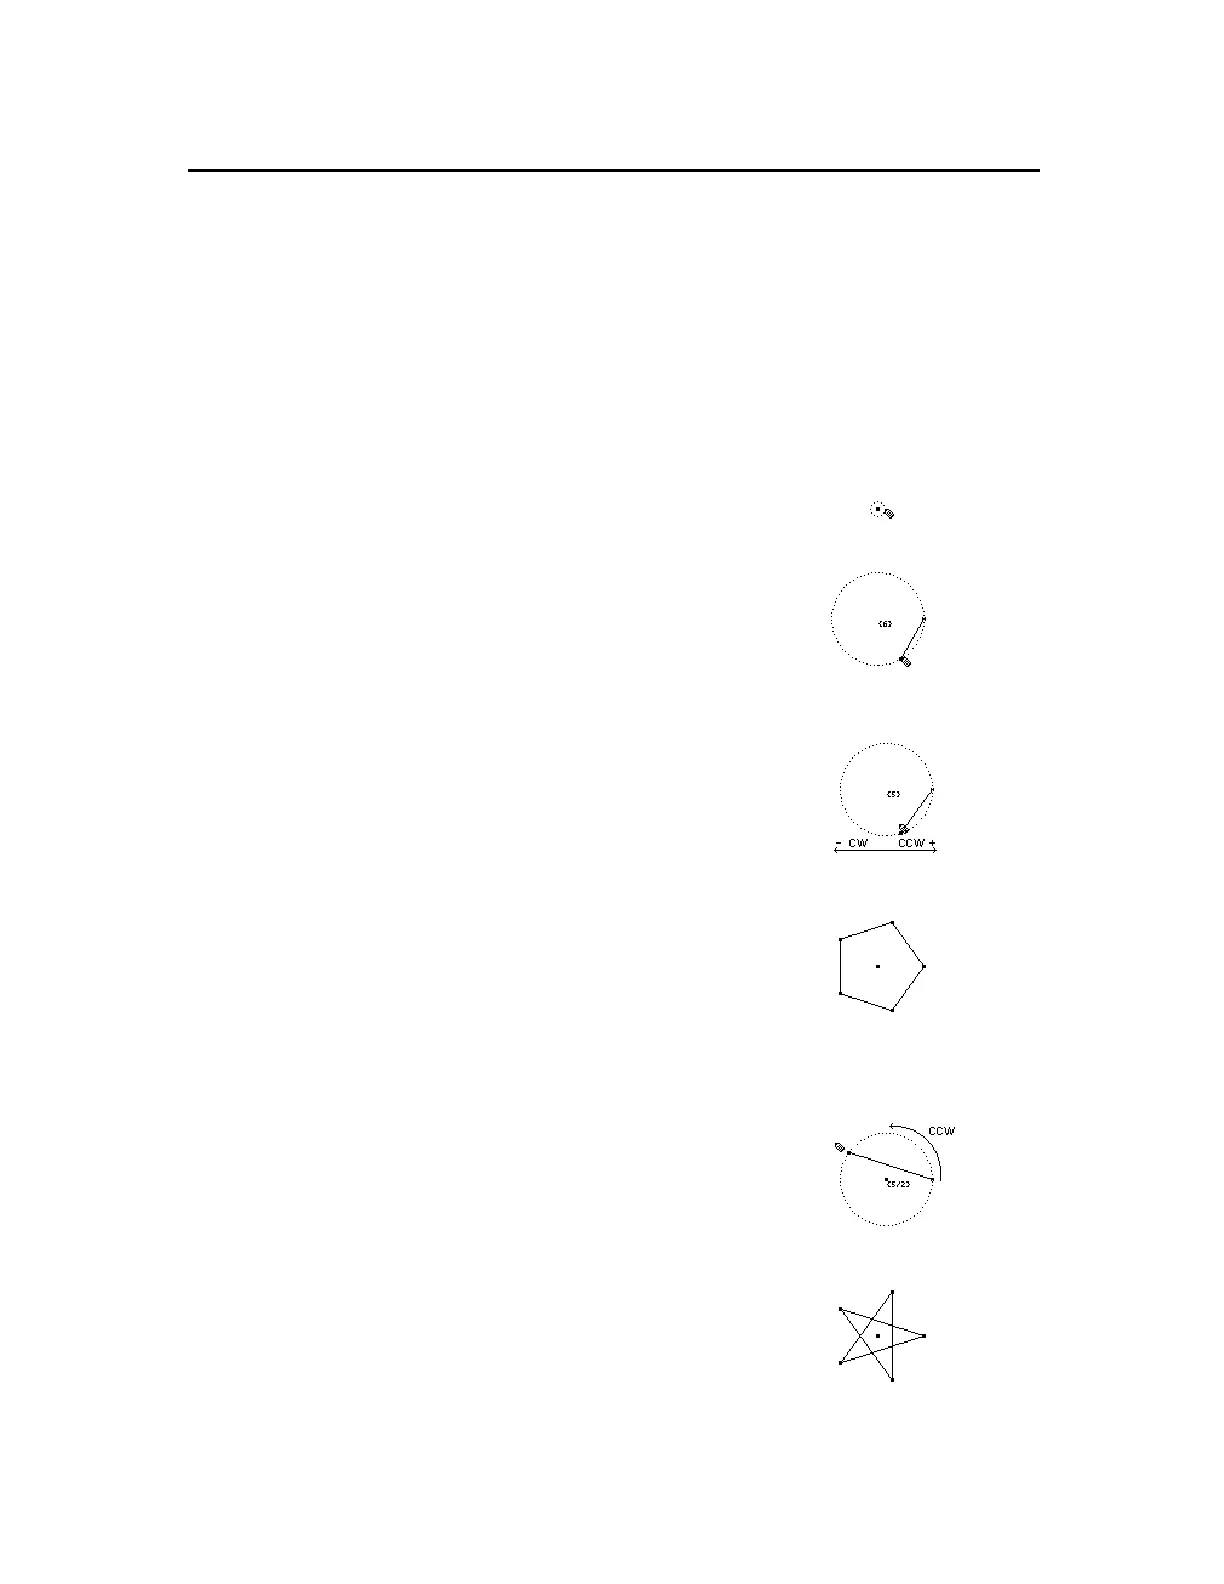
1.
Press
…
and select
5:Regular Polygon
.
2.
Move the (
#
) cursor to the desired
location.
3.
Press
¸
to create the center
point, press the cursor pad to expand
the radius, then press
¸
.
The number of sides is displayed at
the center point. (Default = 6.)
Create the center point.
Specify the radius.
To create a regular
convex
polygon:
4.
Move the pointer
clockwise
from its
current position to decrease (
ì
) the
number of sides or
counterclockwise
from its current position to increase
(+) the number of sides.
Determine # of sides.
5.
Press
¸
to complete the convex
polygon.
Completed polygon.
To create a regular
star
polygon:
6.
Move the cursor
counterclockwise
from its current position until a
fraction is displayed at the center
point. Continue to move the cursor
until the desired number of sides is
reached.
7.
Press
¸
to complete the star
polygon.
Rotate counterclockwise.
Completed polygon.
Creating Polygons
(continued)
Creating a Regular
Polygon
Note:
After creating a
regular polygon, you can
move a point placed on it
along the entire perimeter of
the polygon. (See previous
page.)
Note:
The polygon can hav
a minimum of 3 and
maximum of 17 sides. If you
move beyond 17 sides or
180 degrees from the initial
vertex and the center point,
the convex polygon
becomes a star polygon,
and a fraction is displayed a
the center point.
Note:
The minimum value is
5/2 and the maximum value
is 17/3. The numerator is
the number of sides. The
denominator is the number
of times the star is crossed.