Clutch Maintenance
62
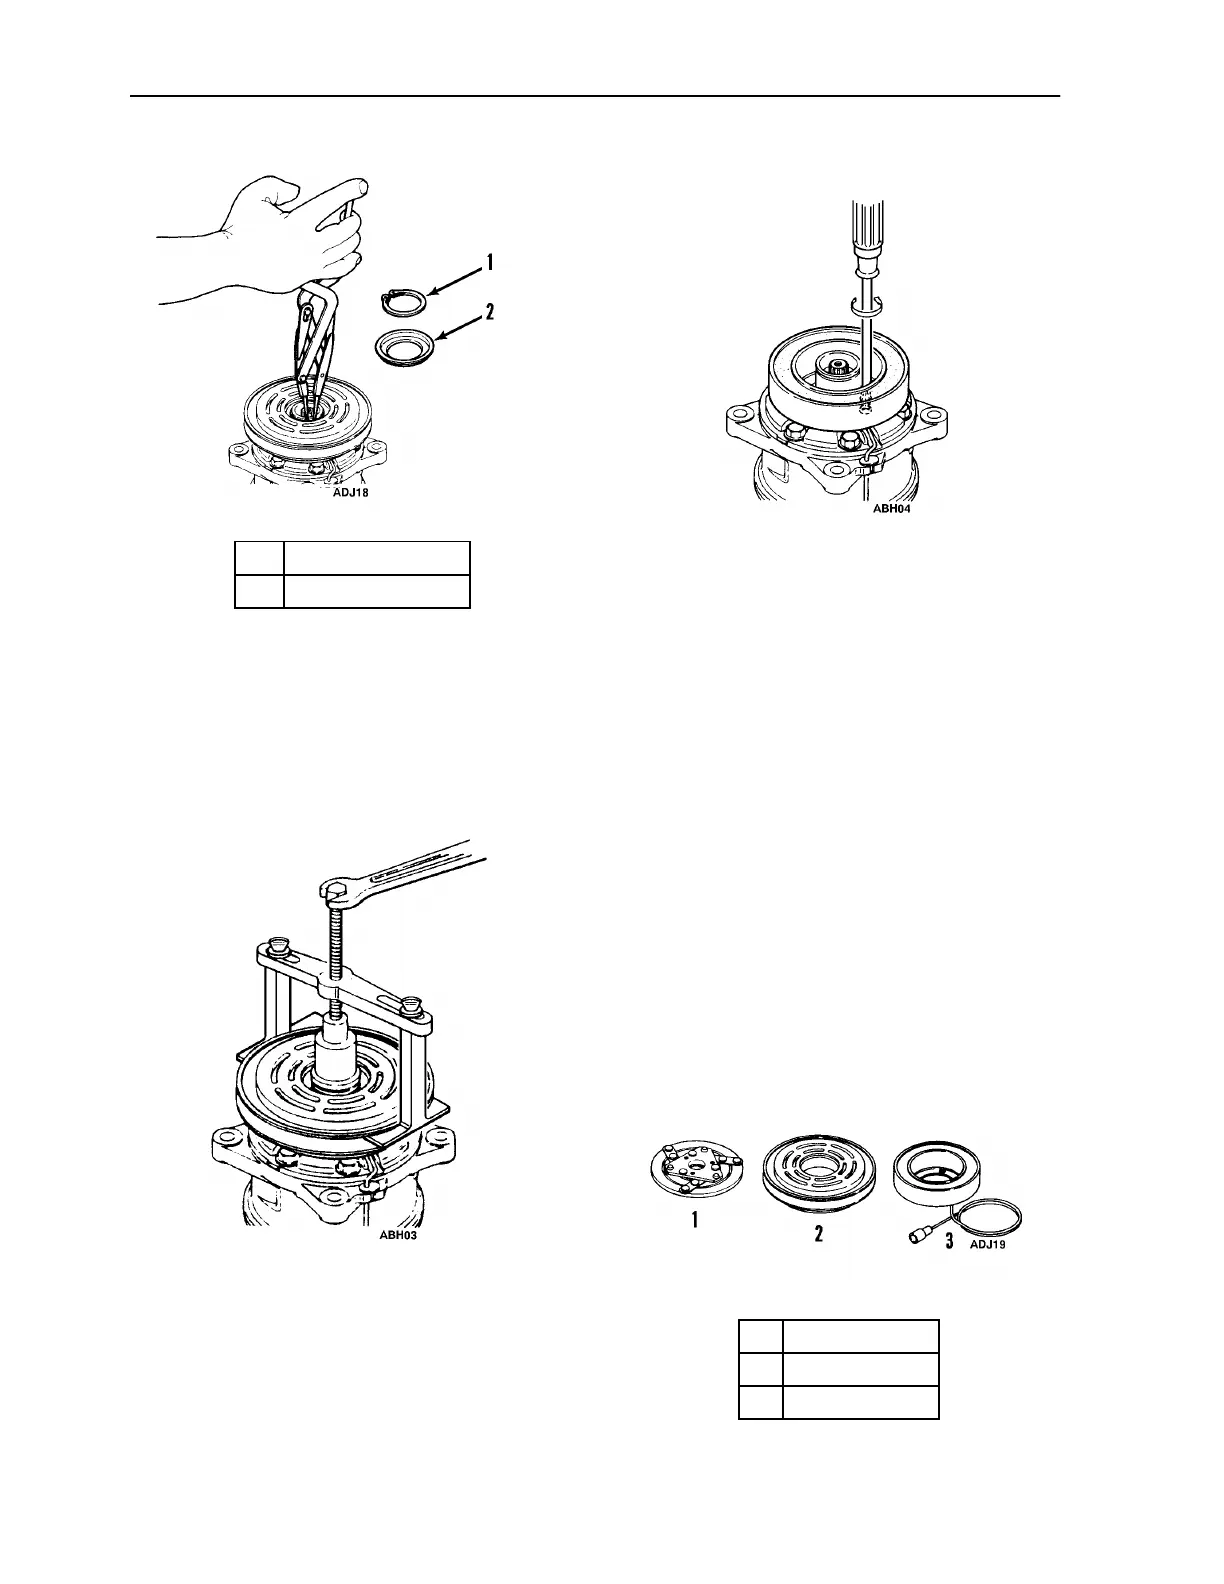
Figure 42: Remove Snap Ring and Cover
5. Remove the pulley assembly using the clutch
remover (P/N 204-806) and the spacer
positioned on the cylinder head hub.
NOTE: To avoid damaging the pulley
groove, the pulley claws should be hooked
into (NOT UNDER) the pulley groove.
Figure 43: Remove Pulley
6. Remove the coil’s lead wire from the holder
on the top of the compressor.
7. Remove the three screws that attach the coil to
the compressor and remove the coil.
NOTE: DO NOT hold the coil by the lead
wire.
Figure 44: Remove Coil
Inspection
1. Drive Plate
If the contact surface is scorched, the drive
plate and pulley should be replaced.
2. Pulley Assembly
Inspect the appearance of the pulley assembly.
If the pulley’s contact surface is excessively
grooved due to slippage, both the pulley and
drive plate must be replaced. There should
also be no foreign matter, such as oil or grit,
lodged between the clutch plate and pulley.
Thoroughly clean these contact surfaces and
the drive plate.
3. Coil
Inspect the coil for a loose connector or
cracked insulation. If the insulation is cracked,
replace the coil. If the field coil lead wire is
broken, replace the field coil.
Figure 45: Inspect Components
1. Snap Ring
2. Cover
1. Drive Plate
2. Pulley Assembly
3. Coil
 Loading...

