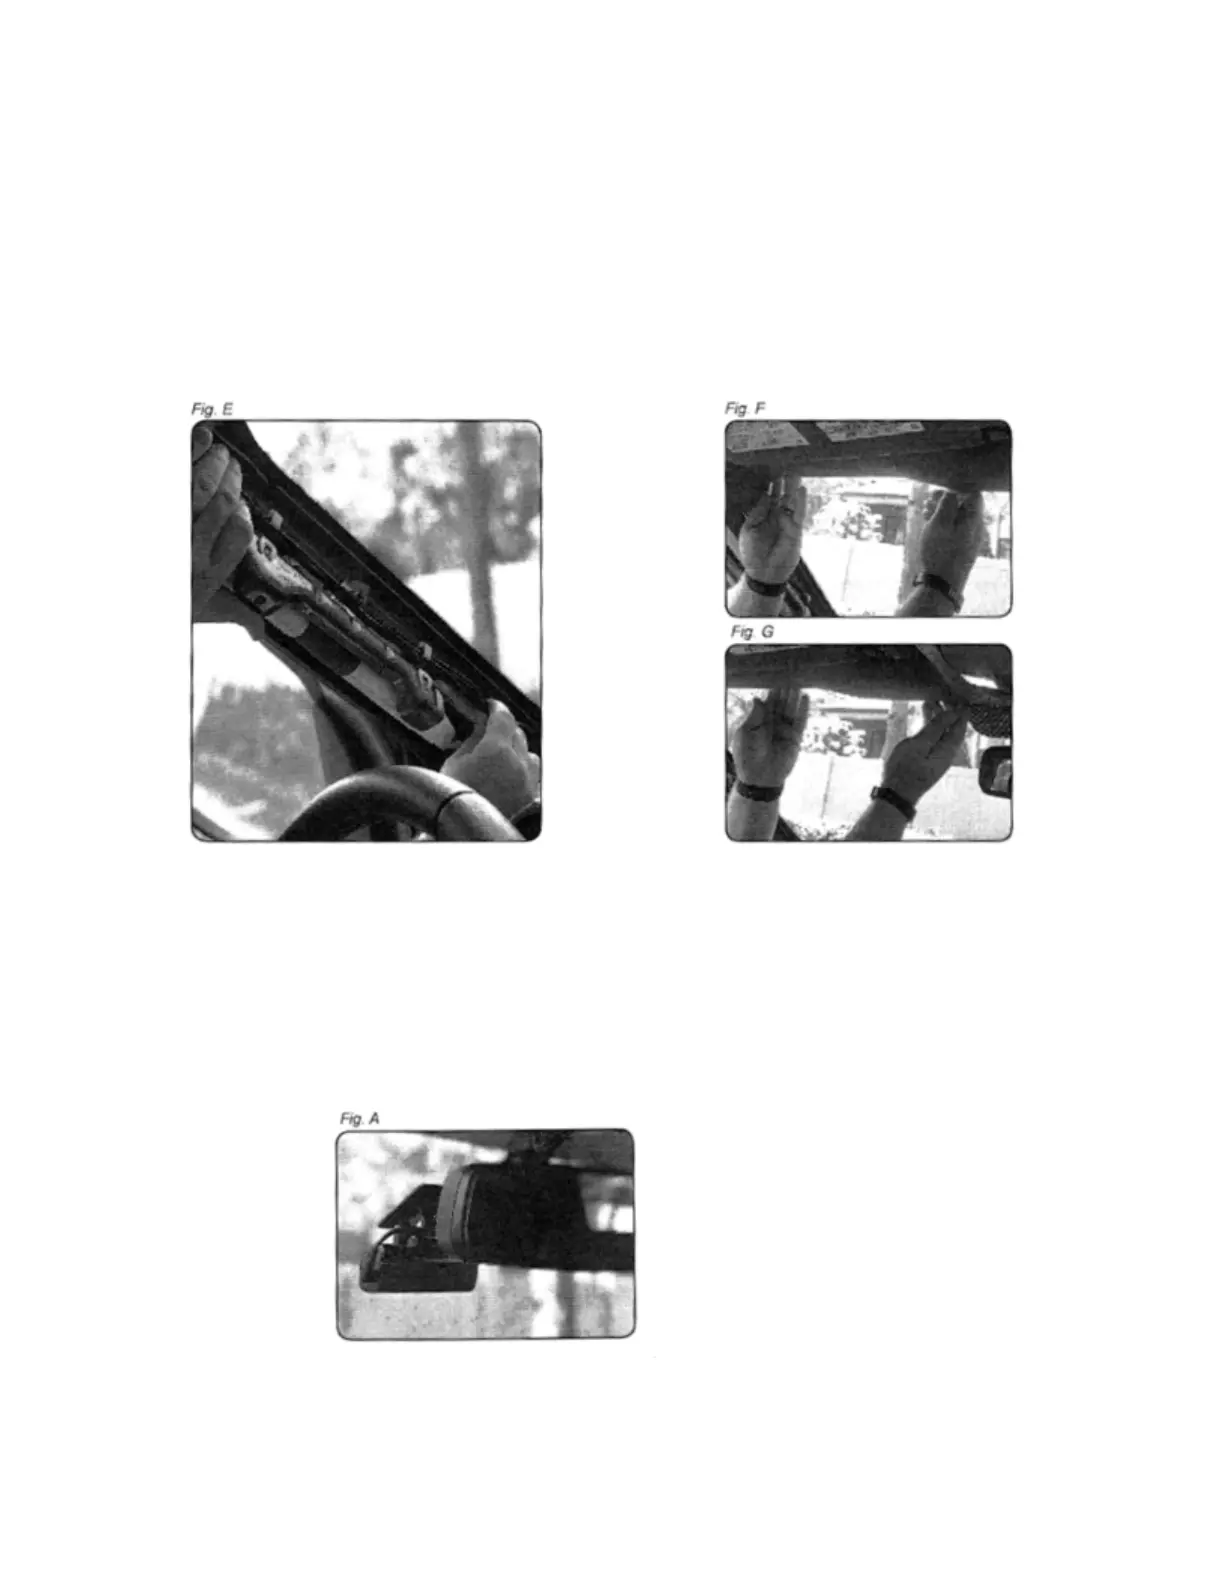
5 Remove!the!saddle!panel!from!the!A!pillar:!for!this!it!may!be!necessary!to!remove!the!2!!!!!
10mm!bolts.!Pass!the!Thinkware!power!cable!to!the!driver's!side!of!the!vehicle,!going!up!
the!A-pillar!(Fig!E)!and!along!the!front!edge!of!the!vehicle's!casing!(Figures!F!and!G)!so!
that!it!is!clear!of!the!casing!through!the!hole!factory!that!is!located!above!the!rearview!
mirror.!NOTE:!If!passing!the!wax!cables!from!the!side!airbag,!make!sure!they!do!not!
impede!the!ability!to!deploy!the!airbag!in!case!of!an!accident!
!
6 Clean!and!dry!the!installation!site!with!a!cloth!with!alcohol!before!placing!the!camera.!
Slide!the!camera!inside!the!bracket!and!secure!it!to!the!windshield!using!the!self-
adhesive!pad!pre-installed!in!the!bracket!(FIG!A).!Be!sure!to!mount!the!dashboard!
behind!the!rearview!mirror!so!that!it!does!not!obstruct!the!driver's!vision,!taking!care!
not!only!that!the!lens!is!as!close!to!the!center!of!the!vehicle!as!it!is!as!level!as!possible.!It!
may!be!necessary!to!connect!to!the!dashboard!with!the!Thinkware!smart!phone!
application!in!order!to!adjust!the!image!up!or!down!until!it!is!acceptable.!
!!!!!!!!!!!!!!!!!!!!!!!!!!!!!!!! !