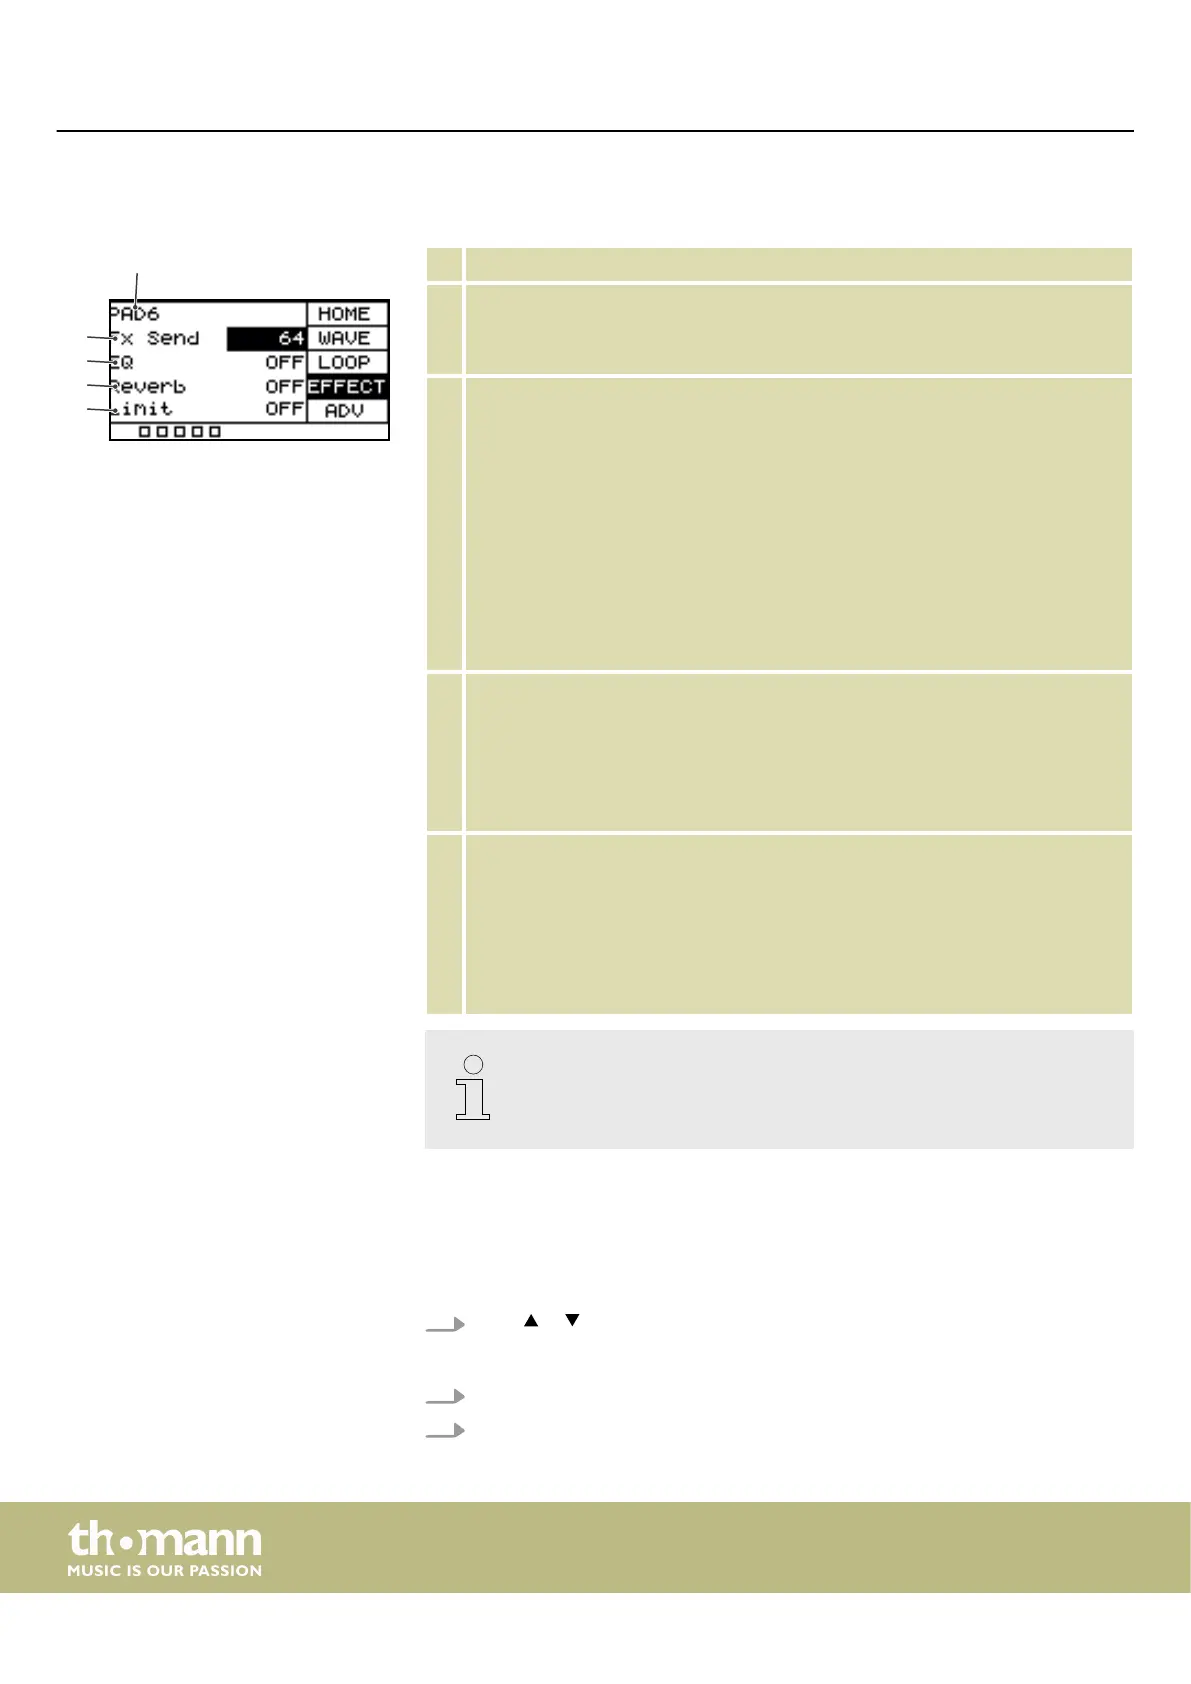
5.6.1 Eects display structure
1 Shows the currently selected pad.
2 Shows the signal portion that is sent to the FX channel.
Use the rotary control or press [–/+] to change the signal portion. Conrm the
selection with [OK].
3 Shows the 3-band equalizer
Use the rotary control or press [–/+] to switch the equalizer on or o.
With the equalizer switched on, press [SELECT] repeatedly to switch between
the submenus.
‘HIGH’ : Use the rotary control or press [–/+] to adjust the treble from ‘–12 dB’
to ‘12 dB’ . Conrm the selection with [OK].
‘MID’ : Use the rotary control or press [–/+] to adjust the mids from ‘–12 dB’ to
‘12 dB’ . Conrm the selection with [OK].
‘LOW’ : Use the rotary control or press [–/+] to adjust the bass from ‘–12 dB’ to
‘12 dB’ . Conrm the selection with [OK].
4 Shows the reverb.
Use the rotary control or press [–/+] to switch the reverb on or o.
With the reverb switched on, press [SELECT] to enter the submenu.
‘Type’ : Use the rotary control or press [–/+] to select the reverb type ( ‘room’ ,
‘studio’ , ‘stage’ ). Conrm the selection with [OK].
5 Shows the built-in limiter.
Use the rotary control or press [–/+] to switch the limiter on or o.
With the limiter switched on, press [SELECT] to enter the submenu.
‘Threshold’ : Use the rotary control or press [–/+] to adjust the threshold
between 0 dBu (no limiting) and –12 dBu (output = 1/4 of the maximum
output). Conrm the selection with [OK].
Note that all settings aect all pads and external triggers. Only the setting
that you make under the menu item ‘FX Send’ aect the respective pad
exclusively.
5.7 Settings
You can dene additional settings for each individual pad.
1.
Press or to select the ‘ADV’ or ‘ADV2’ menu.
ð
The display shows the respective submenus.
2. Press [SELECT] repeatedly to switch between submenus.
3. Use the rotary control or press [–/+] to change the respectively displayed value.
Operating
sampling percussion pad
18