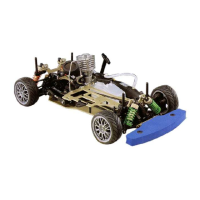
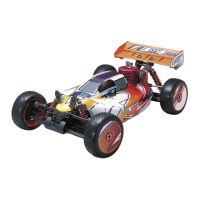
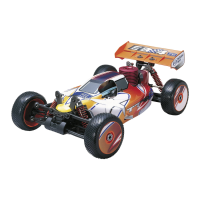
The Thunder Tiger KT8 is a 1/8 scale electric-powered racing kart, designed for hobbyists interested in remote-controlled vehicles. This ready-to-run (RTR) model comes with most of the necessary components for operation, though some items like the battery pack, charger, and AA batteries for the transmitter are not included and must be acquired separately.
Function Description:
The KT8 is a high-performance remote-controlled racing kart. It operates on a 2.4GHz radio system, specifically the ACE RC Cougar PS3 2.4GHz, which ensures reliable communication between the transmitter and receiver, minimizing interference from other controllers. The kart is powered by a brushless motor and controlled by a brushless motor ESC (Electronic Speed Controller), offering efficient and powerful performance. The steering is managed by a servo, providing precise control over the kart's direction.
Important Technical Specifications:
- Scale: 1/8
- Power Source: Electric (Brushless Motor and ESC)
- Radio System: ACE RC Cougar PS3 2.4GHz
- Motor Type: Brushless
- ESC Type: Brushless
- Transmitter: 3-Channel
- Receiver: Included
- Battery for Kart (Not Included): Typically a 7.2V 1100mAh pack is shown, but the manual states battery and charger are not included, implying flexibility in choice.
- Batteries for Transmitter (Not Included): 8 AA Alkaline batteries.
Usage Features:
The manual emphasizes the importance of familiarizing oneself with the model, its manual, and construction before assembly or operation, as it is not a toy.
Radio System Controls (ACE RC Cougar PS3 2.4GHz):
- Transmitter Antenna: Must be straightened before operation for optimal range.
- Battery Level Indicator: Three LEDs show battery voltage; a flashing red LED indicates low battery and requires replacement.
- HI/LO Throttle ATV (Adjustable Travel Volume): Allows independent presetting of maximum throttle servo travel for both high and low settings.
- Servo Reversing Switches: Recessed switches to reverse servo rotation direction, preventing accidental changes.
- Steering Trim: Adjusts steering in small increments for straight running.
- Throttle Trim: Adjusts throttle in small increments to shift the neutral position.
- Steering D/R (Dual Rates): Lever to adjust the amount of steering dual rate (right for increase, left for decrease).
- AUX Ch Button: Provides an extra function for model control.
- External Charging Jack: For rechargeable NiCd/NiHM battery packs on the transmitter only.
- 2.4GHz Binding SW: Button on the back of the transmitter for binding with the receiver.
- Steering Wheel: Controls model steering.
- Power Switch: Slides to turn the transmitter on or off.
- Throttle Trigger: Pulled or pushed to control model movement.
- Steering Tension Adjustment: Uses a Phillips screwdriver to adjust steering wheel tension.
- Battery Cover: Slides to install or remove batteries.
Battery Charging and Installation:
- Charging (Battery & Charger Not Included): Connect adapter connector to charger, then to battery pack. Plug charger into AC outlet. A red LED indicates charging, green indicates completion. Disconnect charger from AC outlet, then battery pack from charger.
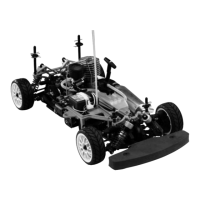
- Installation: Disconnect battery connector, squeeze battery tray tabs to slide the tray under the chassis. Place battery pack with foam spacer onto the tray, then slide it up until tabs lock. The foam spacer acts as a spring to keep locking tabs in place. Reconnect battery connector.
- Battery Placement: Running the battery in the rearward position (foam spacer towards the front) is recommended for stability and ease of driving. Moving it forward can improve traction on certain track surfaces.
Preparing the Chassis:
- Thread the antenna wire through the tubing; do not cut or shorten it.
- Install the driver figure by threading Velcro tape through holes beside the seat, then fastening it around the driver.
Radio Operation:
- Power On Sequence: ALWAYS turn on the transmitter FIRST, then the receiver.
- Power Off Sequence: ALWAYS turn the receiver off FIRST, then the transmitter.
- Steering Function Check: With radio system on, turn the steering wheel left; front tires should turn left. If not, flip the steering servo reverse switch. Return steering wheel to neutral; front tires should be straight. If not, use steering trim. Turn steering wheel right; front tires should turn right.
Binding Process:
The ACE RC Cougar 2.4GHz system includes a binding feature to ensure proper Tx/Rx binding and prevent interference.
- Press and hold the "Binding SW" button on the transmitter while turning it on.
- Release the "Binding SW" button when the green LED flashes, indicating the transmitter is binding.
- Press and hold the bind button on the receiver while turning it on. The LED will flash green/red.
- Release the "Binding SW" button. Successful binding is confirmed by the transmitter LED becoming solid green and the receiver LED becoming solid green.
- Note: Binding can take 3-10 seconds. If it fails, the receiver LED turns red; power off and repeat.
Fail Safe (F/S) Function Setting:
A built-in Failsafe function automatically sets a servo command if the receiver loses signal from the transmitter. It is strongly recommended to activate this function for safety.
- After binding, turn on transmitter and receiver.
- Press and hold the "Binding SW" button on the receiver for 10 seconds. The LED will flash GREEN. Do not release until step C is complete.
- Move and hold the throttle trigger to the desired failsafe position (e.g., brake or neutral) and keep the steering wheel at neutral. Factory pre-settings for RC cars are: Electric Car - steering neutral, throttle neutral; Nitro Car - steering neutral, throttle at idle.
- Release the "Binding SW" button on the receiver, then the throttle trigger. The LED turns solid RED, then solid GREEN, indicating F/S is activated.
- Test by turning off the transmitter and observing servo failsafe position.
- F/S at "Neutral": Hold throttle trigger at full forward (full brake), then turn off transmitter. Throttle servo should move to neutral, steering servo to neutral.
- F/S at "Brake": Keep throttle trigger at neutral, then turn off transmitter. Throttle servo should move to brake, steering servo to neutral.
- If F/S fails or needs adjustment, repeat steps a-e.
- Caution: ALWAYS reset FAILSAFE after binding.
Driving Tips:
- Hold elbows in and keep transmitter antenna pointing straight up.
- Gently squeeze throttle trigger or pull throttle stick and steer left/right.
- Squeeze and release throttle trigger to control speed.
- Practice with the transmitter facing you if unsure of steering direction.
- Initially, set steering D/R for less steering response.
- Avoid abruptly squeezing the throttle trigger while steering.
- Once comfortable, experiment with full throttle and steering.
- Practice figure 8's.
Maintenance Features:
- After Running:
- Always turn off the radio system and disconnect the battery pack when the car is not in use.
- Remove sand, mud, dirt, and other elements completely before storage.
- Do not use chemicals or solvents to clean the chassis, as they can damage electronics and plastic parts. Use compressed air, a soft paintbrush, or a toothbrush for dust and dirt.
Troubleshooting:
The manual provides a quick checklist for common issues:
- Car stops or slows: Speed control overheats (let it cool).
- Car is glitching: Power problem (check motor capacitors, loose wires, crystals).
- Motor overheats: Gear mesh too tight (let motor cool, check recommended gearing, reset gear mesh).
- No power: Battery discharged (charge battery), battery not plugged in (plug in battery).
- No throttle: Motor not plugged in (plug in motor), motor failure (replace motor), motor keeps running (check throttle trim knob neutral).
- No steering: Servo not plugged in (plug servo into ESC unit), locked up steering linkage (free up linkage), servo failure (replace servo).
- Reversing (goes backwards when pulling trigger or right when turning wheel left): Check throttle/steering reversing switches on transmitter.
Warranty:
Thunder Tiger Corporation guarantees the kit to be free from material and workmanship defects. Warranty value is limited to the original purchase cost. It does not cover damage from use or modification. Missing parts must be reported within 60 days of purchase with proof of purchase. Defective parts or missing parts require proof of purchase and/or the defective part for warranty service. Dealers/distributors cannot accept returns if assembly has started.