38 39
ENGLISH
Cleaning
Detaching/attaching the steam cap
Insert your ngers into the opening of the lid
and pull up the steam cap to remove it.
Turn over the steam cap and remove the
cap body as shown in the gure.
Fit and engage the cap body to the cap lid.
Push in until it clicks.
Attach it to the rice cooker securely.
Attaching the gasket for steam cap
Carefully set the gasket in place as shown in the gure.
If it is not tting well, it may come off or cause steam leak
resulting in failure.
Notes
Do not detach the ring gasket.If it has come off, attach it
as it was.
If the gasket is hard to attach, moisten it with a little water
for smooth attachment.
It is very hot just after cooking. Wait until it cools down
before cleaning.
Note
Be careful that the inner pot and body are hot after
cleaning.
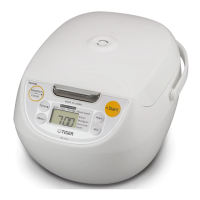
Cleaning when there is a foul odor
Pour water up to the "Maximum Level" line
of the inner pot and set it in the rice cooker.
Connect the power plug to the outlet.
Touch the [Back • Next] key several times to
select the "SlowCook" menu.
Touch the [Hour • Min] key to adjust the time
for 50 minutes.
Touch [Hour] to increase by 5-minute increments
and [Min] to reduce by 5-minute increments.
The time can be set by 5-minute increments
from 5 to 120 minutes.
Touch and hold to fast-forward.
Touch the [Start/Rinse-free] key.
Cleaning starts and the remaining time appears on
the display.
Touch the [Cancel] key and disconnect the
power plug and the plug.
When the body has cooled down, drain the
hot water remaining in the inner pot and
clean the parts.
P.34
A sound informs you when cleaning ends.
Blinking
"Maximum Level" line
gasket
Set in
Cap body
Cap lid
Ring gasket
Tab
Push in
Cap lid
Cap body
Fit
Cap body
Open
Press
Detach
Steam cap
How to attach
How to detach
Blinking
On
On
On
 Loading...