Do you have a question about the TimeMoto TM-616 and is the answer not in the manual?
Unpack the box. During the setup process you must select your preferred software solution.
Connect the time clock device using Wi-Fi or a LAN cable for network access.
Plug the TimeMoto device into the power outlet to supply it with electricity.
The device displays a welcome screen with an SSID and creates a temporary network.
Connect your TimeMoto device to your PC, laptop, tablet, or smartphone via Wi-Fi.
Launch an internet browser and enter the TimeMoto setup address.
Select your preferred language for the TimeMoto device setup process.
Choose between TimeMoto Cloud and TimeMoto PC Plus Software for your needs.
Choose how your TimeMoto device connects to your network: Wi-Fi or LAN.
Enter your Wi-Fi network name (SSID) and password for the connection.
Review and confirm your device settings or make adjustments before finalizing.
Complete the device configuration and click 'Register' after it restarts.
Create a TimeMoto Cloud or PC Plus Software account for registration.
Follow the confirmation email steps to complete setup and find helpful resources.
Register your TimeMoto product online to extend your warranty and access support.
Instructions for physically mounting the TimeMoto device on a wall or surface.
| Display | Yes |
|---|---|
| Display Type | LCD |
| RFID Card Support | Yes |
| Fingerprint Capacity | 1000 |
| User Capacity | 3000 |
| Transaction Capacity | 100000 |
| Memory Capacity | 128MB |
| Communication | USB, TCP/IP |
| Power Source | Adapter |
| Battery Type | Lithium-ion |
| Humidity Range | 20% to 80% |
| Type | Time Attendance Terminal |
| Product Type | Time and Attendance Device |
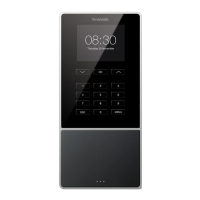
| Display Size | 2.8 inches |
| Identification Methods | RFID |
| Power Supply | 5 V DC, 1 A |
| Operating Temperature | 0 - 45 °C |