32 TimePilot me and a endance systems TimePilot me and a endance systems 33
TimePilot’s built-in tools. For more, see the page on Reports in the TimePilot Central help
system.
Ge ng ready for payroll, step by step
Start TimePilot Central.1.
Extract your pay period. 2.
(Click on “Periods” in the
menu bar, then select
“Extract Pay Period.”)
You’ll be asked if you A.
want to back up your
Current Transac ons.
Click “Yes” and follow
the instruc ons.
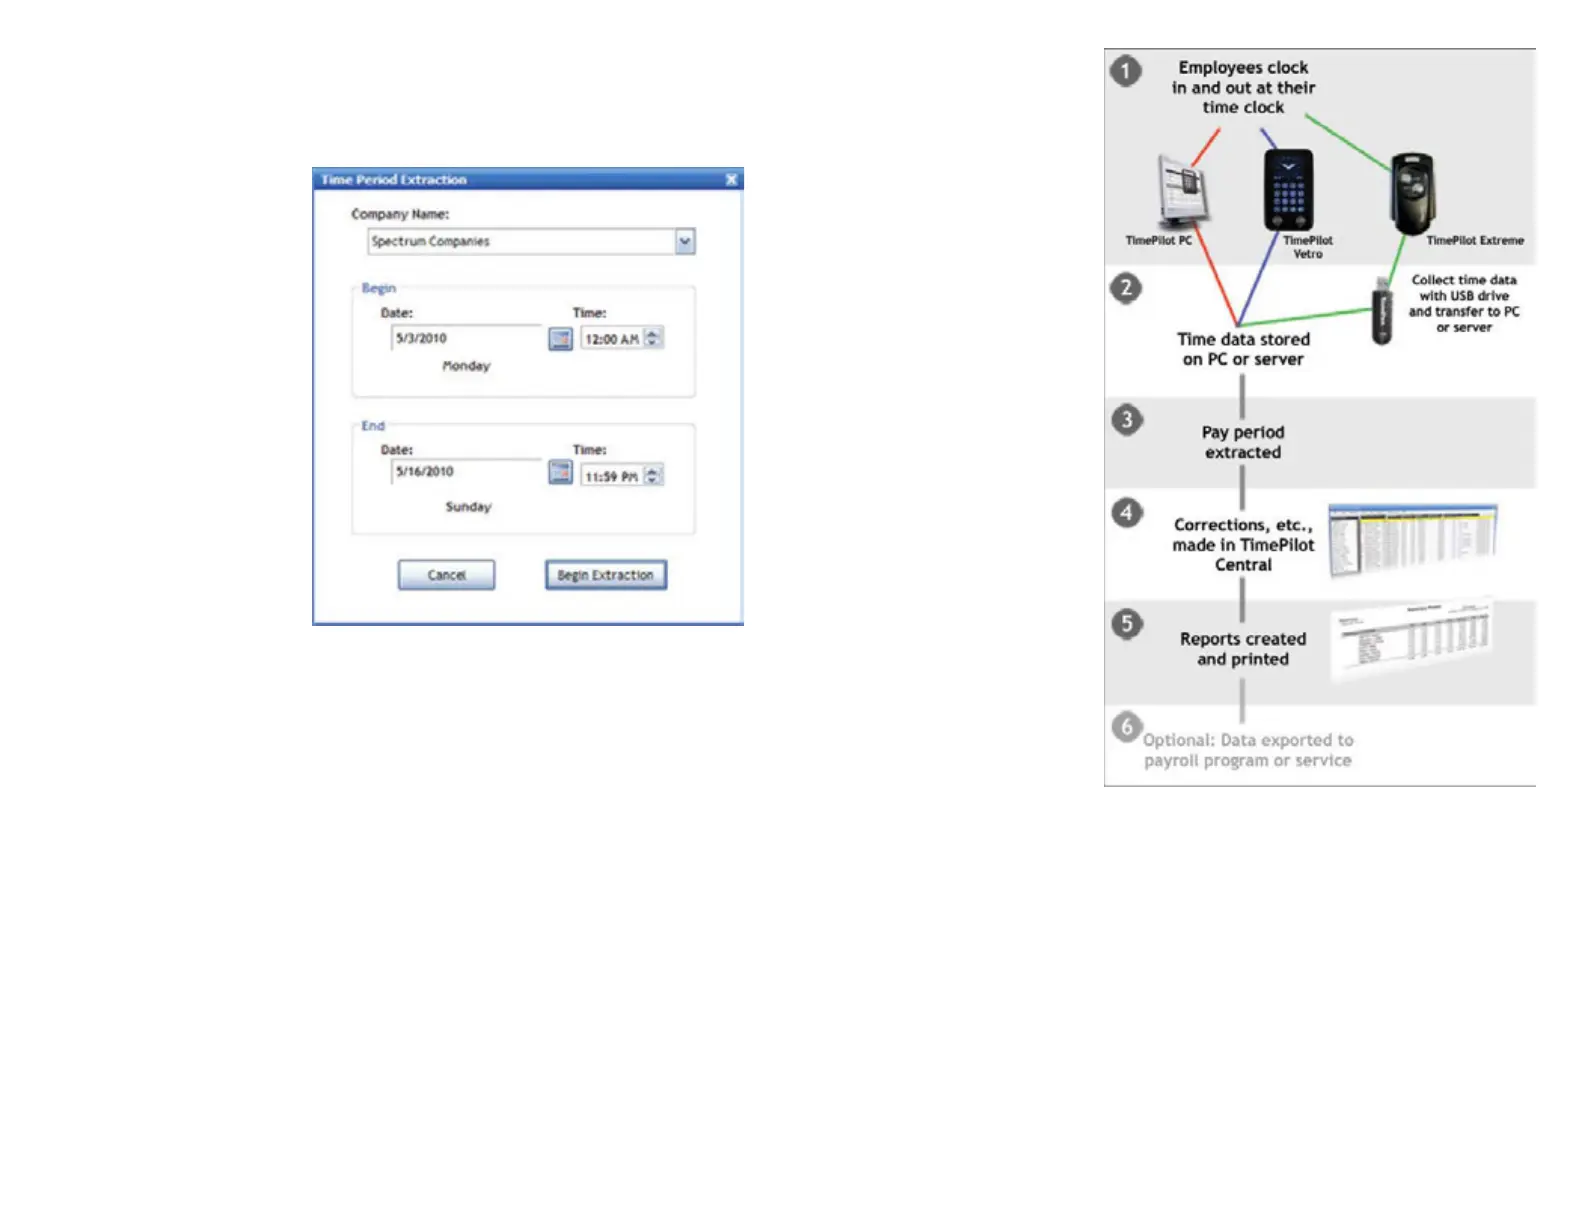
In drop-down list at the B.
top of the pay period
extrac on box (right),
choose the company
whose pay period you
want to extract.
Choose the beginning C.
and ending of the pay
period.
Click “Begin D.
Extrac on.”
Now you’ll have the E.
extracted pay period
open (look for the yellow bar across the top of the transac on window.)
Correct any employee transac ons that are erroneous, using the Quick Bu ons across 3.
the top of the screen. Names in red in the Employee List down the le side of the
screen indicate possible trouble spots that the TimePilot so ware has iden fi ed.
It’s a good idea to also look over each employee’s transac ons to verify that they make 4.
sense. For instance, if an employee clocks in at 8 a.m. on Tuesday, forgets to clock out
that night and also forgets to clock in Wednesday morning, but clocks out Wednesday
night, the TimePilot so ware sees a clock-in followed by a clock-out and will not fl ag
the error, unless you set the Alerts feature to fl ag excessive amounts of me.
Insert transac ons for vaca ons, sick days, paid me off and bereavement me, 5.
if necessary. This is done manually. The simplest way to do this is to click on the
employee’s name, then on the “Edit” menu and choose “Insert Amount of Time.” Enter
the date and amount of me the employee is en tled to and click “OK.”
Generate a report. Click “Reports” in the menu bar, then choose your report. 6.
(“Summary Report” is the most common choice.) If you want a printed copy of the
report, click the “Print” bu on on the le side of the Reports screen. If you want an
electronic copy of the report that can be saved or e-mailed, click the “Export” bu on
at the le side of the screen and choose your fi le format. You can choose from six
diff erent formats: Crystal Reports (.rpt), Adobe Acrobat (.pdf), Microso Excel (.xls),
Microso Excel Data Only (.xls), Microso Word (.doc), or Rich Text Format (.r ). When
you’re done, close the Reports screen to return to TimePilot Central.
Op onal: Export your data to your payroll so ware or service. The 7.
TimePilot.com web site has available for download many exports that will convert
TimePilot data into a
format that can be read
by leading payroll services
and so ware packages,
like QuickBooks or ADP.
To see how to install the
export for your service
or so ware, open the
Help system in TimePilot
Central (in the Help
menu at the top of the
screen), scroll down to
“Defi ni ons” and choose
“Exports.” To use an export
a er you’ve downloaded
and installed it, here’s the
general procedure (see
the instruc ons that came
with your par cular export
for details):
Click “File” on the A.
menu bar, then “Export
to payroll so ware.”
Choose the format B.
for your payroll or
accoun ng program.
If that op on doesn’t
appear in the menu,
you probably haven’t
installed any formats.
Enter the required C.
informa on (available
from your payroll
service or so ware
manual) and click
“Export” to create a fi le
that can be imported into your so ware or e-mailed to your payroll service.

 Loading...