10 TimePilot me and a endance systems TimePilot me and a endance systems 11
TimePilot Vetro
How does the system work?
Your TimePilot Vetro clock is a ached to a wall and powered by a nearby electrical outlet.
Employees can clock in and out in two ways: by tapping their iBu on to the “In” or “Out”
probes at the bo om of the clock; or by entering a four-digit ID code and pressing the “In” or
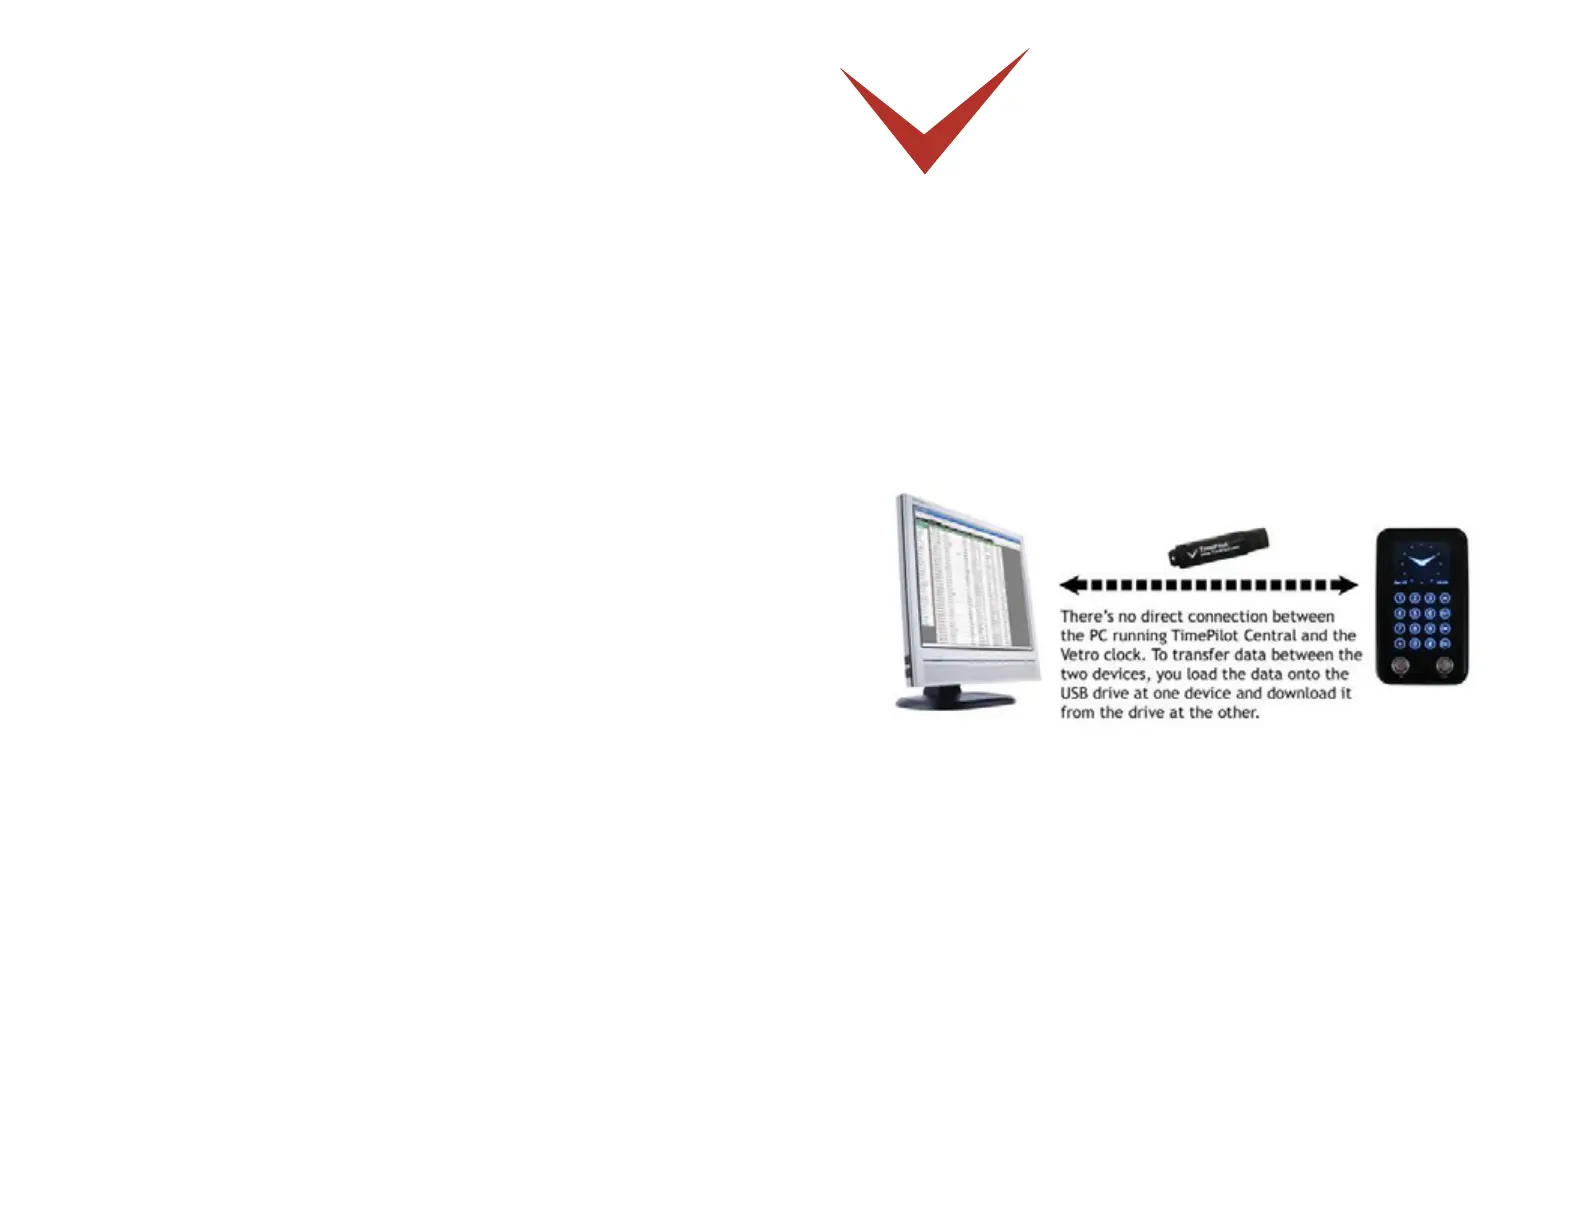
the “Out” bu on on the clock’s keypad. Supervisors collect the clock-in and clock-out data by
plugging their TimePilot USB drive into the port on the right side of the clock. A er collec ng
the data, they plug the USB drive into their computer, where it’s imported into the TimePilot
Central so ware. The clock’s memory can hold 15,000 transac ons: that’s equivalent to 166
days of average use by a 15-employee company. (Of course, with the TimePilot Vetro system,
you download all your transac ons to the USB drive every pay period, so you’ll probably never
come close to having 15,000 transac ons!)
The Quick Start Guide gives more details, but here’s an overview of the basic setup process:
Mount your clock according to the direc ons in the included template. Plug in the 1.
power supply and set the me and date.
Install your so ware and set up your company. Follow the instruc ons in this manual 2.
for installing and se ng up TimePilot Central.
If employees will use iBu ons to clock in and out, assign iBu ons to each employee. 3.
If they’ll use four-digit ID numbers, assign them numbers. Instruc ons for both
procedures appear later in this chapter.
Distribute the iBu ons or ID numbers to employees and show them how to clock in and 4.
out. Instruc ons for both procedures appear later in this chapter.
Moun ng the clock
Your fi rst step should be to decide where the clock will be located. Usually, this will be either
on a wall at a central loca on in your facility or at the employee entrance. The TimePilot Vetro
clock should not be placed outdoors—it is not designed to be exposed to the elements.
To mount the clock on a wall, use four screws (included, with wall anchors). The included
drilling template can be taped to the wall to make it easier to place the screws in exactly the