14 TimePilot me and a endance systems TimePilot me and a endance systems 15
employee’s iBu on serial number to all zeroes, and you can assign his or her iBu on to
another employee.
ID Numbers:• Every employee has to have an ID number, but you can prevent him or her
from clocking in with it. In TimePilot Central, open the employee’s profi le and clear the
“Enable User ID Entry” checkbox. Then transfer your changes to the clock with the USB
drive by following steps 5 through 10 above.
Clocking in and out
There are two ways a person can clock in or out: with an iBu on or with a four-digit ID number.
Clocking in and out with the •
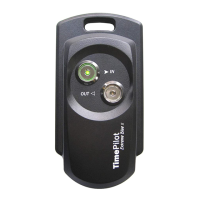
iBu on: Using the iBu on is the least likely method
to allow “buddy-punching.” Each user simply taps his or her iBu on to the “In” or
“Out” probe on the clock. The clock will display the employee’s name, date and me
on its screen and beep twice when they clock in or out to indicate that the process is
complete.
Clocking in and out with a four-digit ID number: • Each user enters their four-
digit number on the clock, which will display their name as confi rma on that they’ve
entered the correct number. The user then presses the “In” or “Out” key on the keypad
to complete the process. The clock will display the employee’s name, date and me on
its screen and beep twice to indicate that the process is complete.
Collec ng data
At some point—usually at the end of a pay period—you’ll want to move your employees’ clock-
in and clock-out data into the TimePilot Central so ware so supervisors can prepare the data
for payroll. Here’s how:
First, you’ll have the me clock(s) download the me and a endance data onto the TimePilot
USB drive. Then you’ll import the data from the USB drive to the computer running the
TimePilot Central so ware.
Two important points:
If you have more than one Vetro clock, you can go from clock to clock collec ng the •
data from each on the USB drive before impor ng it all to the PC. When you view the
clock-ins and clock-outs in TimePilot Central, each will be labeled with the name of the
clock where it occurred.
The data can be collected as o en as you want. Even though your pay period may be •
weekly or biweekly, you may collect the data every day, if desired.
The TimePilot Vetro meclock is made for indoor use only. Do not mount the sta on
outdoors. It must be mounted indoors and protected from outdoor elements. It is not
waterproof and should not be exposed to water, rain or high amounts of moisture.
The me clock also should be protected from spills, chemicals and dirt. If you need an
outdoor, weatherproof me clock, check out TimePilot Extreme at www.TimePilot.com.
Warning
Here are step-by-step instruc ons:
Plug the TimePilot USB drive into the USB port on the side of the Vetro me clock.1.
Enter the clock’s Administra ve Mode by pressing the “9” bu on twice, then the “OK” 2.
bu on on the Vetro clock keypad.
The clock will ask you to enter your six-digit administrator password. This is the 3.
password you created while se ng up your so ware.
If the password is correct, a menu will appear on the clock’s screen. Press the number 4.
on the keypad corresponding with the “Collect Data” menu item (1). The clock will copy
the data to the USB drive and tell you when the process is complete.
If you want to collect data from other Vetro clocks, repeat Steps 1-4 at each one.5.
Now return to the computer running TimePilot Central and plug the USB drive into a 6.
USB port. TimePilot Central will detect the presence of the TimePilot USB drive and
automa cally import the data on the drive into the TimePilot database.
Once the data is imported, you can view and edit the transac ons in TimePilot Central. For
more about TimePilot Central, see Page 25.
 Loading...