19
TIMEX INTERNATIONAL WARRANTY
(U.S. – LIMITED WARRANTY – PLEASE SEE BELOW FOR TERMS OF
EXTENDED WARRANTY OFFER)
Your Timex watch is warranted against manufacturing defects by Timex
Corporation for a period of ONE YEAR from the original purchase date.
Timex and its worldwide affiliates will honor this International Warranty.
Please note that Timex may, at its option, repair your watch by installing
new or thoroughly reconditioned and inspected components or replace it
with an identical or similar model. IMPORTANT—PLEASE NOTE THAT THIS
WARRANTY DOES NOT COVER DEFECTS OR DAMAGES TO YOUR WATCH:
• after the warranty period expires;
• if the watch was not originally purchased from an authorized Timex retailer;
• from repair services not performed by Timex;
• from accidents, tampering or abuse; and
• lens or crystal, strap or band, watch case, attachments or battery.
Timex may charge you for replacing any of these parts.
THIS WARRANTY GIVES YOU SPECIFIC LEGAL RIGHTS. YOU MAY ALSO
HAVE OTHER RIGHTS WHICH VARY FROM COUNTRY TO COUNTRY AND
STATE TO STATE. IN THE U.K., NOTHING IN THIS WARRANTY WILL
AFFECT YOUR STATUTORY RIGHTS.
To obtain warranty service, please return your watch to Timex, one of its
affiliates, or the Timex retailer where the watch was purchased, together
with a completed original Watch Repair Coupon or, in the U.S. and Canada
only, the completed original Watch Repair Coupon or a written statement
identifying your name, address, telephone number and date and place of
purchase. To cover Timex’ cost of returning the watch to you (this is not a
repair charge), please include with your watch a US$ 7.00 check or money
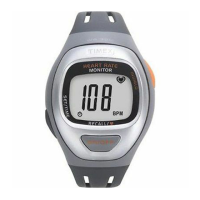
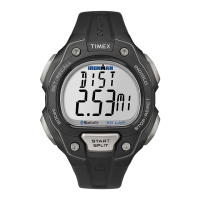
• The watch no longer receives heart rate information from the chest trans-
mitter when properly worn on the chest.
• Error messages (COMM ERR, SIGNAL LOST) begin to appear with
increased frequency on the display.
Turn the unit over and use a coin to open the battery compartment cover.
Replace the battery, making sure the “+” is facing you when you insert the
new one. Push the reset button next to the battery (a toothpick or straight-
ened paper clip will help you do this) before installing the battery cover.
A quick test of the unit should be performed after changing the battery:
1. Move away from any possible sources of electrical or radio interference.
2. Liberally moisten the sensor pads and put the units on your chest,
securely against your skin.
3. Press the MODE button until the watch is in Time of Day mode.
4. Press the HEART RATE button on the watch to enable the Heart Rate
Monitor.
5. Within a few seconds, the “heart” graphic on the watch display should
begin flashing, indicating that the chest belt transmitter is active. This
indicates that the battery was installed correctly. NOTE: It is not neces-
sary for a heart rate value to appear on the display during this test.
IF YOU DO NOT SEE A FLASHING HEART ON THE WATCH, try the following:
• Press the reset switch in the battery compartment again and replace the
battery cover.
• Reinstall the battery, and press reset as instructed above.
18

 Loading...