16
E
N
G
L
I
S
H
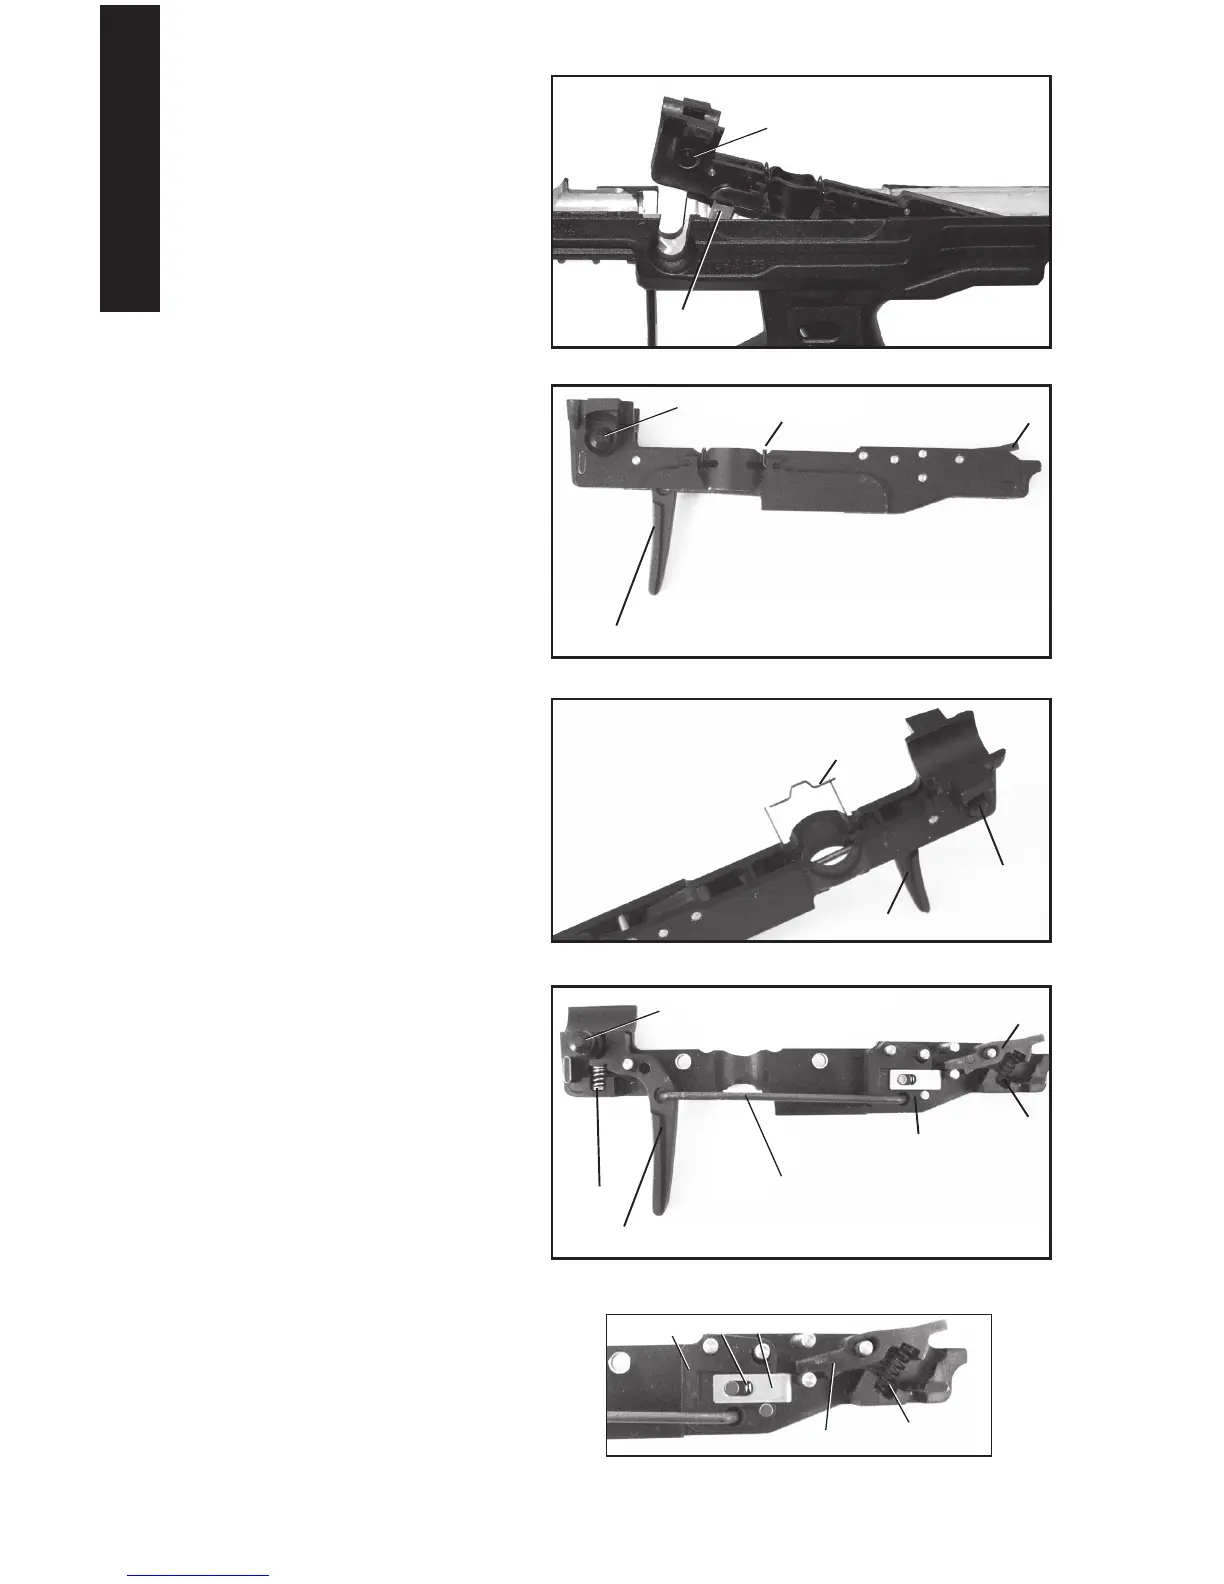
Trigger Box Assembly
1. Placeangeroneachendofthe
Safety Pin(33).Gentlyliftat
thispoint,andasyoulift,slightly
pulltowardsthebarrelendofthe
marker,therebyliftingtheentire
TriggerBoxassemblyfromthe
Bottom Receiver(2).
2. PullonthetaboftheTrigger
Box Spring
(37)androtateover
thetopoftheTriggerBox.
3. LaytheTriggerBoxonthe
workbench(rightsidedown)
andgentlyprytheleftsideof
theTrigger Box(36)offfrom
theassembly.Theresultshould
lookjustlikeFigure17.
4. RemovetheTrigger Link
(24)fromtheTrigger(38)and
Trigger Adapterassembly
(25).
5. RemovetheTriggerand
TriggerSpringbyliftingfrom
theTriggerBoxassembly.The
TriggerAdapterassemblyhasa
Spring(26)insidetheTrigger
Return Slide
(28),somewhat
visibleinFigure18.Thereisno
needtoremovetheSlidefrom
theTriggerAdapter,otherthan
toreplacetheSpring.
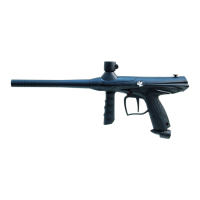
6. RemovetheSear(29)bylifting
straightupfromtherightTrigger
Boxhalf.Besuretomaintain
controloftheSpring(30)while
removingtheSear.
7. RemovetheSafetyPinbylifting
straightoutoftherightTrigger
Boxhalf.
25
26
24
Figure17:Safety,Trigger,TriggerLink,TriggerAdapter,andSear
38
33
29
30
Figure15:SafetyPin,Trigger,TriggerBoxSpring,andSear
38
33
29
37
Figure16:SafetyPin,Trigger,andTriggerBoxSpring(opened)
33
37
38
Figure14:TriggerBoxAssemblyliftingfromBottomReceiver.
33
38
Figure18:LocationoftheTriggerAdapter,Sear,
andSearSpring
30
29
25
26
28