Getting Started
• Eyeprotectiondesignedforpaintballusemustbewornbytheuserandanyperson
withinrange.
• Donotdisassemblethismarkerwhileitispressurizedwithair/CO2.
• Donotpressurizeapartiallyassembledmarker.
• Readeachstepcompletelybeforeperformingthestep.
NOTE:Carefullyhandstartallthreadedpartswhenassembling,anddonot
overtighten,asthismaypotentiallystripthethreadedparts.
1. Air/CO2 Supply Cylinder Installation
ReviewAir/CO2 Supply Cylinder Safety Tips(seepage11).
a. PuttheTriggerSafetyinSafemode(seepage6)andinstallthebarrelblocking
device(seepage4).
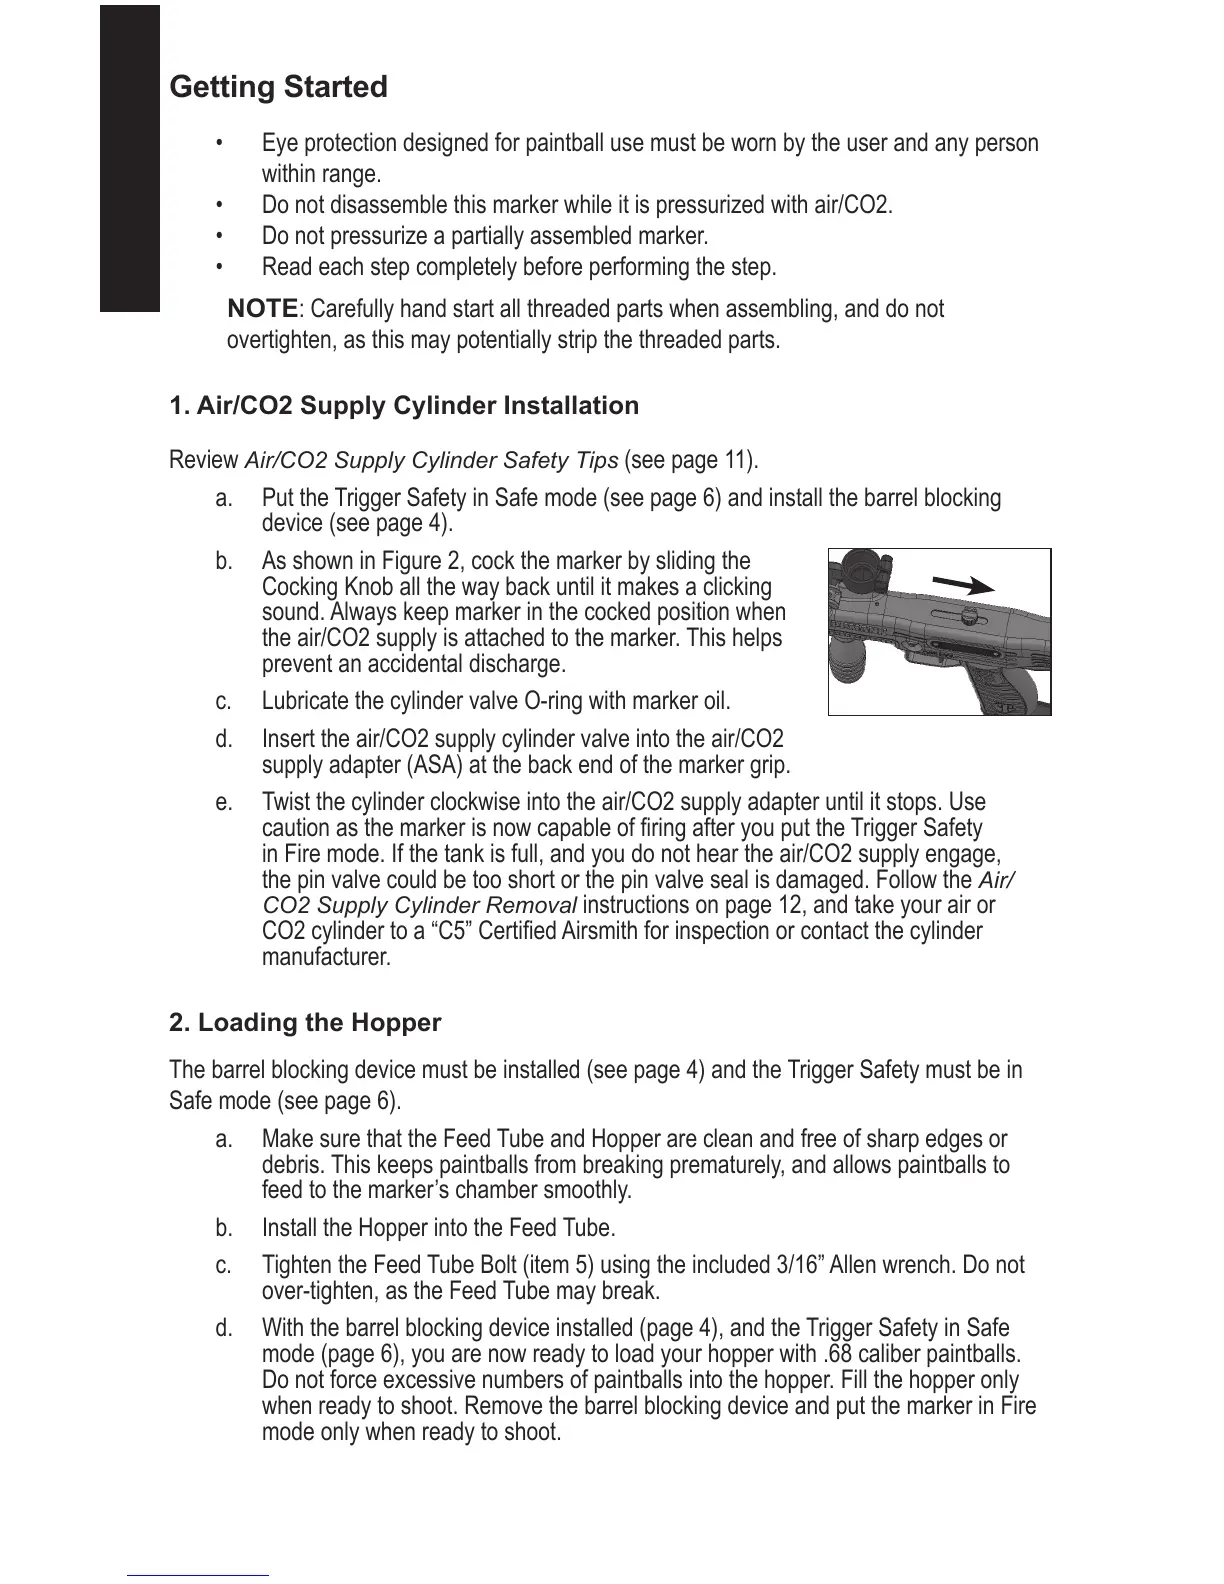
b. AsshowninFigure2,cockthemarkerbyslidingthe
CockingKnoballthewaybackuntilitmakesaclicking
sound.Alwayskeepmarkerinthecockedpositionwhen
theair/CO2supplyisattachedtothemarker.Thishelps
preventanaccidentaldischarge.
c. LubricatethecylindervalveO-ringwithmarkeroil.
d. Inserttheair/CO2supplycylindervalveintotheair/CO2
supplyadapter(ASA)atthebackendofthemarkergrip.
e. Twistthecylinderclockwiseintotheair/CO2supplyadapteruntilitstops.Use
cautionasthemarkerisnowcapableofringafteryouputtheTriggerSafety
inFiremode.Ifthetankisfull,andyoudonotheartheair/CO2supplyengage,
thepinvalvecouldbetooshortorthepinvalvesealisdamaged.FollowtheAir/
CO2 Supply Cylinder Removal
instructionsonpage12,andtakeyourairor
CO2cylindertoa“C5”CertiedAirsmithforinspectionorcontactthecylinder
manufacturer.
2. Loading the Hopper
Thebarrelblockingdevicemustbeinstalled(seepage4)andtheTriggerSafetymustbein
Safemode(seepage6).
a. MakesurethattheFeedTubeandHopperarecleanandfreeofsharpedgesor
debris.Thiskeepspaintballsfrombreakingprematurely,andallowspaintballsto
feedtothemarker’schambersmoothly.
b. InstalltheHopperintotheFeedTube.
c. TightentheFeedTubeBolt(item5)usingtheincluded3/16”Allenwrench.Donot
over-tighten,astheFeedTubemaybreak.
d. Withthebarrelblockingdeviceinstalled(page4),andtheTriggerSafetyinSafe
mode(page6),youarenowreadytoloadyourhopperwith.68caliberpaintballs.
Donotforceexcessivenumbersofpaintballsintothehopper.Fillthehopperonly
whenreadytoshoot.RemovethebarrelblockingdeviceandputthemarkerinFire
modeonlywhenreadytoshoot.