7
7. INSTALLATION PRECAUTIONS
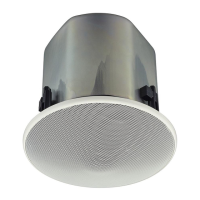
8. INSTALLATION
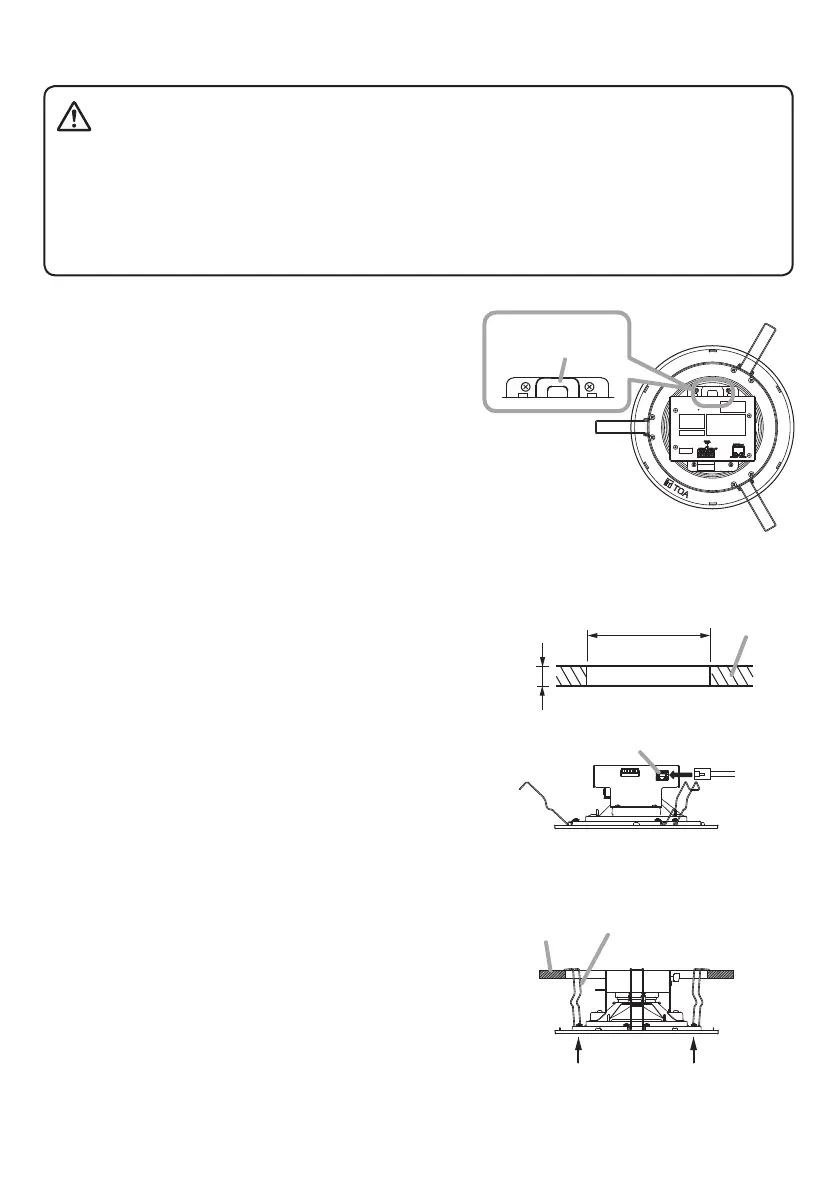
Step 1. Using the supplied paper pattern as a guide, open
amounting hole of the dimension specied below in
the ceiling.
Mounting hole dimension:
ø200 mm ± 2 mm (7.87" ± 0.08")
Step 2. Connect the speaker to the PoE switching hub
using a LAN cable (straight UTP or STP cable, both
rated at Category 5 or greater and tted with RJ45
connectors).
Power to the speaker is supplied by the PoE switching
hub.
Compatible switching hubs:
Switching hubs conforming to PoE (IEEE802.3af
Class 3) specications
Step 3. Hook the speaker mounting spring into the mounting
hole in the ceiling.
Step 4. Push the panel surface into the mounting hole.
Observe the following instructions when attaching the safety wire. Failure to do so could result in
the speaker falling, potentially resulting in personal injury.
• Select a safety wire that is strong enough to withstand the total weight of the speaker being
mounted.
• Use a wire with a diameter larger than 1.5 mm or 0.06".
• Attach the safety wire so that it does not become slack.
CAUTION
Notes
• Since the safety wire is not supplied with the speaker,
be sure to prepare it separately.
• When attaching the safety wire, be sure that it is
fastened securely to the safety wire attachment hole.
Safety wire
attachment hole
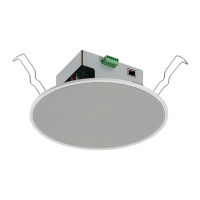
IP-A1PC238
(rear)
5 mm to 25 mm (0.2" – 0.98")
ø200 ± 2 mm
(7.87" ± 0.08")
Ceiling
From PoE
switching hub
LAN port
2
IP-A1PC238 (side)
Ceiling
Speaker mounting spring
44
33