5 5
CLEANING & STO R I N G
ALWAYS UNPLUG THE UNIT AND ALLOW TO COOL COMPLETELY BEFORE CLEANING.
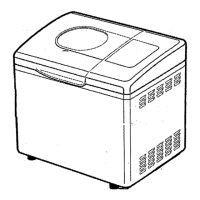
CAREFULLY UNPACK THE BREAD MAKER AND REMOVE ALL PACKAGING MATERIALS.
A ny service requiring disassembly, other than the cleaning described below, must be
p e r formed by an authorized service representative. U n a u t h o r i zed service will void yo u r
w a r r a n t y.
C L E A N I N G
CLEAN-UP OF BREAD MAC H I N E
1 . Unplug and allow to cool before cleaning.
2 . R e m ove bread pan from inside the bread machine.
3 . Clean ex t e rior and interior of bread machine with a damp cloth and plastic scouring pad if
n e c e s s a r y. Do not rub too hard as the surface may be scra t c h e d .
4 . To clean the glass in the lid, use a glass cleaner or mild detergent and a damp cloth or plas-
tic scouring pad. Do not use an abra s i ve cleaner or pad as they might scratch the glass.
5 . Rinse with a damp cloth and dry thoroughly.
CLEAN-UP OF BREAD PAN AND KNEADING BLADE
DO NOT IMMERSE PAN OR WASH IN DISHWA S H E R
1 . A l l ow to cool before cleaning.
2 . Fill with hot soapy water and remove kneading bl a d e. If necessary to remove the kneading
blade from the bread pan, allow the soapy water to remain in the pan for up to 30 minu t e s
(longer times may damage the non-stick surfa c e ) . It is not necessary to remove the kneading
blade for cleaning. But if you wish to, it must be removed after each use otherwise it will
become ve ry difficult to remove.
3 . Wash bread pan and kneading blade with a nylon bristle bru s h . Do not use steel wool, abra-
s i ve cleaners, or metal utensils on the bread pan or kneading blade as they will damage the
n o n - s t i ck surfa c e. N o rmal wear is to be ex p e c t e d . The non-stick may discolor over time and
in no way affects perfo rm a n c e.
S TO R I N G
• All remova ble parts should be thoroughly cleaned and dri e d .
• Store with lid closed and bread pan with kneading blade inside.