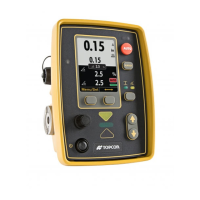
GC-35 Setup
Paving Applications
9
P/N: 1001548-01
5. Place the screed on the ground and null it out.
6. Power up the Control Box and select Slope Control by pressing the Slope/Elevation button until the yellow LED
above the slope symbol lights up.
7. Press Survey.
a. If the On-grade bar lights up, and the screen displays a slope value that is identical to the laser or Smart
Level, press the Auto button to put the Control Box into Automatic control, and begin paving.
b.
If the slope displayed in the box does not match the surface, then you must calibrate the slope sensor.
8. Press and hold the Menu/Set button, then turn the Grade Adjustment Knob to change the display’s slope
percentage to match the slope of the surface.
9. Press the Auto button to switch to Auto, and begin paving.
10. Use the Grade Adjustment Knob as needed to make changes to the slope value.
Once the slope sensor is calibrated and you are ready to begin paving, you may find the existing surface does not
have the same slope as the finish design. In order to produce a smooth transition, begin paving at the existing
slope and slowly turn the Grade Adjustment Knob to change the cross slope to the correct percentage.
GC-35_QRG.book Page 9 Tuesday, January 31, 2017 3:43 PM

 Loading...