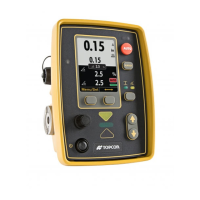
GC-35 Setup
Profiler (Milling) Applications
11
P/N: 1001548-01
Getting Started Milling Using Elevation Control
1. Setup the profiler as you would to start milling manually.
2. Power up the Control Box and select Elevation Control by pressing the Slope/Elevation button until the green LED
above the elevation symbol lights up.
3. Position the Sonic Tracker over the grade reference or the side blade when using yoyo sensors.
4. Gradually lower the drum so it is just about the scrape the surface at both sides.
5. Press Survey to set to On-grade.
6. Press and hold the Menu/Set button, then turn the Grade Adjustment Knob to set the display’s Elevation Setpoint
value to zero cutting depth.
7. Switch to Auto, by pressing the Auto button and begin milling. Use the Grade Adjustment Knob to gradually cut to
the desired depth
.
8. After milling several feet/meters, check the cutting depth.
If you are using both a sonic tracker and a yoyo sensor, pressing the Slope/Elevaton button cycles
through the sonic tracker
, the yoyo sensor , and the slope sensor .
If you are using only one elevation sensor, either sonic or yoyo, pressing the Slope/Elevation button
switches between the elevation sensor
and the slope sensor .
GC-35_QRG.book Page 11 Tuesday, January 31, 2017 3:43 PM