12
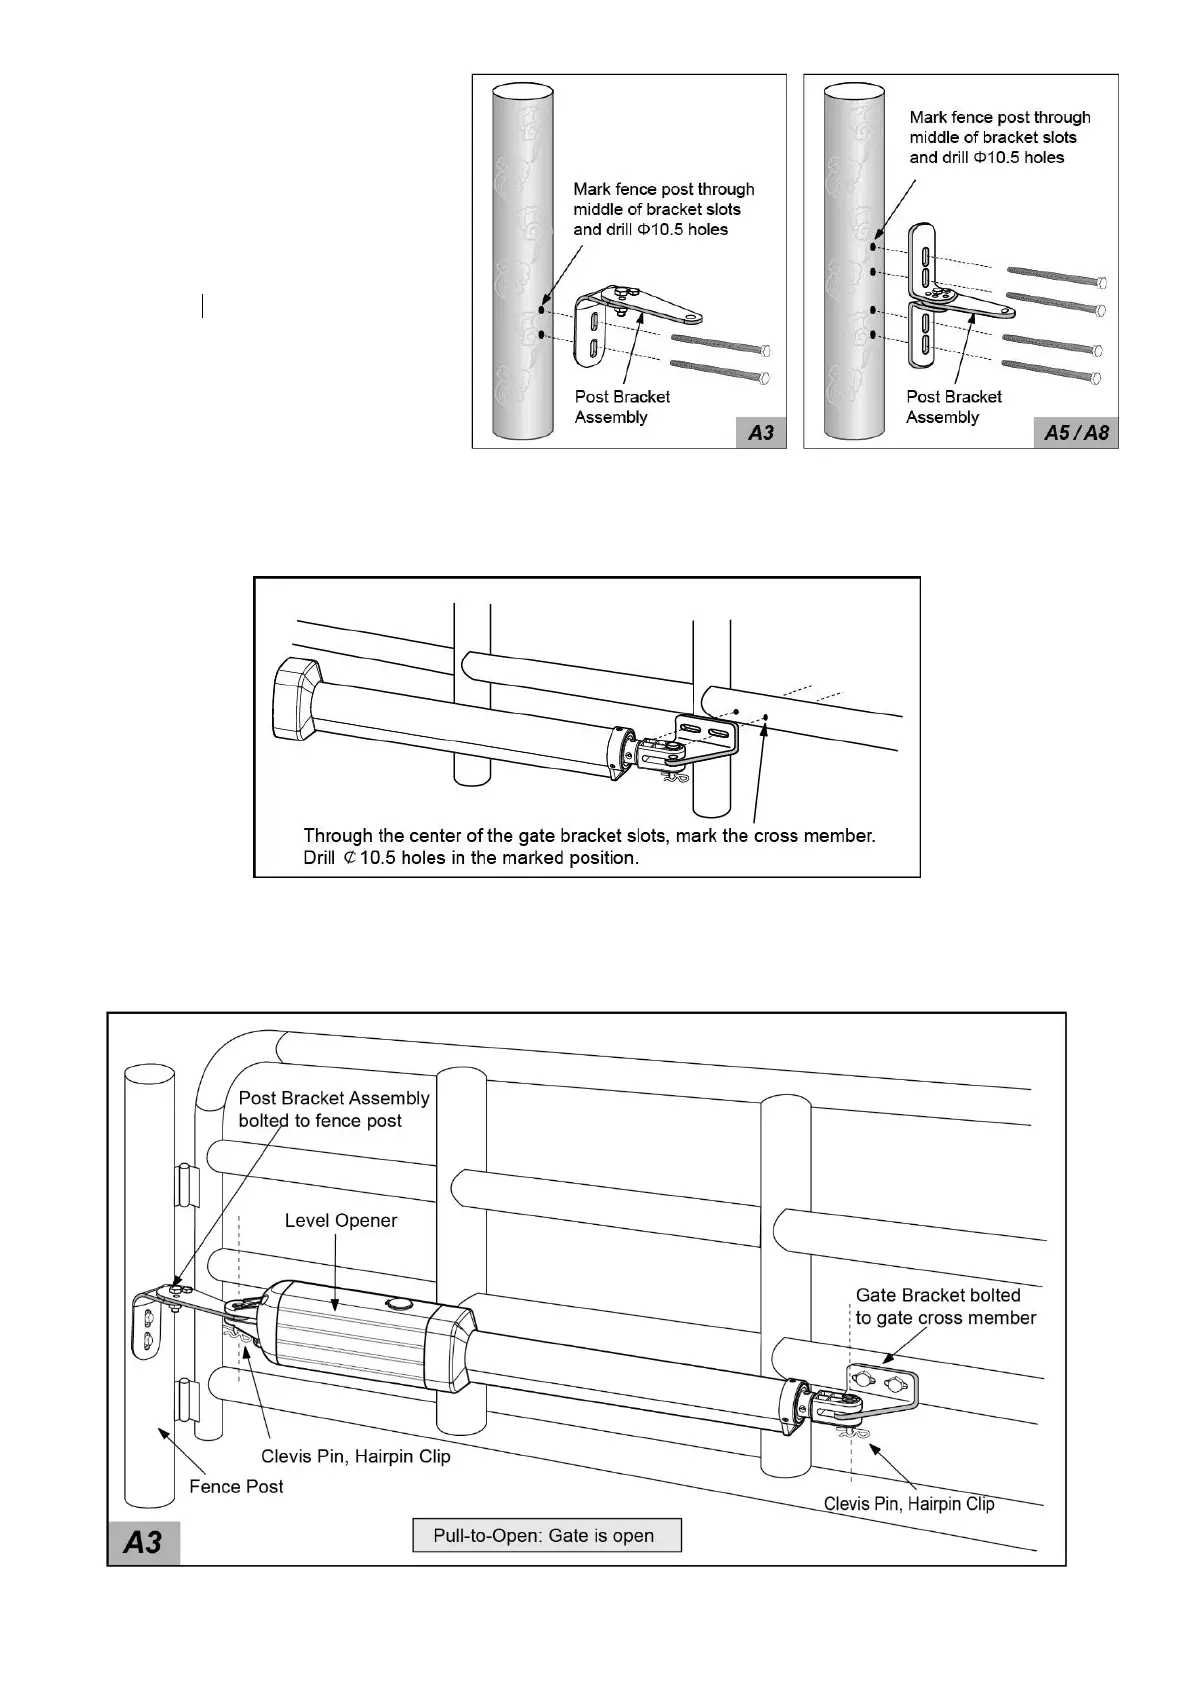
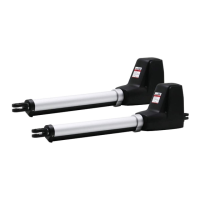
6. Sign the bolt-hole point on the gate
post and gate. Do this by placing a
punch or a sign in the middle of each bolt
slot on the post bracket and the gate
bracket. It allows slight adjustments to
the post bracket. Then remove the
opener and brackets assy. by taking off
the C-clamps.
7. Drill 10.5 mm diameter holes through
the post and the gate at the marked
locations.
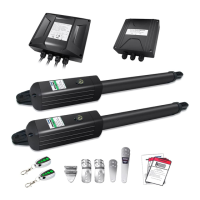
8. Attach the post bracket assemblies to
the gate post by inserting M10 x 200 bolts through each post bracket assy. and the drilled holes in the gate post.
Fasten each bolt with one ¢10 washer, one ¢10 lock washer, and one ¢10 nut.
9. Attach the gate brackets to each gate by inserting two M10 x 75 bolts through the gate brackets and the
drilled holes in the gates. Fasten each bolt with one ¢10 lock washer, and one ¢10 nut.
10. Cut off any part of the bolts that extend beyond the tightened nuts.
11. With the opener fully retracted and with the gate in the fully open position (for Pull-to-Open installation),
insert a clevis pin through the gate opener and the Post Pivot Bracket and insert another clevis pin through the
gate opener and the Gate Bracket. Secure each clevis pin with a hairpin clip.