Do you have a question about the Tork EWZ101C and is the answer not in the manual?
Lists the primary functions and key attributes of the TORK EWZ series time switch.
Guides users on setting up the timer's operational logic for different modes.
Details how to configure holiday periods for special scheduling requirements.
Crucial safety warnings and precautions to follow before attempting installation.
Step-by-step guide for physically installing the time switch unit.
Choosing between 2-channel, 1-channel DPST, or Momentary operation modes.
Configuring the current time and date for accurate timer operation.
Enabling or disabling automatic daylight saving time adjustments.
Details how to set start and end dates for holiday blocks and special schedules.
How to set ON/OFF events and assign specific days for schedules.
Configuring ON/OFF operations based on local sunset and sunrise times.
Adjusting ON/OFF times relative to calculated sunset/sunrise times.
Procedures for checking, changing, or deleting existing timer configurations.
How to use override functions and convert the unit for momentary operation.
Explains MAN mode, memory clearing, and power failure indications.
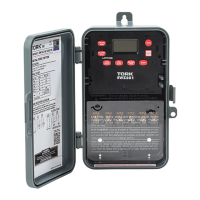
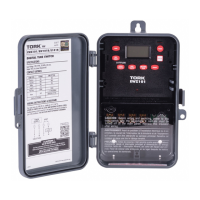
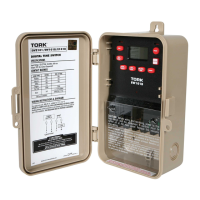
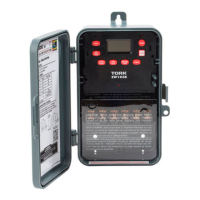
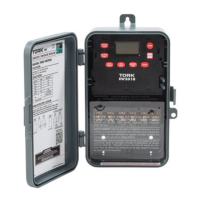
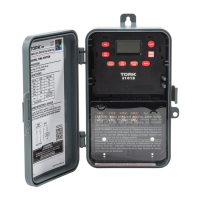
This document provides the instruction manual for the TORK EWZ101C and EWZ201C Digital Time Switches, which are clock-operated switches designed for various scheduling and control applications.
The EWZ series time switches offer a range of capabilities, including 7-day scheduling with up to 32 set points. The EWZ101C model can be wired as either a Single Pole Single Throw (SPST) or Single Pole Double Throw (SPDT) switch. The EWZ201C is more versatile, being field convertible for 2-channel operation, 1-channel Double Pole Single Throw (DPST) operation, or momentary output. Both models support up to 20 block holidays and feature an astronomic option for automatic ON at sunset and OFF at sunrise, ideal for outdoor lighting applications.
Key features of these time switches include automatic daylight saving time adjustment (user selectable) and automatic leap year compensation. In the event of a power outage, the unit retains its schedule permanently, thanks to a supercapacitor that provides 4 days of real-time backup. Manual override is also available, effective until the next scheduled event. The devices are designed for multi-voltage input, supporting 120-277 Volts.
The EWZ201C in two-channel mode allows for different control logic for each channel. For example, one channel can be set for sunset to sunrise operation, while the other is set for sunset to a specific time OFF. In one-channel DPST mode, both relays turn ON and OFF simultaneously, which is useful for switching 208 or 240 volts. The momentary output mode is designed for switching latching contactors; conversion to this mode involves removing a jumper on the back of the timer, as detailed in the installation section. To complete a schedule for each channel, two schedule (SCH) events are required: one for ON and one for OFF. The event screen will display the event number from 01 to 32.
Users can select up to 20 holiday blocks, each with a start and end date. Holiday blocks can range from one day to 364 consecutive days, but they must not cross over December 31st. If a holiday period spans across the new year, it must be entered as two separate blocks (e.g., 12/18 to 12/31 and 01/01 to 01/05). During these holiday dates, the timer will execute a special holiday schedule. If no specific holiday schedule is entered, ON/OFF operations will be omitted. Astronomic schedules, however, are not affected by holiday dates and will always execute if chosen.
Installation of the unit must be performed by a licensed electrician. To remove the unit from its enclosure, push the tab on the right outward and lift the mechanism. The left side is held in place as the mechanism swings out to the left for removal. The enclosure should be mounted at eye level, and supply and load wires brought in through the side or bottom knockouts (top knockouts should not be used).
For the EWZ201C, conversion to a momentary unit involves removing a small black jumper located on the upper right next to the R35 marking on the back of the mechanism. After removing the jumper and restoring power, the unit must be reset by inserting a small pin or paper clip into the hole next to the EVENT key. The unit is then reinstalled by reversing the removal steps and connecting wires according to the provided wiring diagrams. Power should be applied to the unit, and programming should only be done with AC power, not under supercapacitor backup power. When powering up for the first time, allow 1-2 minutes for the supercapacitor to charge. If the screen is blank after 2 minutes, press the reset button.
Programming for the EWZ101C starts at step 2.0, while for the EWZ201C, it starts at step 1.0. After making any program changes, the MODE button must be pressed to go to RUN mode, followed by the EVENT button to update the load status.
Upon initial power-up, the display will show a flashing "2CH".
The display will show "AM 12:00 CLK". Press HOUR and MIN to adjust the time, checking AM/PM, then press ENTER.
The display will show a default date (e.g., "MO 01 01 07 DATE"). Press MONTH, DATE, and YEAR to set the current date, then press ENTER. The day of the week will be set automatically.
The display will show "dSt ON".
The display will show "HdAY00" if no holidays are entered.
Press MODE until the display shows "--:-- 01 SCH".
The display shows "ASTRO LAEN--". Press MODE to skip.
Press MODE to cycle through the following modes for review and modification:
The OVR (Override) function is effective in AUTO mode until the next scheduled event, and indefinitely in MAN (manual) mode.
In RUN mode, the EVENT button updates the load status by executing the last scheduled event for CH1 and CH2. The display shows the last scheduled event for CH1; press EVENT again for CH2. If no schedule is programmed, the display shows "-:-".
To convert the EWZ201C to a momentary unit, first remove all power. Remove the mechanism from the enclosure to access the back. Remove the small black jumper near the R35 marking. Reinstall the mechanism and restore power. Reset the unit by inserting a small pin or paper clip into the hole next to the EVENT key, then reset the clock and date. After removing the jumper and resetting, the unit will be configured as a 1-channel momentary ON and OFF. Only CH1 will be programmed; CH2 can be viewed but will not take effect. A 2-second closure between terminals 3 and 4 occurs at an ON event, and between terminals 5 and 6 at an OFF event.
The manual also includes schedule sheets for recording load descriptions, ON/OFF times, and days of the week, as well as an astronomic schedule sheet for latitude, sunset/sunrise times, and offsets. A map of astronomic latitude zones for the USA and Puerto Rico is provided, along with wiring diagrams for the EWZ101C (SPST and SPDT) and EWZ201C (CH1/CH2 SPST, Momentary Option, and DPST).
| Type | Digital Timer |
|---|---|
| Voltage | 120-277 VAC |
| Contact Type | SPDT |
| Amperage | 20A |
| Maximum Current | 20A |
| Number of Channels | 1 |
| Enclosure | Plastic |
| Battery Backup | Yes |
| Display | LCD |
| Number of Programs | 20 |
| Mounting | DIN rail |
| Mounting Type | Surface |