9
ATTENTION:
This operation must be
carried out using gloves for
protection against dangerous
solutions.
STOPPING OF THE
MACHINE AFTER
CLEANING OPERATION
Before executing any type of
maintenance:
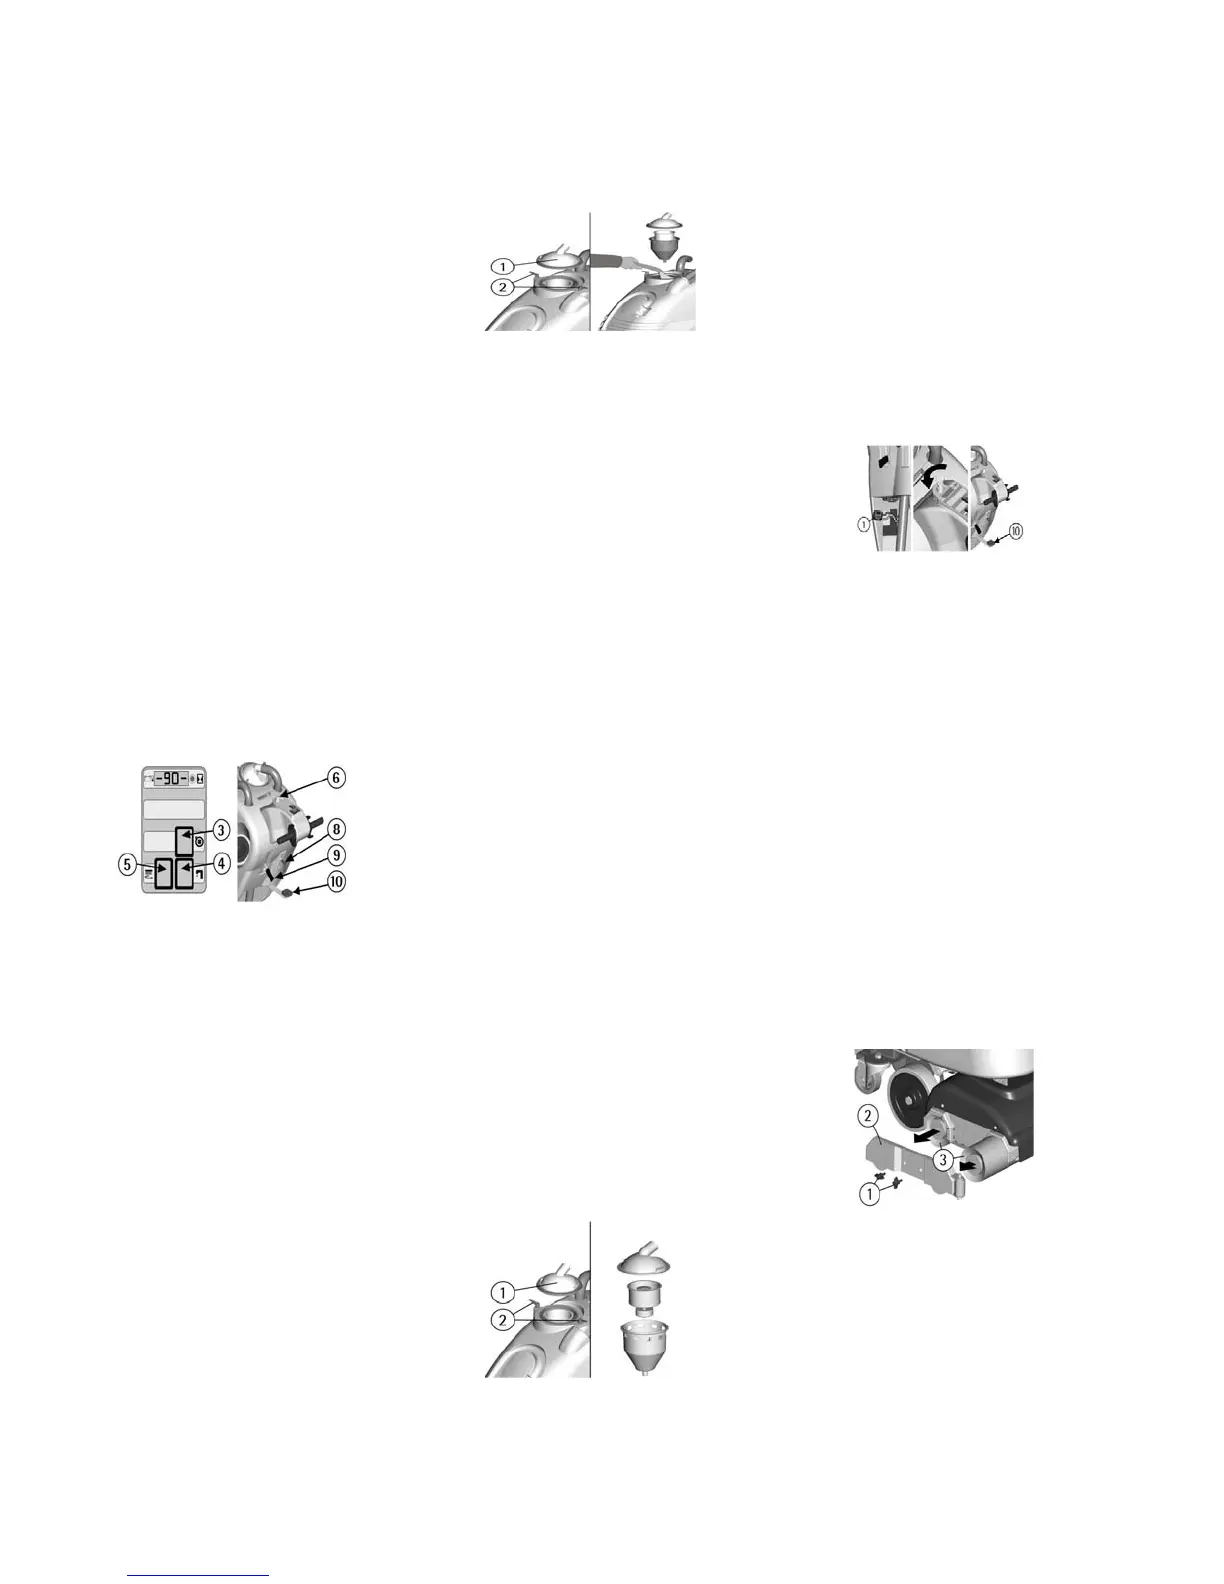
1. Close the solution valve lever
(8) and check that the indicator for
the open solution valve (4) on the
instrument board turns off.
2. Lift the brush head using the
pedal (10).
3. Lift the squeegee with the lever
(9).
4. Turn the brush motor switch off
(5).
5. Turn the suction motor switch
off (3).
6. Bring the machine to an
appropriate place for draining
tanks.
ATTENTION:
The machine is not equipped
with a parking brake;
therefore do not leave it on
slopes.
DAILY MAINTENANCE
Recovery tank cleaning
1. Hold the drain hose placed in
the front part of the machine.
2. Take off the drain plug by using
its lever. Empty the recovery tank
into appropriate containers (see
under "OVERFLOW DEVICE").
3. Take off the suction cover (1)
after rotating the blocking levers
(2).
4. Take off the filter and filter
protection.
5. Rinse the tank with a water jet.
ATTENTION:
This operation must be
carried out using gloves for
protection against dangerous
solutions.
Emptying detergent
solution
To empty the detergent
solution remaining in the
solution tank:
1. Bring the machine to an
appropriate place for tank
draining.
2. Unscrew the solution tank
cap.
3. Remove solution filter, let it
drain.
ATTENTION:
This operation must be
carried out using gloves for
protection against dangerous
solutions.
Suction filter cleaning
1. Take off the suction cover (1)
after rotating the blocking levers
(2).
2. Take off the filter and filter
protection.
3. Clean all parts with a water jet
especially inside surfaces and filter
bottom.
4. Carry out carefully the cleaning
operations.
5. Reassemble all parts.
Brush cleaning
Disassemble the brush and clean
them with a water jet (for
disassembly, see as follows under
“BRUSH DISASSEMBLY”).
Brush disassembly
1. Lift the brush head by lowering
the pedal (10).
2. Take off the electric supply to
the brush motor unplugging the
battery connector (1).
3. With the brush head in lifted
position, unscrew the two wing
nuts (1) and then remove the side
support of the brush (2).
4. Take off the brush (3) from their
seats to proceed for their cleaning
or replacement.
5. To reassemble, insert the brush
(3) into their seats from the side of
the hexagonal coupling. Make
sure the coupling is at the opposite
end.
6. Reposition the side support (2)
so that the support pins enter into
the bearing holes visible at the
center of the brush frame.
7. Retighten and block the wing
nuts.
 Loading...