7
On the display (1) the following
indication of the battery charge
level is digital and indicates the
percentage of the battery charge.
90 is the maximum charge, down
to a minimum of 10, indicating
every 10% decrease.
When the charge level reaches
10%, the display starts blinking
indicating the end of the battery
charge.
ATTENTION:
After a few seconds from the
four blinking ‘’----’’ dashes,
the brush motor stops
automatically. It is possible
to finish the drying operation
before proceeding to the
recharge.
Hour meter
The machine is equipped with an
hour meter located on the same
display of the battery's charge level
indicator (1). Keep the button (2)
pressed for more than 3 seconds,
the first data indicates the working
hours and after a few seconds, the
working minutes are shown.
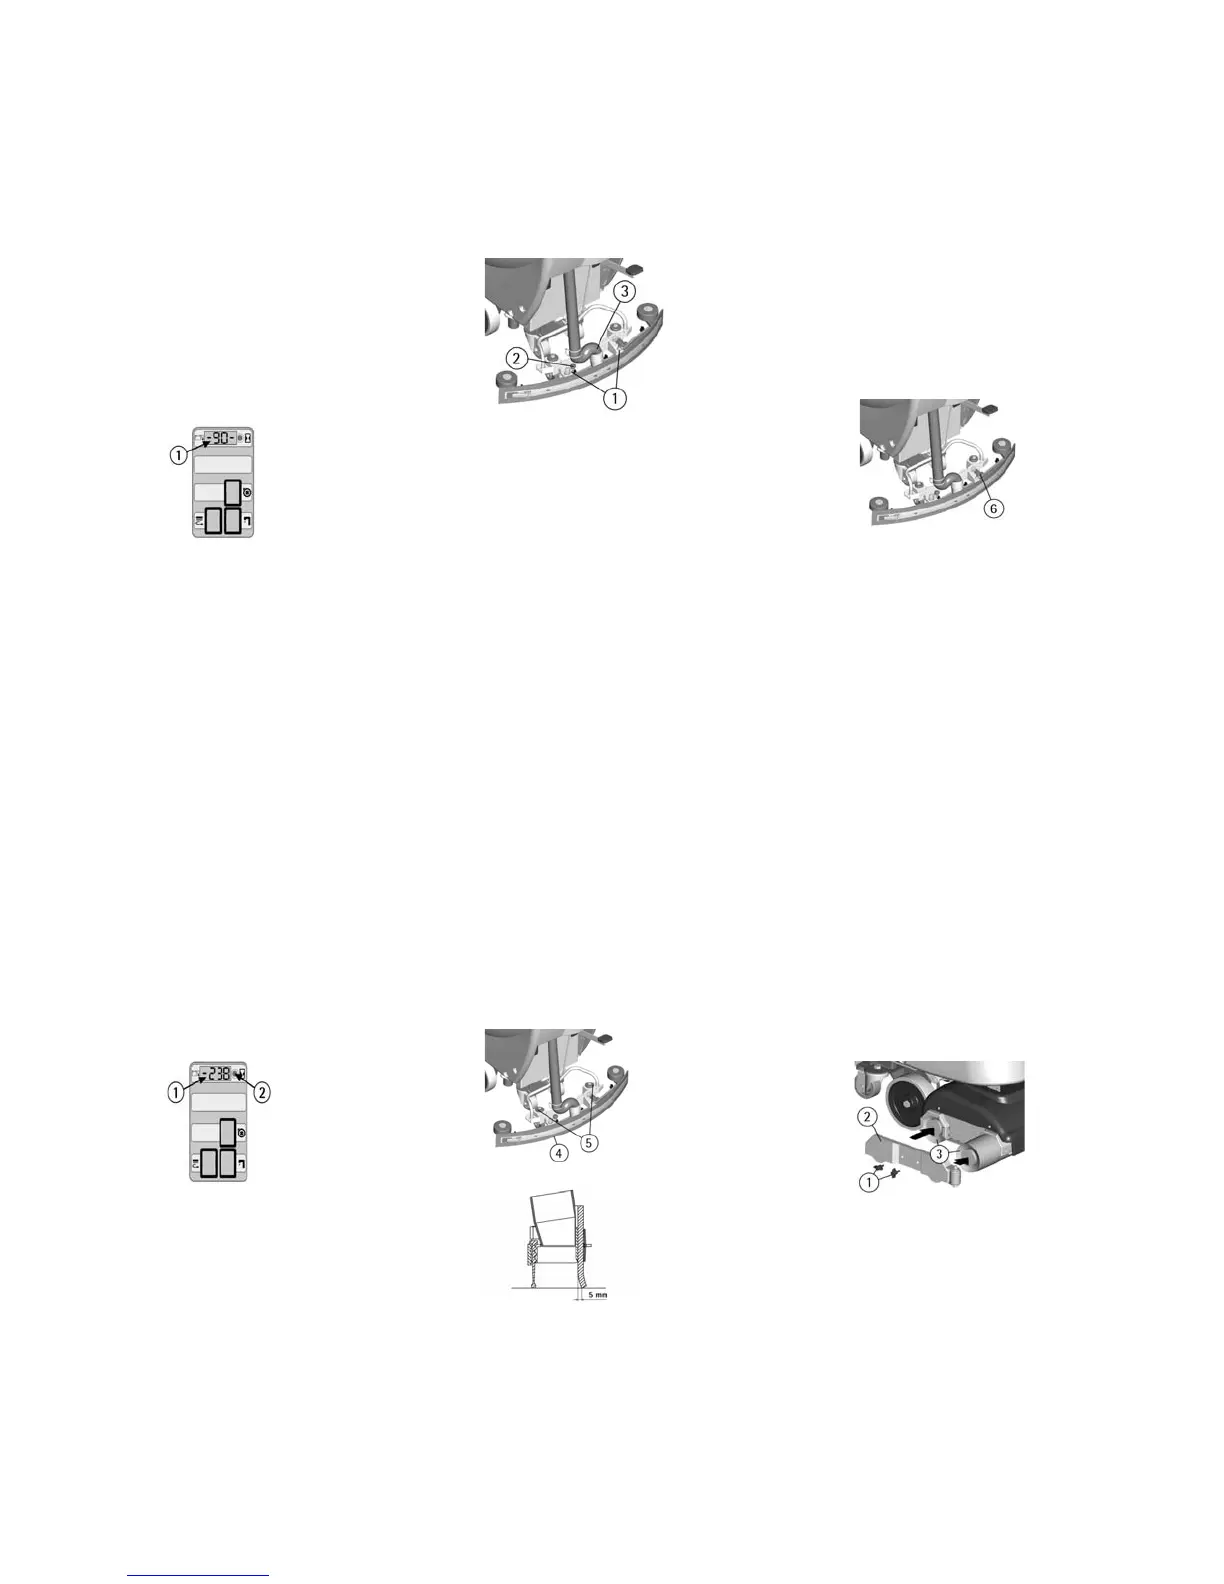
Squeegee assembly
With the squeegee support
lowered, slide the two stud bolts
(1) placed on the upper part of the
squeegee inside the slots on the
support. Block the squeegee by
rotating the lever (2) clockwise.
Insert the squeegee hose (3) into
its coupling, respecting its position
as indicated in the figure.
Adjustment of the
squeegee height
The squeegee must be adjusted in
height depending on the rubber
wear. In order to guarantee a
perfect drying during the
operation, the lower blade of the
rear squeegee rubber (4) must
work slightly bent backwards
(operator side) in uniformed way
in all its length.
Turn the two knobs (5) clockwise
to increase the bending of the
rubber and counterclockwise to
decrease the rubber bending.
A label placed near the two knobs
(5) indicate rotation to increase or
reduce the height.
Note: The wheels of the squeegee
support must be adjusted through
the knobs (5) at the same height so
that the squeegee works parallel to
the floor.
Adjustment of the
squeegee inclination
To increase the rubber bending in
the central part, it is necessary to
tilt the squeegee rotating
counterclockwise the knob (6).
To increase the rubber bending on
the squeegee extremities, rotate the
knob clockwise.
Brush assembly
1. Take off the electric supply to
the brush motor unplugging the
battery connector (1).
2. Step on the pedal to lift the
brush head.
3. With the brush head in lifted
position, unscrew the two wing
nuts (1) and then remove the side
support of the brush (2).
4. Insert the brush (3) into their
seats from the side of the
hexagonal coupling, find the
coupling at the opposite end and
insert them completely.
5. Reposition the side support (2)
so that the support pins enter into
the bearing holes visible at the
center of the brush frame.
6. Retighten and block the wing
nuts.
ATTENTION:
Use only the brush supplied
with the machine. The use of
other brushes can damage
the machine.
 Loading...