g034114
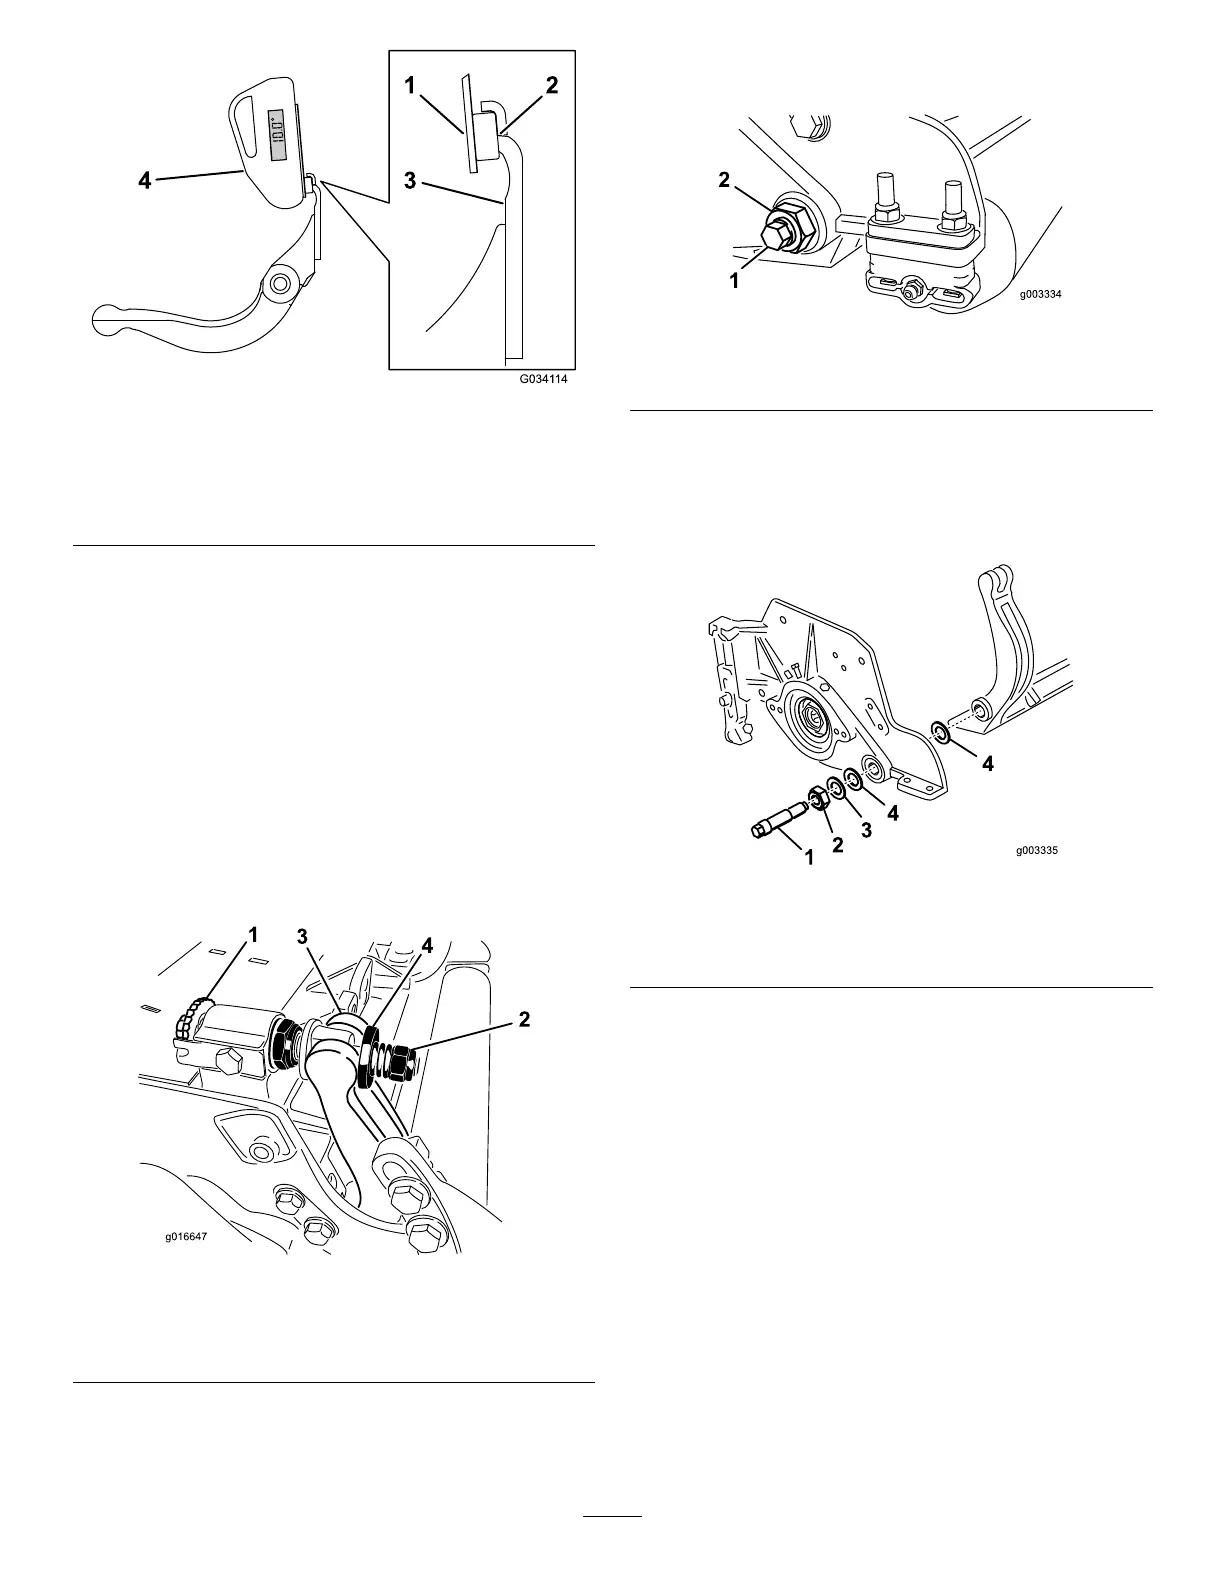
Figure31
1.Angle-indicatormount
3.Bedknife
2.Edgeofthemagnetmated
withtheedgeofthe
bedknife
4.Angleindicator
4.Placetheangleindicatoronthemountasshown
inFigure31.
Note:Thisistheanglethatyourgrinder
produces,andshouldbewithin2°ofthe
recommendedtopgrindangle.
ServicingtheBedbar
RemovingtheBedbar
1.Turnthebedbar-adjusterscrews
counterclockwisetobackthebedknife
awayfromthereel(Figure32).
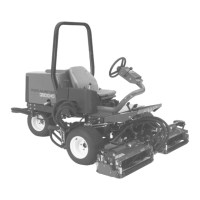
g016647
Figure32
1.Bedbar-adjustingscrew3.Bedbar
2.Spring-tensionnut
4.Washer
2.Backoutthespring-tensionnutuntilthewasher
isnolongertensionedagainstthebedbar
(Figure32).
3.Oneachsideofthemachine,loosenthelocknut
securingthebedbarbolt(Figure33).
g003334
Figure33
1.Bedbarbolt2.Locknut
4.Removeeachbedbarbolt,allowingthebedbar
tobepulleddownwardandremovedfrom
machinebolt(Figure33).Accountfor2nylon
washersand1stampedsteelwasheroneach
endofthebedbar(Figure34).
g003335
Figure34
1.Bedbarbolt
3.Steelwasher
2.Nut4.Nylonwasher
AssemblingtheBedbar
1.Installthebedbar,positioningthemountingears
betweenthewasherandthebedbaradjuster.
2.Securethebedbartoeachsideplatewiththe
bedbarbolts(nutsonbolts)and6washers.
3.Positionanylonwasheroneachsideofthe
side-plateboss.
4.Placeasteelwasheroutsideeachofthenylon
washers(Figure34).
Note:Torquethebedbarboltsto37to45N∙m
(27to33ft-lb).Tightenthelocknutsuntilthe
outsidesteelwasherstopsrotatingandendplay
isremoved,butdonotovertightenordeect
thesideplates.Thewashersontheinsidemay
haveagap.
21