5.Tightenthespring-tensionnutuntilthespringis
collapsed,thenbackoff1/2turn(Figure35).
g006505
Figure35
1.Spring-tensionnut2.Spring
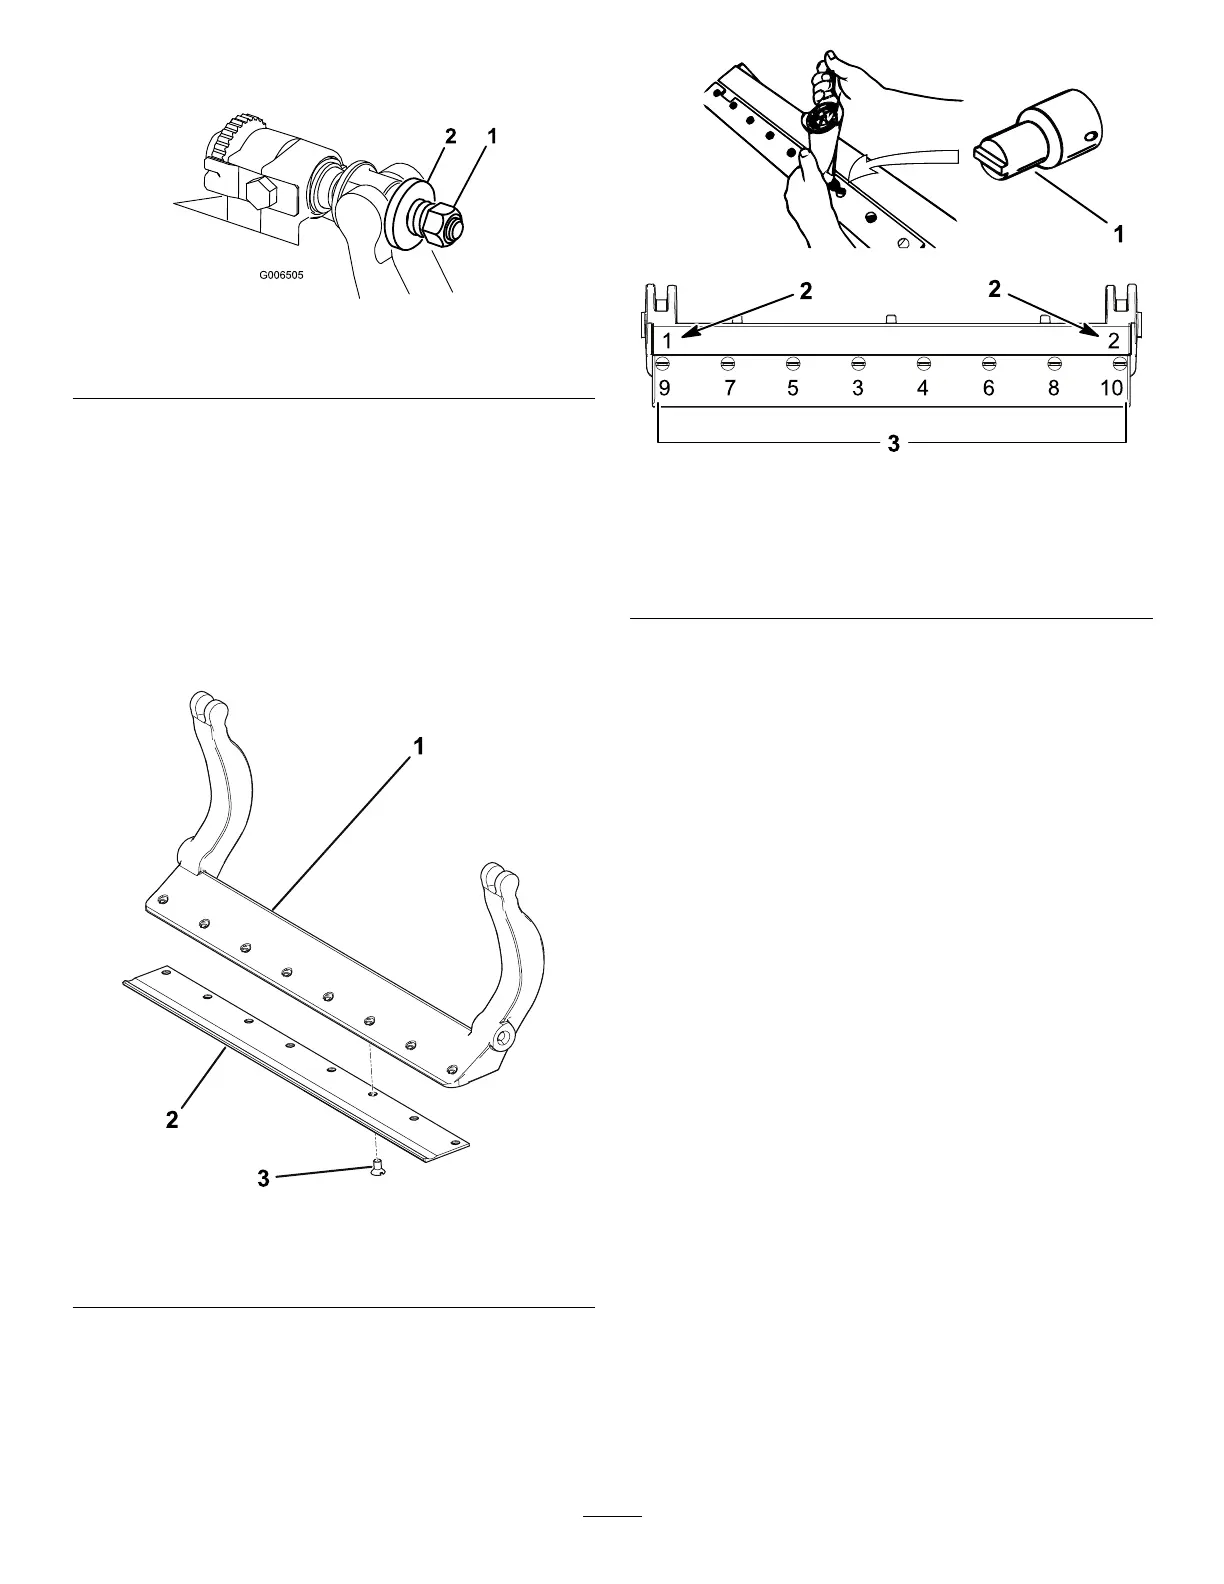
InstallingtheBedknife
1.Removetherust,scale,andcorrosionfromthe
bedbarsurfaceandapplyathinlayerofoilto
thebedbarsurface.
2.Cleanthescrewthreads.
3.Applyanti-seizecompoundtothescrewsand
installthebedknifetothebedbarasfollows
(Figure36):
g279161
Figure36
1.Bedbar
3.Screw
2.Bedknife
A.T orquethe2outerscrewsto1N∙m(10
in-lb);refertoFigure37.
B.Workingformthecenterofthebedknife,
torquethescrewsto23to28N∙m(200to
250in-lb);refertoFigure37.
g279162
Figure37
1.Bedknifescrewtool
3.Torqueto23to28N∙m
(200to250in-lb).
2.Installandtorquethese
rstto1N∙m(10in-lb).
4.Grindthebedknife.
22