1
InstallingtheRollBar
Partsneededforthisprocedure:
1Rollbar
4
Bolt(1/2x3-3/4inches)
4
Flangenut(1/2inch)
Procedure
1.Removethetopcratesupportfromthecrate.
2.Removetherollbarfromthecrate.
3.Removethe3boltsthatsecuretherightside
covertothemachineandremovethesidecover.
4.Removethe2boltsthatsecurethefuse-block
brackettotheROPSbracketasshowninFigure
3.
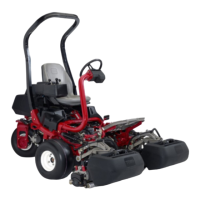
g255172
Figure3
1.Rollbar
4.Bolt(1/2x3-3/4inches)
2.Rightsidecover
5.Flangenut(1/2inch)
3.Fuseblockbracket
5.Alignthefuse-blockbracketontherightROPS
bracketanduse4bolts(1/2x3-3/4inches)and
4angenuts(1/2inch)toinstalltherollbarinto
theROPSbracketsoneachsideofthemachine.
6.Torquethefastenersto136to149N∙m(100to
110ft-lb).
7.Usethe3boltsthatyoupreviouslyremovedto
securetherightsidecovertothemachine.
2
InstallingtheSeat
Partsneededforthisprocedure:
1
Seat
1
Seatwireharness
Procedure
Note:Mounttheseatinthefrontsetofmounting
holestogainanadditional7.6cm(3inches)inthe
forwardadjustment,orintherearmountingholes
foranadditional7.6cm(3inches)intherearward
adjustment.
1.Removeanddiscardthelagboltssecuringthe
seatslidesandcuttheshippingstraps.
2.Removethe4bolts(5/16x3/4inch)and
washersfromtheshippingbracketanddiscard
thebracket.
3.Securetheseattotheseatbasewith4bolts
andwashersremovedpreviously(Figure4).
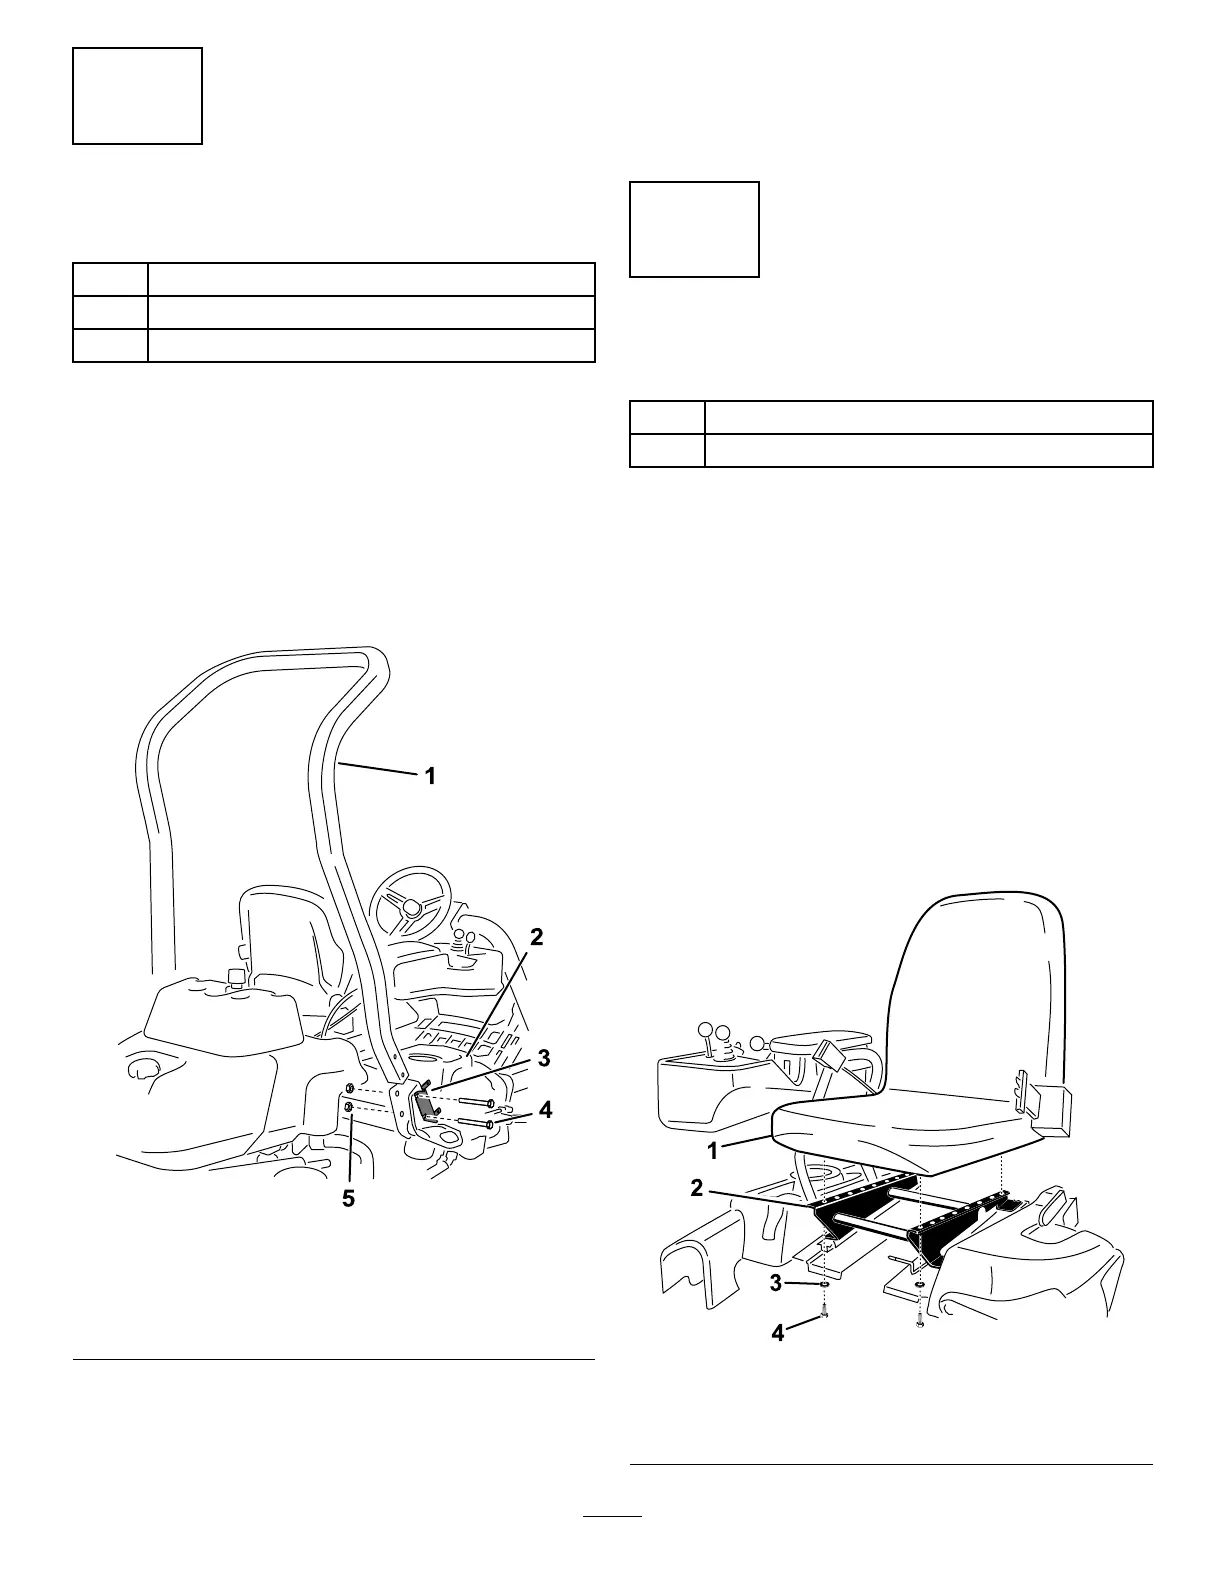
g193736
Figure4
1.Seat
3.Washer
2.Seatbase4.Bolt(5/16x3/4inch)
11