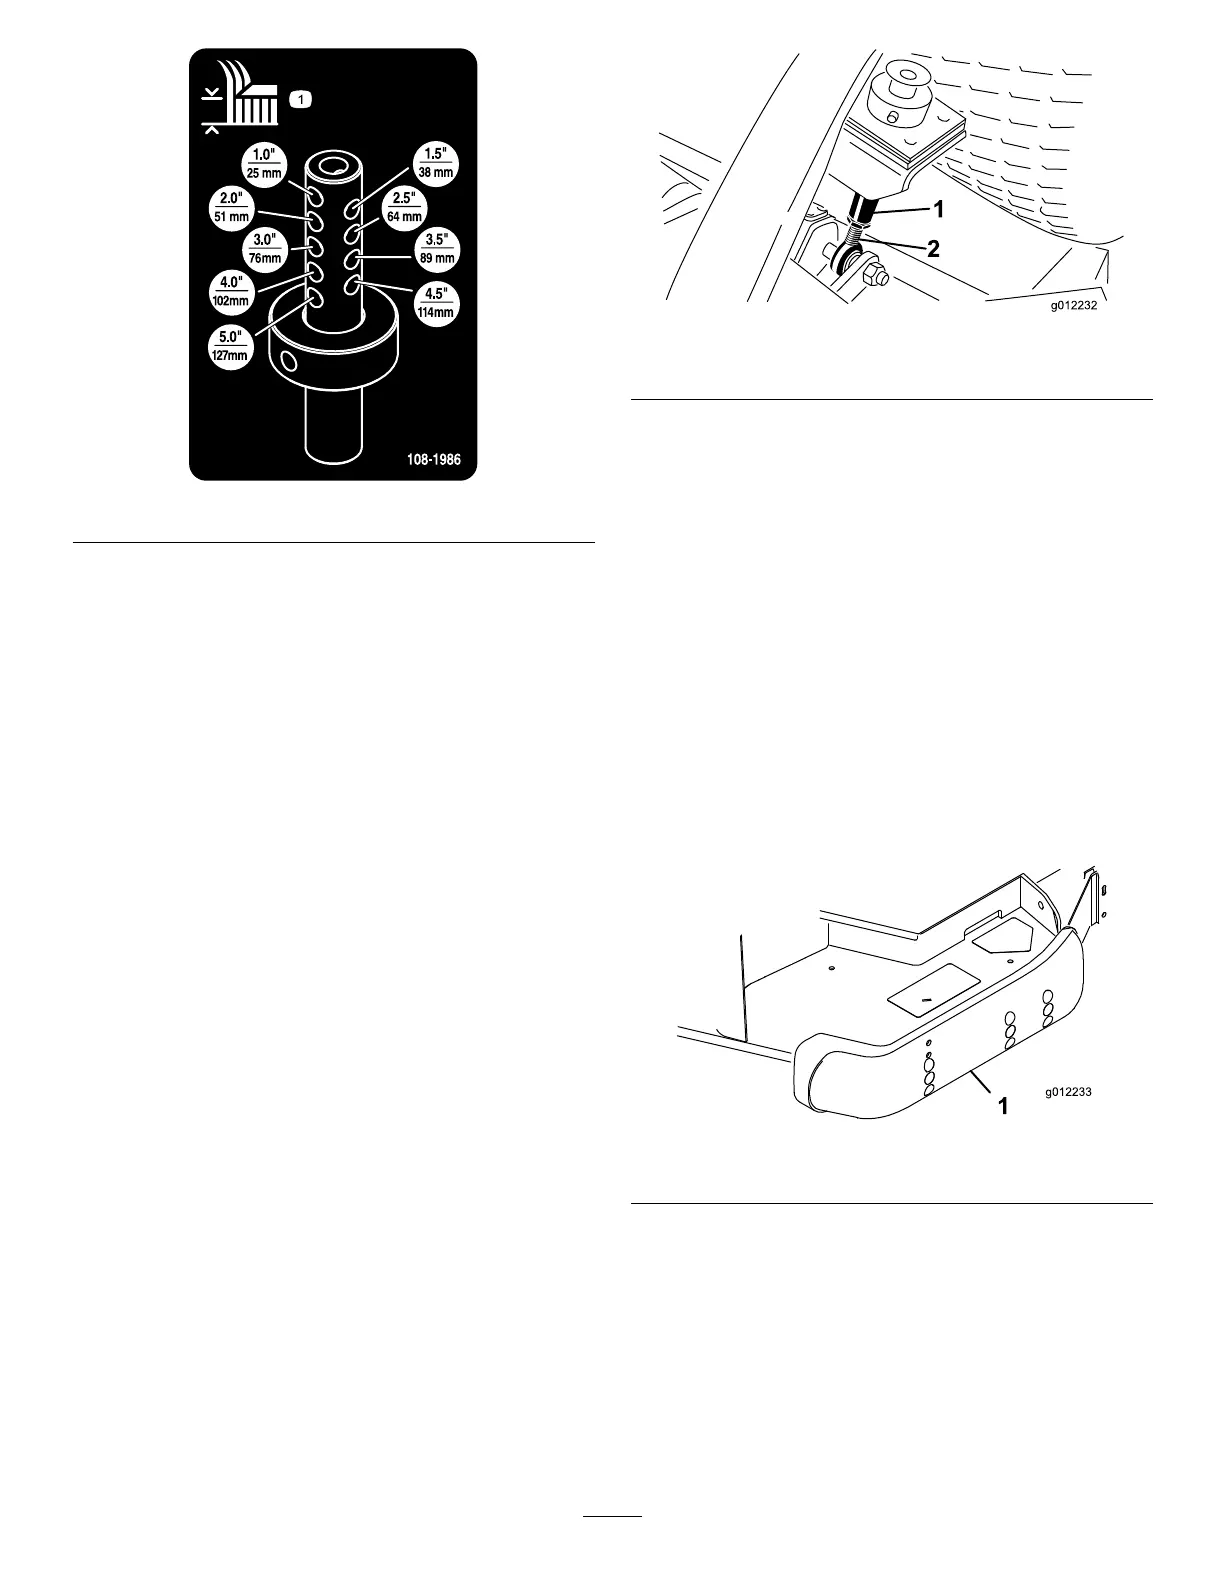
Figure10
7.Securetheadjustmentwiththeclevispinandhair
pin.
Note:Positiontheheadoftheclevispintoward
thefrontofthedeck,ifpossible.
Note:Whenusing1inch(25mm),1-1/2inch(38
mm),oroccasionally2inch(51mm)height–of–cut,
movetheskidsandrollertothehighestholes.
AdjustingtheCuttingUnit
Pitch
Cuttingunitpitchisthedifferenceinheight-of-cut
fromthefrontofthebladeplanetothebackofthe
bladeplane.Tororecommendsabladepitchof1/4
inch(6mm).Thatisthebackofthebladeplaneis1/4
inch(6mm)higherthanthefront.
1.Positionthemachineonalevelsurfaceontheshop
oor.
2.Setthecuttingunittothedesiredheight-of-cut.
3.Rotate1bladesothatitpointsstraightforward.
4.Usingashortruler,measurefromtheoortothe
fronttipoftheblade.Rotatethebladetiptotherear
andmeasurefromtheoortothetipoftheblade.
5.Subtractthefrontdimensionfromtherear
dimensiontocalculatethebladepitch.
6.Loosenthejamnutsonthebottomofthe
height-of-cutrods(
Figure11).
Figure11
1.Height-of-cut
2.Jamnut
7.Rotatetheheight-of-cutrodstoraiseorlowerthe
rearofthecuttingunitandattainthecorrectcutting
unitpitch.
8.Tightenthejamnuts.
AdjustingtheSkids
Theskidsshouldbemountedinthelowerposition
whenoperatinginheightofcutsgreaterthan2-1/2
inches(64mm)andinthehigherpositionwhen
operatinginheightofcutslowerthan2-1/2inches(64
mm).
Adjusttheskidsbyremovingtheangeboltandnuts,
positioningthemasdesired,andinstallingthefasteners
(
Figure12).
Figure12
1.Skid
AdjustingtheRollers
Note:Ifthecuttingunitistobeusedinthe1or1-1/2
inch(25or38mm)height-of-cutsetting,thecutting
unitrollersmustberepositionedinthetopbracket
holes.
1.Removethescrewandnutsecuringtherollershaft
tothedeckbracket(Figure13).
14