3
InstallingtheRodCamSensor
Partsneededforthisprocedure:
1Bracket
2
Bolt(M12-13/4x60mm)
2
Locknut(M12)
1
Hexnut(M10)
2
Bolt(M4)
1
Sensorassembly
2
Nut(M4)
2
Cotterpins
1
Sensorharnessadapter
1
Sensor-connectorclip
Procedure
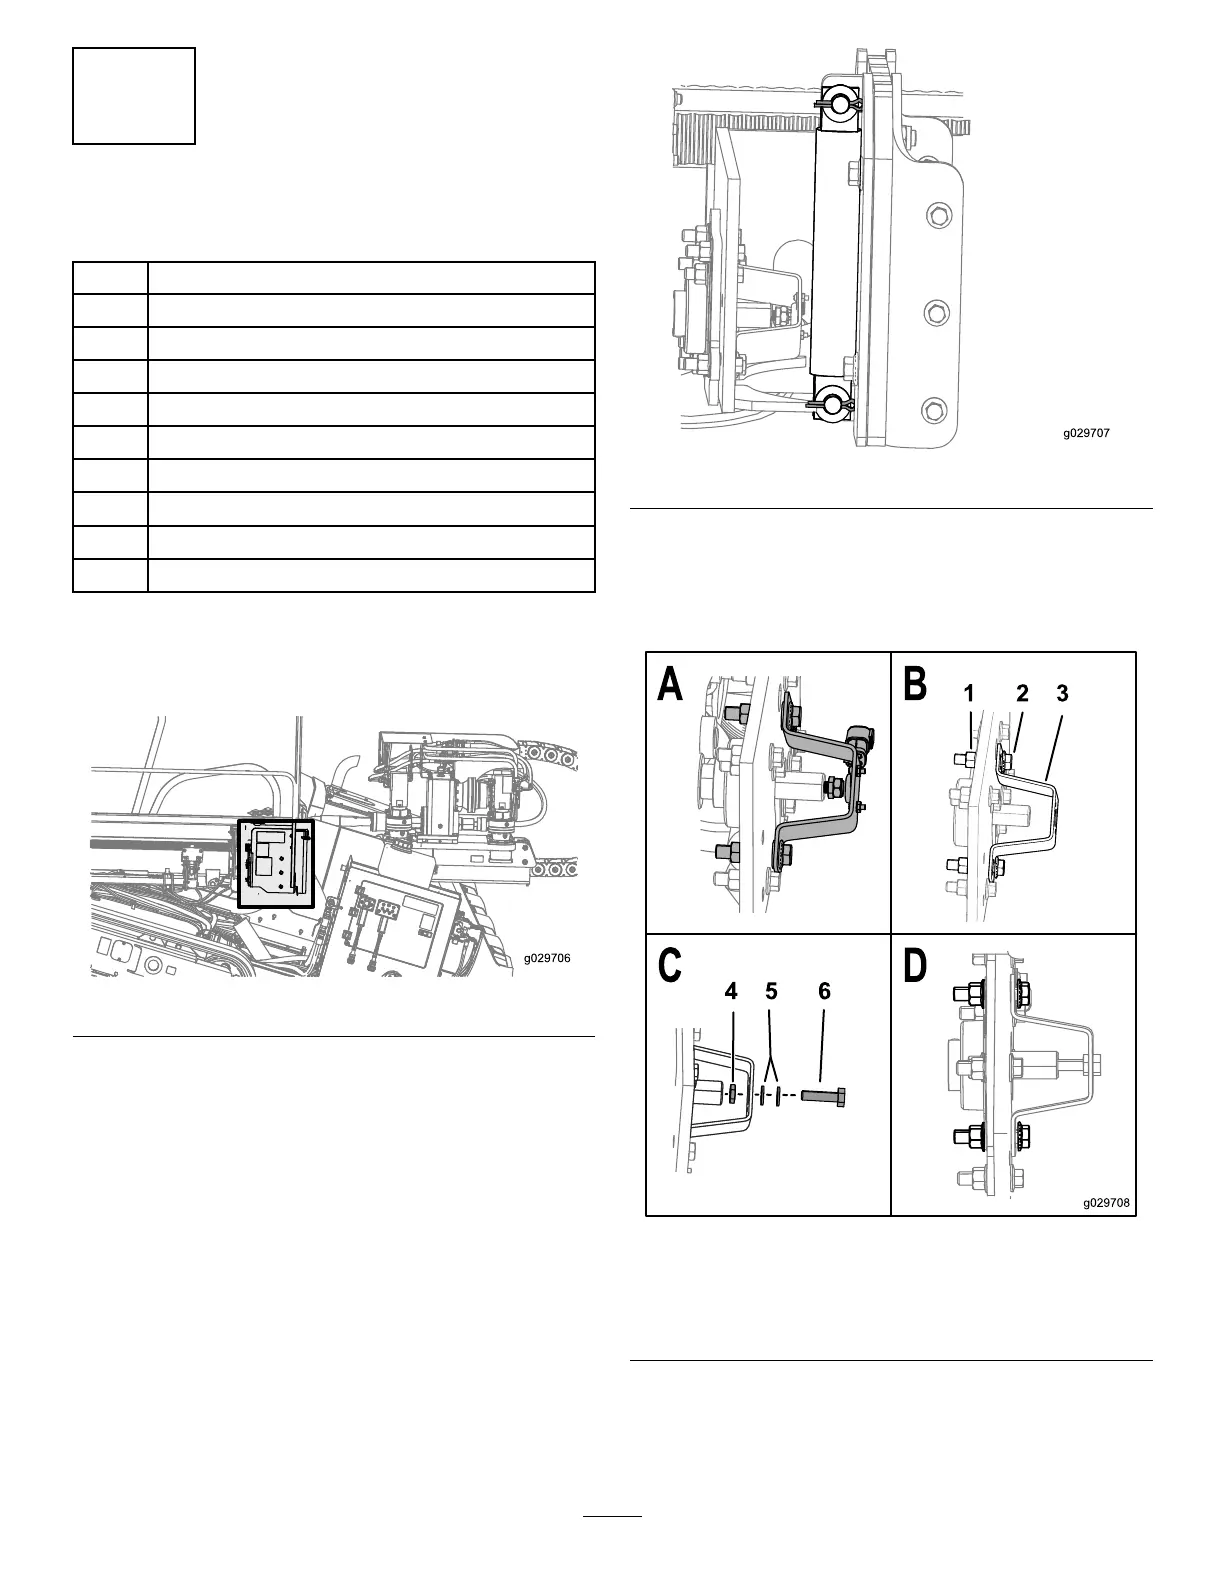
RefertolocationhighlightedinFigure10forthisprocedure.
Figure10
1.Removethecotterpinsontheelevatorcylinder(Figure
11).
Note:Donotdisconnectthehydraulichoses.
Figure11
2.Placetheelevatorcylinderasidetogainaccesstothe
sensorbracket.
3.Removethesensorassemblyandbracketasshownin
BoxAofFigure12.
Figure12
1.Locknuts(M12)4.Hexnut(M10)
2.Bolts(M12-13/4x60mm)
5.Flatwashers
3.Bracket
6.Bolt(M10)
4.Looselyinstallthenewbracketwith2bolts(M12-1
3/4x60mm)and2locknuts(M12)asshowninBox
BofFigure12.
5
 Loading...