31
GENERAL AIR CLEANER
MAINTENANCE PRACTICES
Inspect the Air Cleaner and Hoses periodically to
maintain maximum engine protection and to
ensure maximum service life. Extensive damage
can result from operating with a dirty Air Cleaner.
1. Check Air Cleaner Body for dents and other
damage which could possibly cause an air leak.
Replace a damaged Air Cleaner Body.
2. Squeeze the Vacuator Valve to eject dust and
water.
3. Service the Air Cleaner Filter every 100 hours
(more frequently in extremely dust conditions.)
4. Be sure Dust Cup is sealing around Air
Cleaner Body.
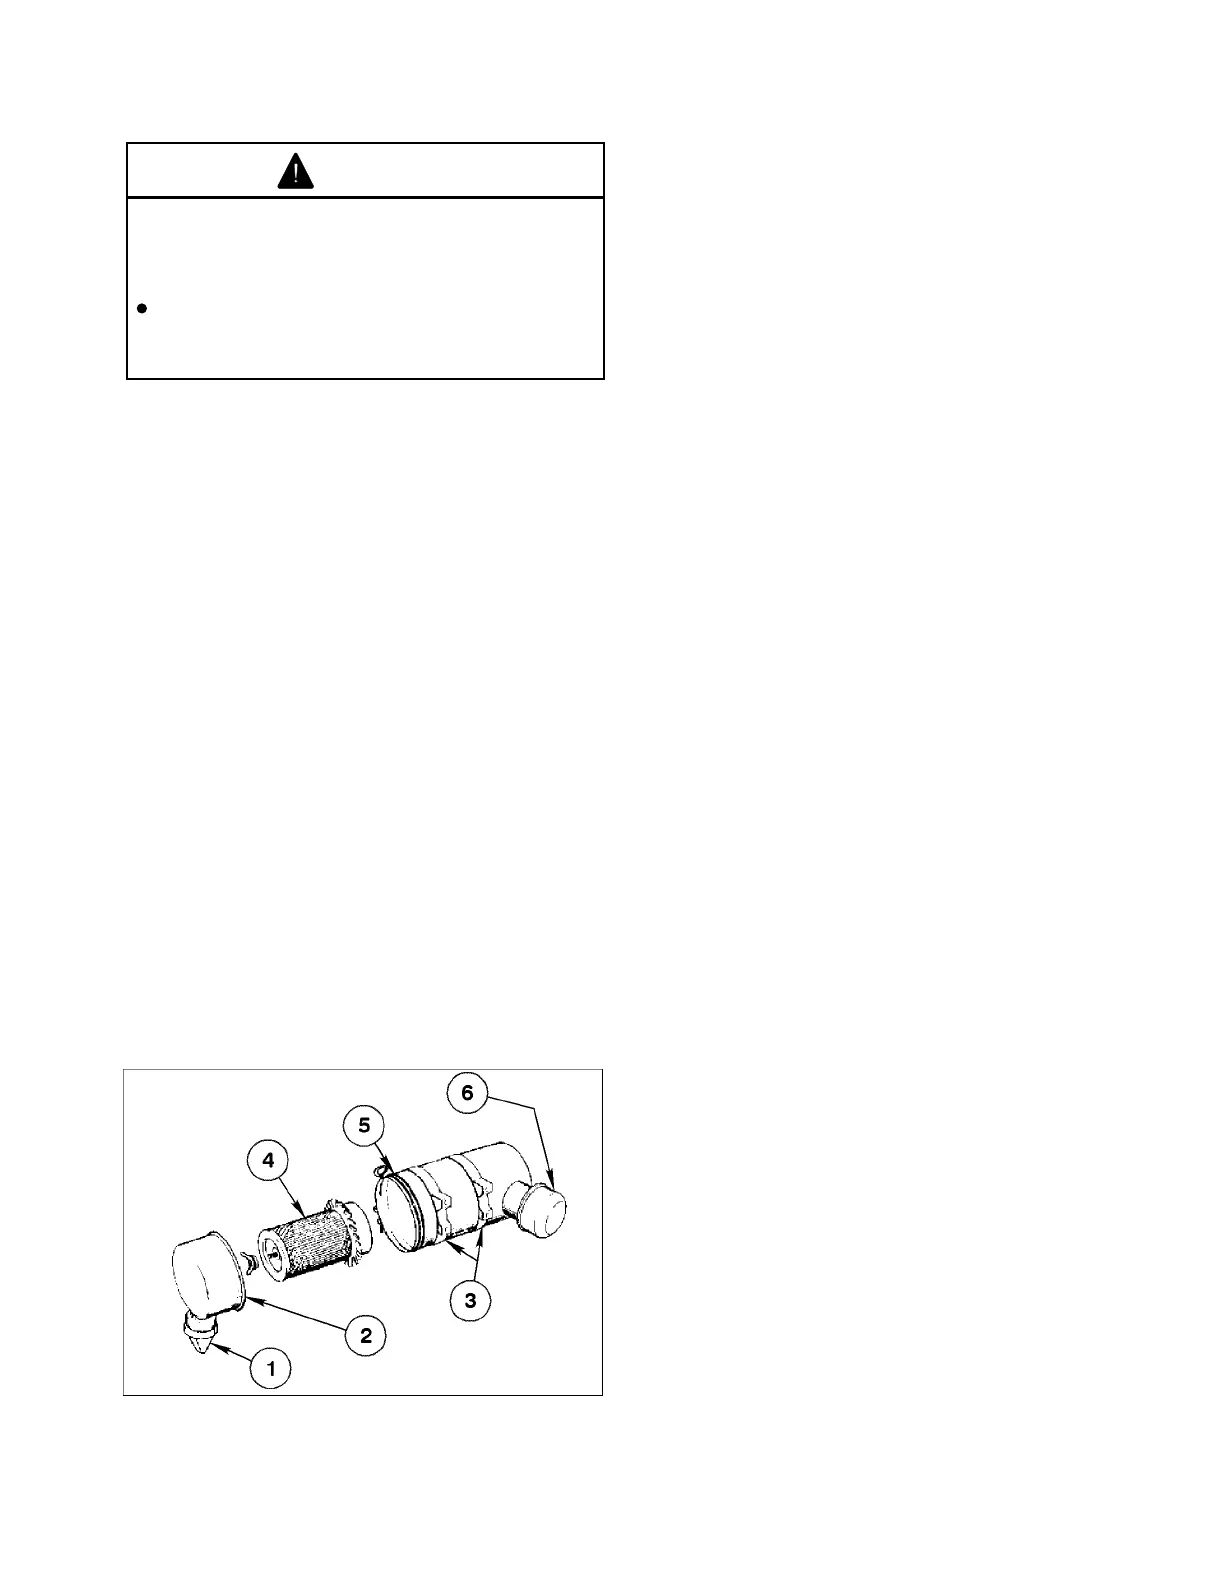
SERVICING AIR CLEANER FILTER
(Fig. 27)
1. Loosen the Strap that is securing Dust Cup
to Air Cleaner Body. Remove the Dust Cup from
body. Clean inside of Dust Cup.
AIR CLEANER MAINTENANCE
Figure 27
2. Remove Wing nut from the Air Filter guide
bolt, and gently slide the Air Filter out of the
Air Cleaner Body. Avoid knocking filter against
Air Cleaner Body to reduce amount of dust
dislodged.
3. Wipe inside of the Air Cleaner Body with
a damp rag.
4. Inspect Air Filter, replace if damaged.
A. Place a bright light inside of filter.
B. Rotate filter slowly while checking for dirt,
ruptures, holes, and tears.
C. Check fin assembly, gasket, and screen
for damage.
5. Clean a reusable element by washing it, or
blow out dirt by using compressed air. Do not
reuse a damaged filter.
WASHING METHOD:
NOTE: Do not remove plastic fin assembly.
Washing will remove dust from beneath fins.
A. Prepare a solution of filter cleaner and
water and soak filter element approximately
15 minutes. Refer to directions on filter
cleaner carton for complete information.
B. After soaking, rinse with clear water.
Maximum water pressure must not exceed 40
psi to prevent damage to the filter element.
Rinse filter from clean side to dirty side.
C. Dry filter using, warm flowing air (160°F
max), or allow element to air dry. Do not use
compressed air or light bulb to dry the filter
element because damage could result.
COMPRESSED AIR METHOD:
NOTE: Do not remove plastic fin assembly.
Back-blowing with compressed air removes
dust from beneath fins.
A. Blow compressed air from inside to
outside of filter element. Do not exceed 100
psi. (Wear eye protection)
B. Keep air hose nozzle at least 1 inch from
pleated paper, and move nozzle up and down
while rotating the filter. Inspect filter when dust
and dirt are removed.
1. Vacuator valve 4. Filter element
2. Dust cup 5. Air cleaner strap
3. Mounting bands 6. Inlet hood
6. Inspect a replacement filter for any shipping
damage. Install the new filter and secure the Wing
nut, Dust Cup, and Air Cleaner Strap.
7. Check all ducting, hoses, and clamped
connections for leaks.
WARNING
Servicing the vehicle while the engine is
running or vehicle is not properly secured,
could result in personal injury or death.
Before servicing or making adjustments
to the vehicle, set parking brake, stop
engine, and remove key from the switch.
 Loading...


