5
InstallingtheProximitySwitch
Partsneededforthisprocedure:
1Proximityswitchassembly
1
Sensorplate
2
Carriagescrew,5/16x1–1/4inch
2
Flangenut,5/16inch
Procedure
1.Usingtheholeinthebottomofthefrontframe,loosely
mounttheproximityswitchwiththewashersandjam
nuts(Figure14).
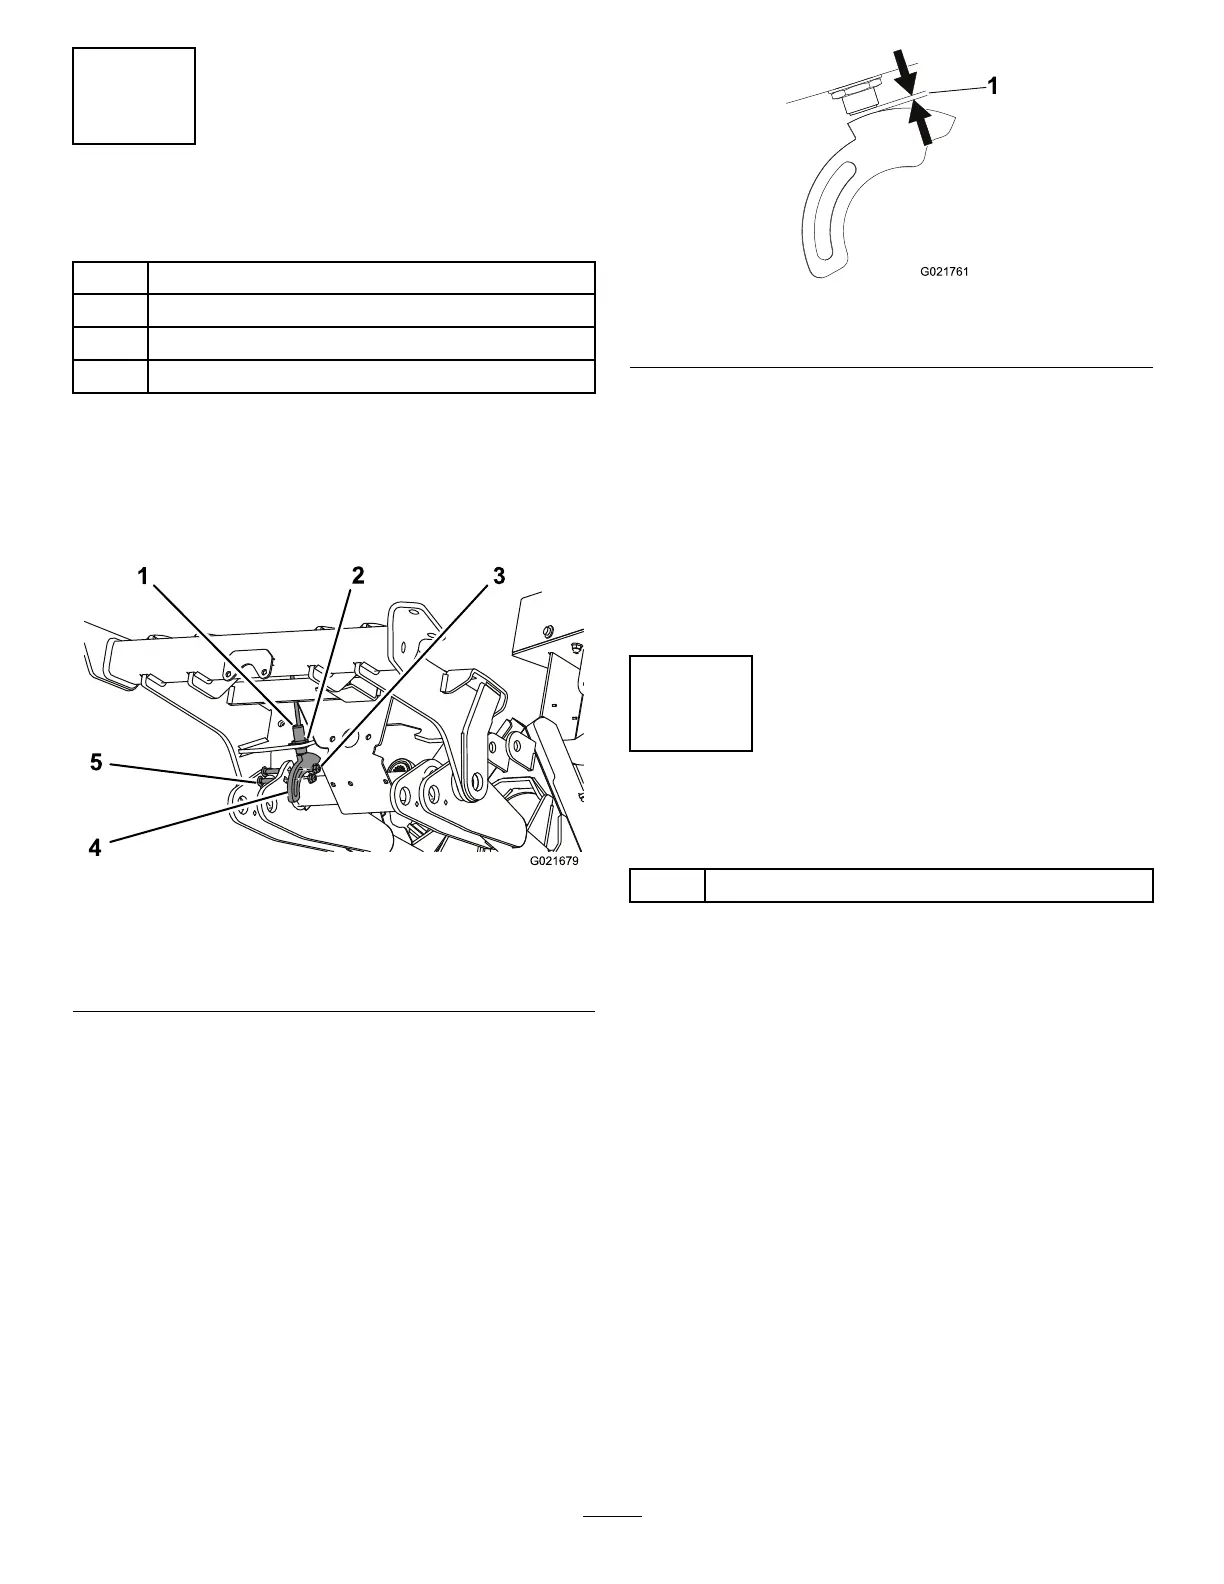
Figure14
1.Proximityswitch
4.Carriagescrew(2)
2.Jamnutandwasher(2)5.Sensorplate
3.Flangenut(2)
2.Looselymountthesensorplatetotheleftliftarmwith
(2)5/16x1–1/4inchcarriagescrewsandangenuts.
Donottightenthejamnutsatthistime.Positionthe
sensorplateasshowninFigure14.Makesurethe
switchdoesnotcontactthesensorplate.
3.Startthemachineandraisetheblower.Stopthe
machine.
4.Adjustthesensorplateuntilitalignswiththeproximity
switchandtightenthecarriagescrewnuts.Makesureit
doesnotcontacttheproximityswitch.
5.Usingthejamnuts,adjusttheproximityswitchupor
downuntilthegapbetweentheswitchplungerand
thesensorplateis3.8to4.3mm(.150to.170inch)
(
Figure15).Torquethejamnutsto20N-m(15ft-lb)
whenthegapisattained.
Figure15
1.3.8to4.3mm(.150to.170inch)gap
6.Connectthewiresfromtheproximityswitchtothe
frontattachmentupswitchontheGroundsmaster360
electricalaccessorykit
7.Whentheswitchisadjustedcorrectly,theblower
shouldshutoffifraised.
Note:Whenthetractionunitisconvertedbacktoa
mowingmachine,thePTOwillnotcomeonwhenthefront
attachmentisinthefullyraisedposition.Toengagethe
mower,thefrontattachmentmustbefullylowered.
6
GreasingtheMachine
Partsneededforthisprocedure:
A/RGeneralPurposeLithiumBaseGrease
11