29
m–6724
4
3
5
1
2
1
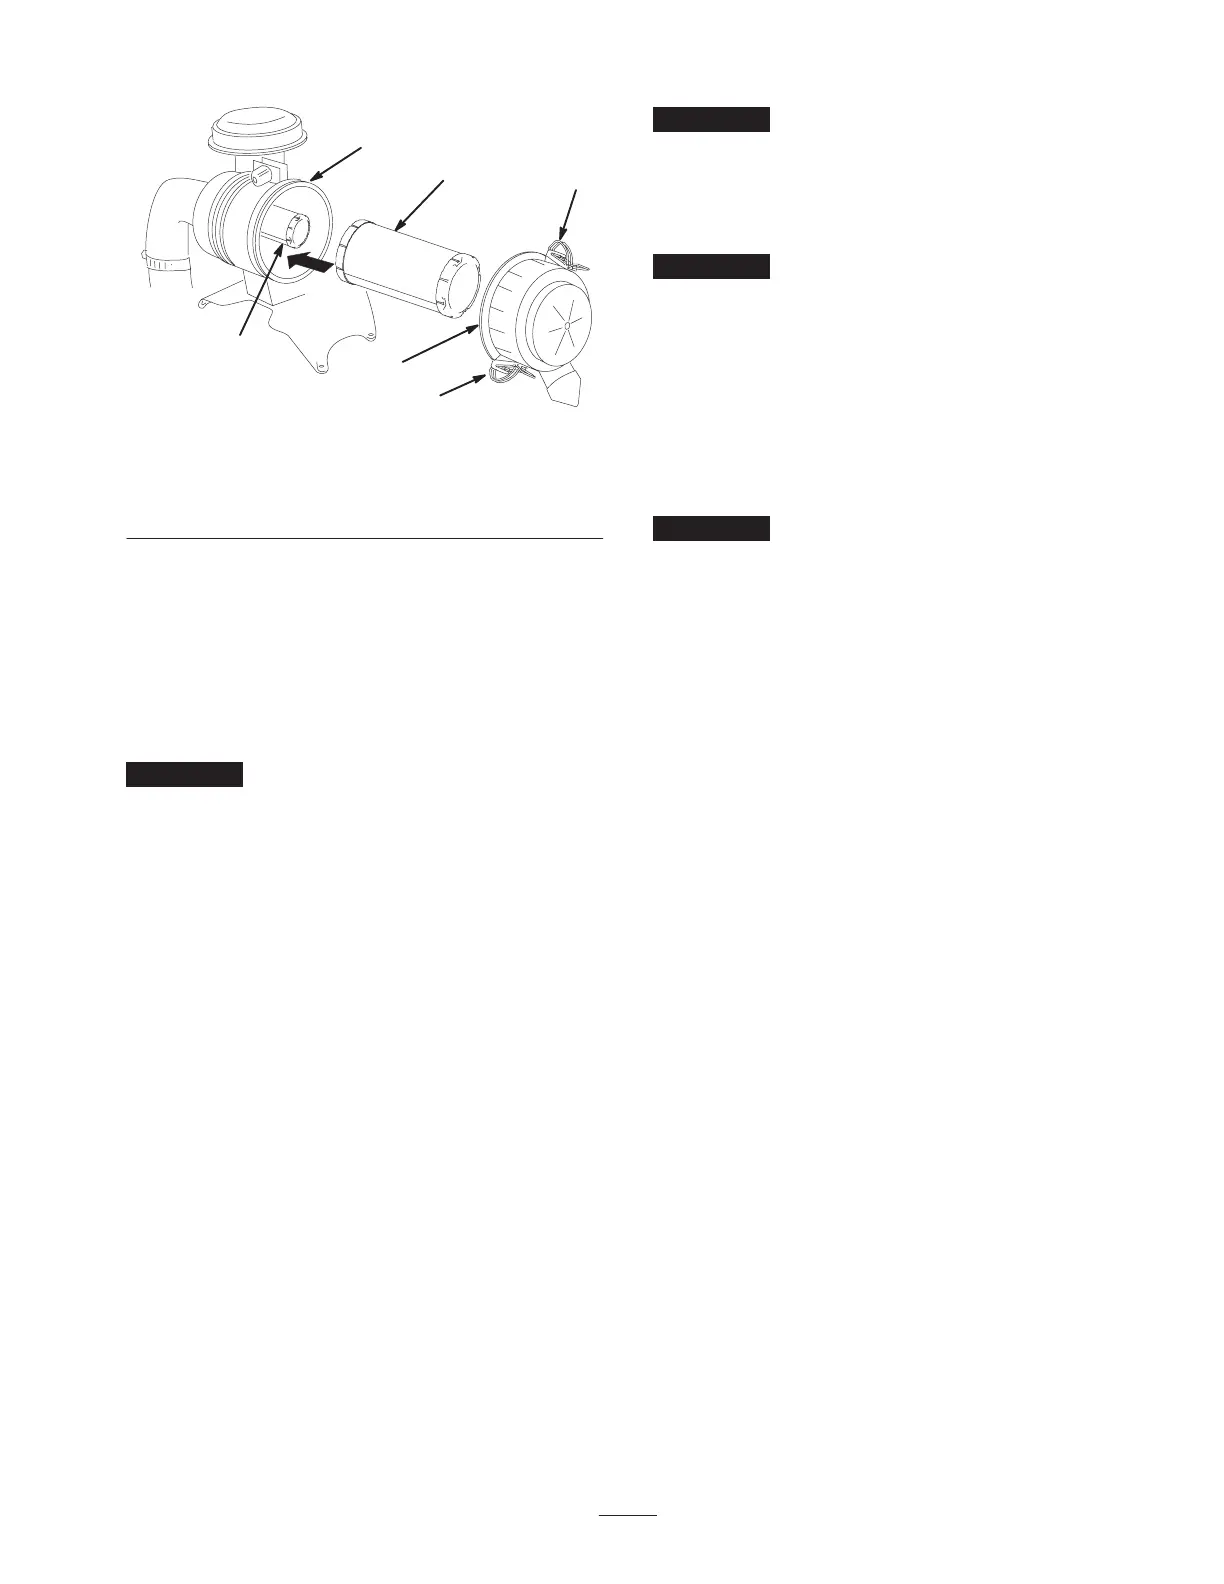
Figure 34
1. Latches
2. Air cleaner cover
3. Air filter body
4. Primary filter
5. Safety filter
3. Clean the inside of the air cleaner cover with
compressed air.
4. Gently slide the primary filter out of the air cleaner
body (Fig. 34). Avoid knocking the filter into the side
of the air cleaner.
5. Remove the safety filter only if you intend to replace
it.
Important Never attempt to clean the safety filter. If
the safety filter is dirty, then the primary filter is damaged
and you should replace both filters.
6. Inspect the primary filter for damage by looking into
the filter while shining a bright light on the outside of
the filter. Damage and holes in the filter will appear as
bright spots. If the filter is damaged discard it.
Servicing the Primary Filter
Check and/or replace it after 200 operating hours.
If the primary filter is dirty, bent, or damaged then replace
the filter.
Do not clean the primary filter.
Servicing the Safety Filter
Replace it after 600 operating hours.
Important Never attempt to clean the safety filter. If
the safety filter is dirty, then the primary filter is damaged
and you should replace both filters.
Installing the Filters
Important To prevent engine damage, always operate
the engine with both air filters and cover installed.
1. If installing new filters, check each filter for shipping
damage. Do not use a damaged filter.
2. If the safety filter is being replaced, carefully slide it
into the filter body (Fig. 34).
3. Carefully slide the primary filter over the safety filter
(Fig. 34). Ensure that it is fully seated by pushing on
the outer rim of the filter while installing it.
Important Do not press on the soft inside area of the
filter.
4. Install the air cleaner cover with the side indicated as
UP facing up and secure the latches (Fig. 34).
Cleaning the Cooling System
Clean the air intake screen before each use. Remove any
buildup of grass, dirt, or other debris from the engine air
intake.
Spark Plug
Check the spark plug(s) after every 200 operating hours.
Make sure that the air gap between the center and side
electrodes is correct before installing the spark plug. Use a
spark plug wrench for removing and installing the spark
plug(s) and a gapping tool/feeler gauge to check and
adjust the air gap. Install a new spark plug(s) if necessary.
Type: Champion RC12YC (or equivalent)
Air Gap: 0.030 inch (0.76 mm)
Removing the Spark Plug(s)
1. Disengage the PTO, set the parking brake, stop the
engine, and remove the key.
2. Pull the wire(s) off the spark plug(s) (Fig. 35). Clean
around the spark plug(s) to prevent dirt from falling
into the engine and potentially causing damage.