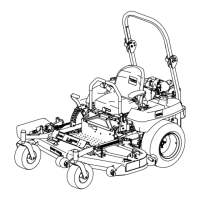
Figure71
1.Doublenuts4.Locknut
2.Pumprod5.Balljoint
3.Adjustmentbolt6.Pumps
Electricalsystemwillnotperformpropersafety
shutoffwithjumperwireinstalled.
•Removejumperwirefromwireharness
connectorandplugconnectorintoseat
switchwhenadjustmentiscompleted.
•Neveroperatethisunitwithjumperinstalled
andseatswitchbypassed.
7.Afterbothpumpneutralsareset,shutoffthe
machine.
8.Removethejumperwirefromthewireharness
connectorandplugtheconnectorintotheseat
switch.
9.Installtheseatrodandlowertheseatintoposition.
10.Removethejackstands.
MowerDeck
Maintenance
LevelingtheMoweratThree
Positions
Important:Thereareonlythreemeasuring
positionsneededtolevelthemower.
SettingUptheMachine
1.Positionmoweronaatsurface.
2.DisengagethePTO,movethemotioncontrollevers
totheneutrallockedpositionandsettheparking
brake.
3.Stoptheengine,removethekey,andwaitforall
movingpartstostopbeforeleavingtheoperating
position.
4.Checktirepressureofallfourtires.Ifneeded,adjust
to13psi(90kPa)
5.Lowerthemowertothe3inch(76mm)height-of-cut
position.
6.Inspectthefourchains.Thechainsneedtohave
tension.
•Ifonerearchainisloose,lower(loosen)thefront
supportarmonthesameside.RefertoAdjusting
theFront-to-RearMowerPitch.
•Ifonefrontchainisloose,raise(tighten)thefront
supportarmforthatchain.RefertoAdjustingthe
Front-to-RearMowerPitch.
LevelingtheMowerSide-to-Side
1.Positiontherightbladefront-to-rear(Figure72).
2.MeasuretherightbladeattheBlocation,froma
levelsurfacetothecuttingedgeofthebladetip
(Figure72).
3.Recordthismeasurement.Thismeasurementneeds
tobe3-1/8to3-1/4inches.
4.Positiontheleftbladefront-to-rear(Figure72).
5.MeasuretheleftbladeattheClocation(Figure72),
fromalevelsurfacetothecuttingedgeoftheblade
tip.
6.Recordthismeasurement.Thismeasurementneeds
tobe3-1/8to3-1/4inches.
52