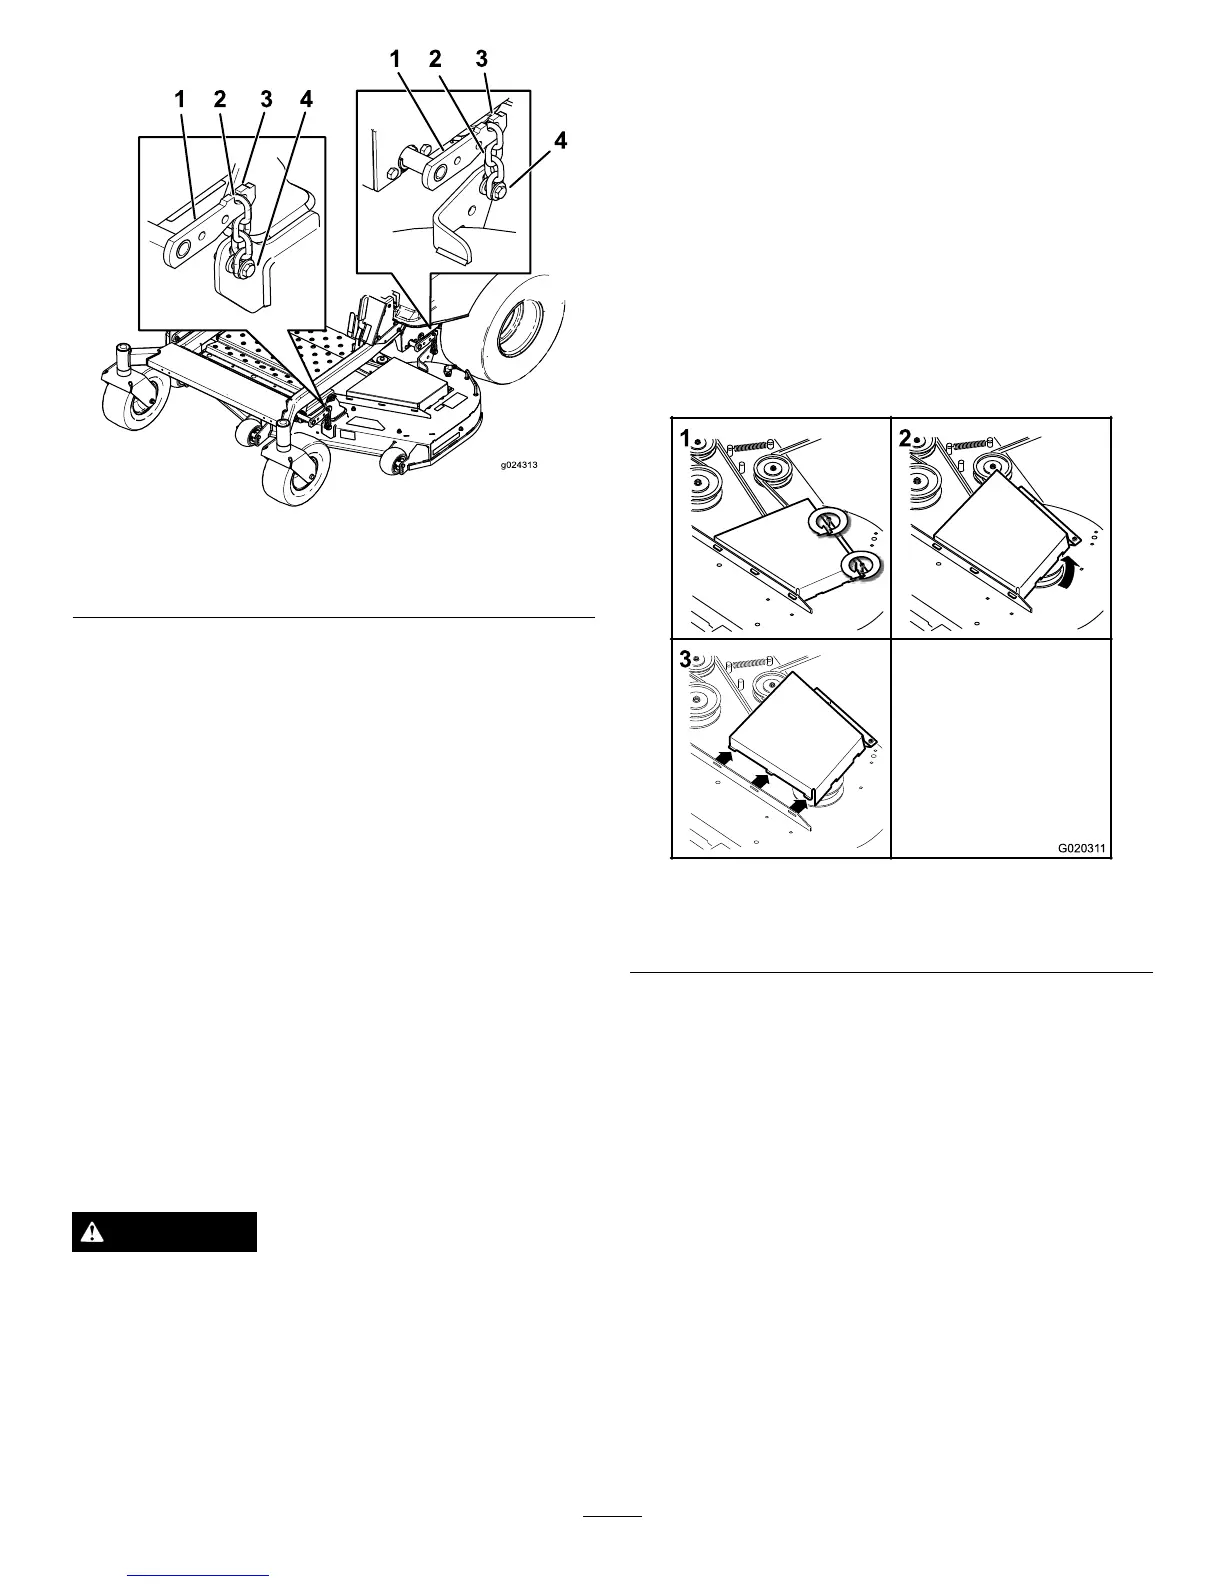
Figure61
1.Deckliftarm
3.Hook
2.Chain
4.Adjustmentbolt
6.Ensurethereistensiononallfourchains(Figure61).
7.Tightenthefouradjustmentbolts(
Figure61).
8.Checkthatblockstjustsnuglyunderthedeckskirt.
Makesureallboltsaretight
9.Verifythatthedeckislevelbycheckingtheside-to-side
levelandfront-to-rearbladeslope;repeatthedeck
levelingprocedureifnecessary.
InspectingtheBelts
ServiceInterval:Every50hours
Checkthebeltsforsquealingwhenthebeltisrotating,blades
slippingwhencuttinggrass,frayedbeltedges,burnmarksand
cracksaresignsofawornmowerbelt.Replacethemower
beltifanyoftheseconditionsisevident.
Note:Lifttheoorpantogainaccesstothebeltandidler
pulley.
ReplacingtheMowerBelt
WARNING
Thespringisundertensionwheninstalledandcan
causepersonalinjury.
Becarefulwhenremovingthebelt.
RemovingtheBelt
Squealingwhenthebeltisrotating,bladesslippingwhen
cuttinggrass,frayedbeltedges,burnmarksandcracksare
signsofawornmowerbelt.Replacethemowerbeltifanyof
theseconditionsisevident.
1.Disengagethebladecontrolswitch(PTO),movethe
motioncontrolleverstotheneutrallockedposition,
andsettheparkingbrake.
2.Stoptheengine,removethekey,andwaitforallmoving
partstostopbeforeleavingtheoperatingposition.
3.Lowerthemowertothe76mm(3inch)height-of-cut
position.
4.Lifttheoorpantogainaccesstothebeltandidler
pulley.
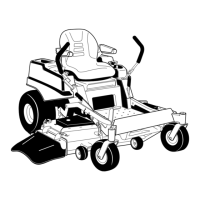
5.Removethebeltcovers(
Figure62).
Figure62
1.Loosenthescrews3.Removebeltcover
2.Pivotthebeltcoverup
6.Usingaspringremovaltool(Toropartno.92-5771),
removetheidlerspringfromthedeckposttoremove
tensionontheidlerpulley(Figure63).
43