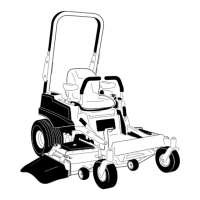
(Figure34).Removetherightbafefromthe
mowerdeck.
Figure34
1.Locknut(5/16inch)3.Weldedposts,rightbafe
2.Rightbafe
11.Locatethecutoffbafeintheloosepartsbag.
Removethefastenersattherearholesofthe
dischargeplate.Installthebafeattheside
dischargeopeningonthemowerdeck(Figure35).
Figure35
1.Carriagebolt,existing3.Cutoffbafe,shipped
loose
2.Rearholesinthe
dischargeplate
4.Locknut,existing
12.Usethefastenersremovedtosecurethecutoff
bafetothedeck.
13.Installthebladestothedeck.RefertotheInstalling
theBladesprocedureintheMaintenancesectionfor
moreinformation.
Note:Standardcuttingbladeswillimprove
dischargeperformanceandcanobtainedfromyour
localauthorizedTorodealer.
14.InstallthemowerasdescribedintheInstallingthe
MowerprocedureintheMaintenancesectionfor
moreinformation.
Convertingthe54inchMower
toSideDischarge
Themowerdeckandmowerbladesshippedwith
thismachineweredesignedforoptimummulching
performance.Sidedischargeperformancecanbe
improvedbyreplacingthemulchingbladeswith
standardcuttingbladesobtainedfromyourlocal
authorizedTorodealer.Tomaintainoptimummulching
performance,alwaysinstallthemulchingbladesthatare
shippedwiththisunitwhenchangingbacktomulching
operation.
Installthefastenersintothesameholesinthedeckthey
wereoriginallyremovedfrom.Thisensurenoholesare
leftopenwhenthedeckisoperated.
DANGER
Openholesinthemowerexposeyouandothersto
throwndebris.Debristhrownoutofholesinthe
mowercancauseinjury.
•Neveroperatethemowerwithouthardware
mountedinallholesinthemower.
•Installhardwareinmountingholeswhenthe
bafeisremoved.
RemovingtheMulchBafe
1.Parkthemachineonalevelsurfaceanddisengage
thebladecontrolswitch.
2.Movethemotioncontrolleversoutwardtothe
neutrallockposition,settheparkingbrake,stop
theengine,removethekey,andwaitforallmoving
partstostopbeforeleavingtheoperatingposition.
3.RemovethemowerasdescribedintheRemoving
theMowerprocedureintheMaintenancesectionfor
moreinformation.
4.Turnthemowerupsidedown.
5.Removetheexistingmowerbladesinstalledonyour
deck.RefertotheRemovingtheBladesprocedure
intheMaintenancesectionformoreinformation.
6.Removethethreelocknuts(5/16inch)securedto
theweldedpostsoftheleftbafeonthetopofthe
mowerdeckatthecenter,leftofcenterandleft
positions(
Figure36).Removethecarriageboltand
30