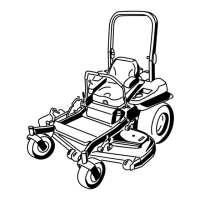
Figure72
LeftSideShown
1.L-bracket4.Rearlinkageassembly
2.Linkagestop
5.Caliper
3.Gap
6.Wheelhub
9.Disengagetheparkingbrake,thelevershouldbein
thedownposition.
10.Turnthewheelhubbyhandinbothdirectionsrelative
tothecaliper;thewheelhubshouldmovefreely
betweenthecaliper.
11.Ifagapisneededorthewheelhubdoesnotmove
freely:
A.Disengagetheparkingbrake.
B.Disconnectandne-tunetherearlinkage
assembly:
•Shortenthelinktocreateagap.
•Lengthenthelinktoallowwheelhub
movement.
C.Reconnecttherearlinkageassembly.
12.Engagetheparkingbrakeandcheckthegap.
13.Repeatsteps9through13untilavisiblegapisachieved
andthewheelhubrotatesfreely.
14.Repeatthisprocedureforthebrakeontheopposite
side.
15.Rotatethedrive-wheelreleasehandletotheoperating
position.RefertoUsingtheDrive-Wheel-Release
Valves(page27).
16.Installthereartiresandtorquethelugnuts.Referto
CheckingtheWheelLugNuts(page44).
17.Removethejackstands.
BeltMaintenance
InspectingtheBelts
ServiceInterval:Every50hours
Checkthebeltsforsquealingwhenthebeltisrotating,blades
slippingwhencuttinggrass,frayedbeltedges,burnmarks,
andcracksaresignsofawornmowerbelt.Replacethe
mowerbeltifanyoftheseconditionsareevident.
ReplacingtheMowerBelt
Squealingwhenthebeltisrotating,bladesslippingwhen
cuttinggrass,frayedbeltedges,burnmarksandcracksare
signsofawornmowerbelt.Replacethemowerbeltifanyof
theseconditionsareevident.
1.DisengagethePTO,movethemotion-controlleversto
theneutrallockedposition,andsettheparkingbrake.
2.Stoptheengine,removethekey,andwaitforallmoving
partstostopbeforeleavingtheoperatingposition.
3.Lowerthemowertothe76mm(3inch)heightofcut.
4.Removethebeltcovers(Figure73).
Figure73
1.Pushtabdown2.Removebeltcover
5.Usearatchetinthesquareholeintheidlerarmto
removetensionontheidlerspring(Figure74).
6.Removethebeltfromthemowerdeckpulleys.
7.Removethebeltguideonthespringloadedidlerarm
showninFigure74.
8.Removetheexistingbelt.
9.Installthenewbeltaroundthemowerpulleysandthe
clutchpulleyundertheengine(Figure74).
49