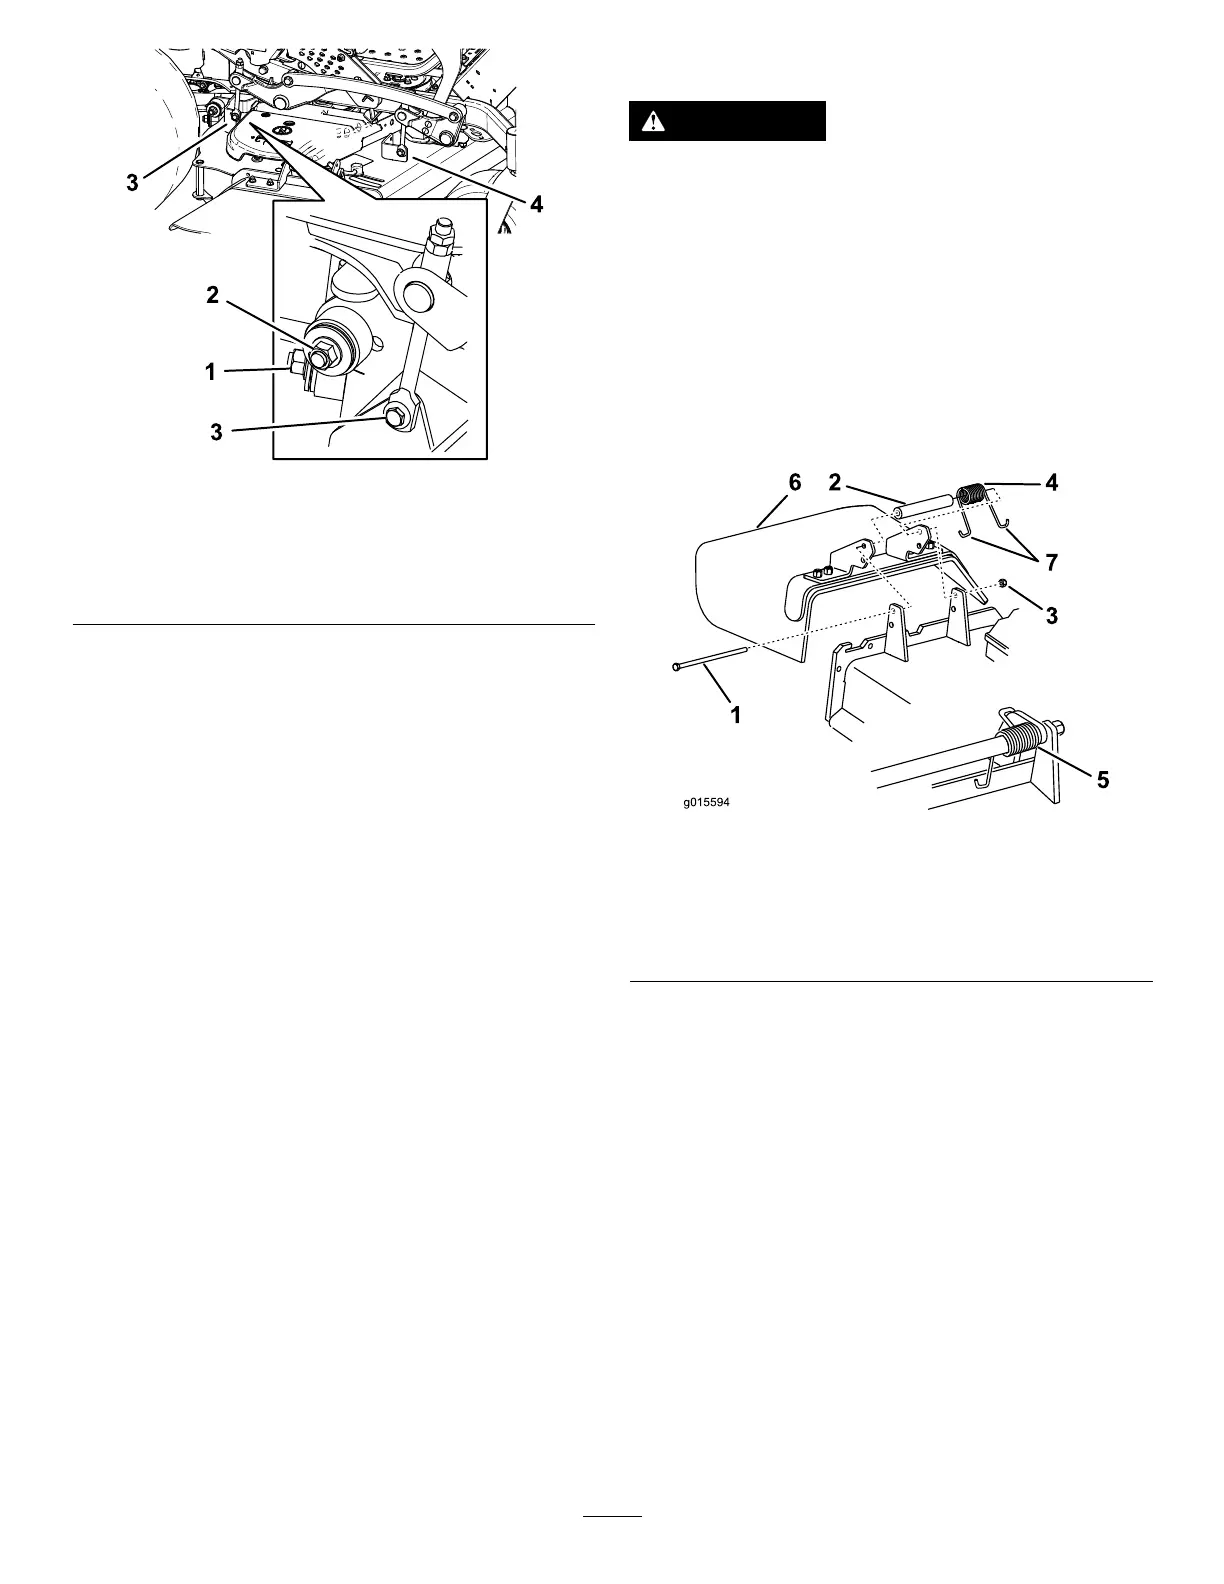
Figure105
1.Rightstabilizer
2.Deckstrut(rightsideshown)
3.Removetheshoulderboltandnut.
4.Removetheshoulderboltandnut.
8.Raisethedeckstrutsandsecurethemintheup
position.
9.Slidethedeckouttotherightsideofthemachine.
ReplacingtheGrassDeector
WARNING
Anuncovereddischargeopeningcouldallowthe
lawnmowertothrowobjectsatyouorbystanders,
resultinginseriousinjury.Also,contactwiththe
bladecouldoccur.
Donotoperatethelawnmowerunlessyouinstalla
coverplate,mulchplate,grassdeector,orbagger.
1.Removethelocknut,bolt,spring,andspacerholding
thedeectortothepivotbrackets(Figure106).
2.Removethedamagedorworngrassdeector(Figure
106).
Figure106
1.Bolt
5.Springinstalled
2.Spacer6.Grassdeector
3.Locknut
7.J-hookendofspring
4.Spring
3.Placethespacerandthespringontograssdeector.
4.Place1J-hookendofthespringbehindthedeckedge.
Note:Makesurethat1J-hookendofthespringis
installedbehindthedeckedgebeforeinstallingthebolt
asshowninFigure106.
5.Installtheboltandthenut.
6.Place1J-hookendofthespringaroundthegrass
deector(Figure106).
Important:Thegrassdeectormustbeable
torotate.Liftthedeectoruptothefullopen
positionandensurethatitrotatesintothefully
downposition.
66

 Loading...